Showing posts with label seed saving. Show all posts

Friday, November 15, 2013

Saving Allium Seeds at Home

 photo file-22.jpg

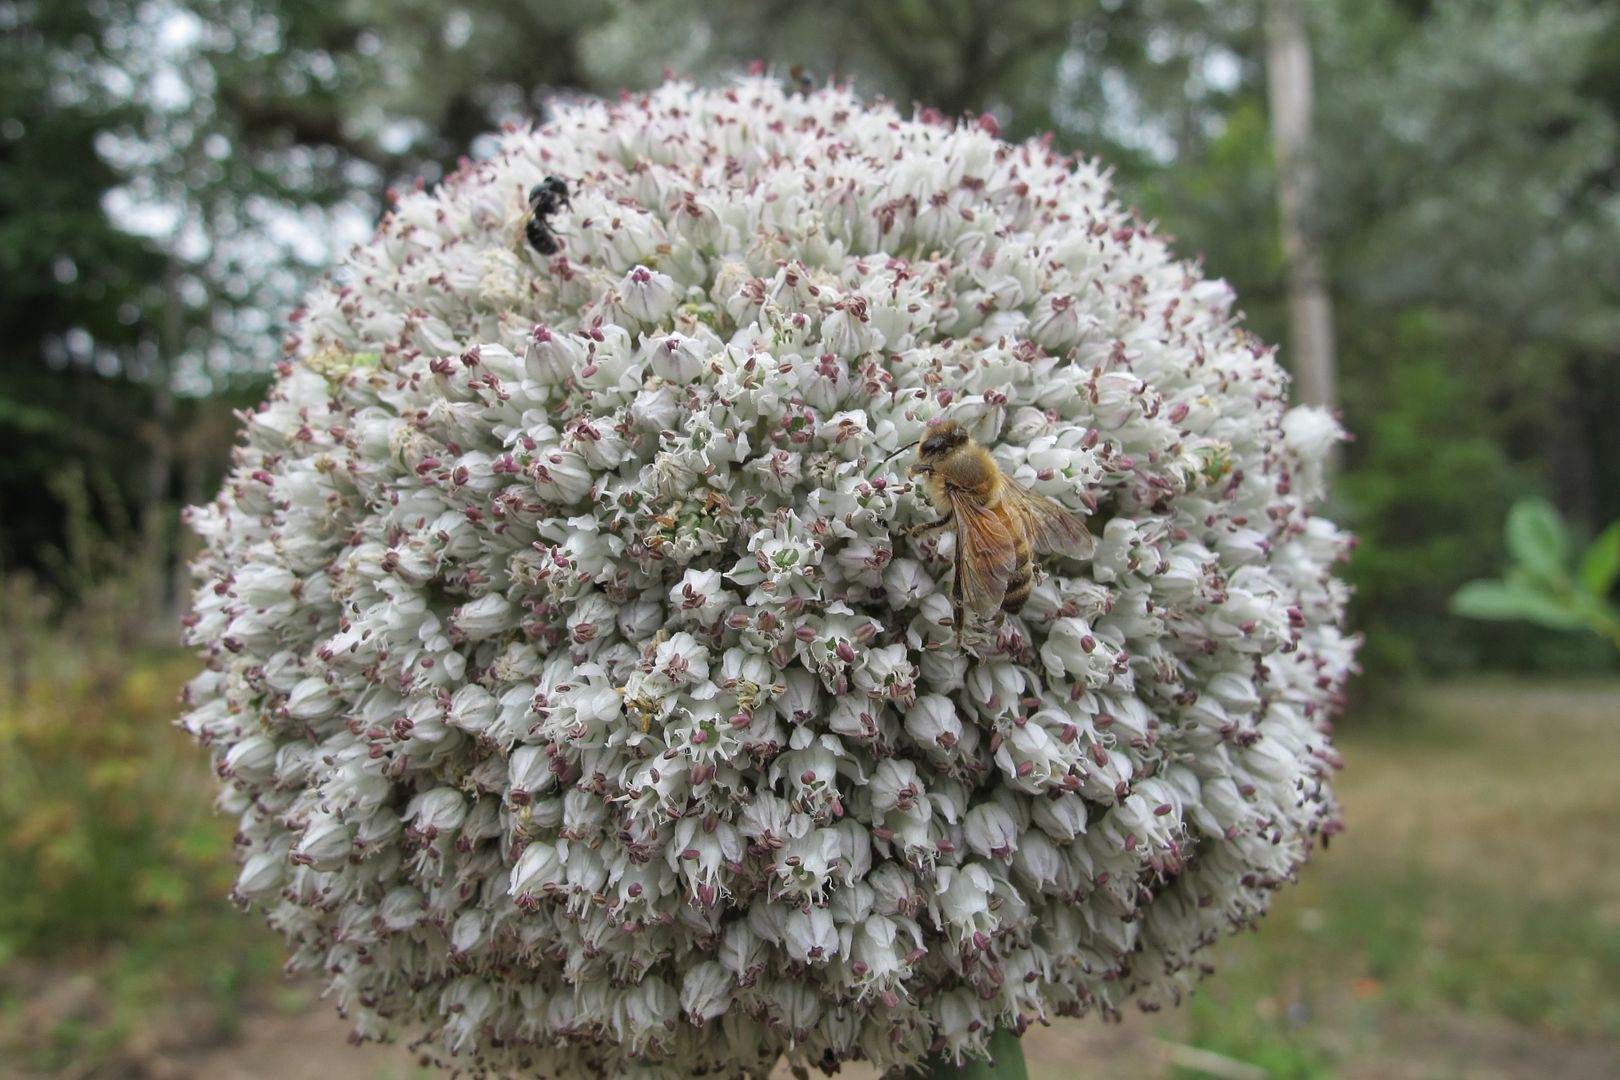
I've written about saving leek - Allium ampeloprasum* - seeds before but can one really read too much about saving Alliums? Here are some differences between Allium nutans and Allium amepeloprasum too.

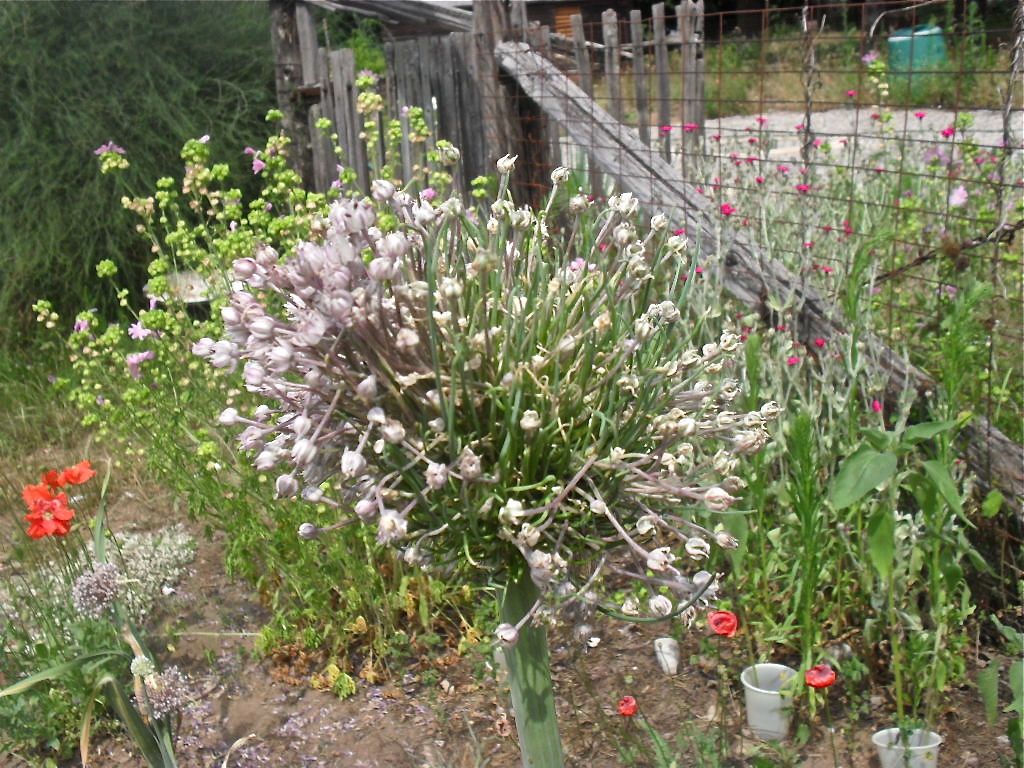
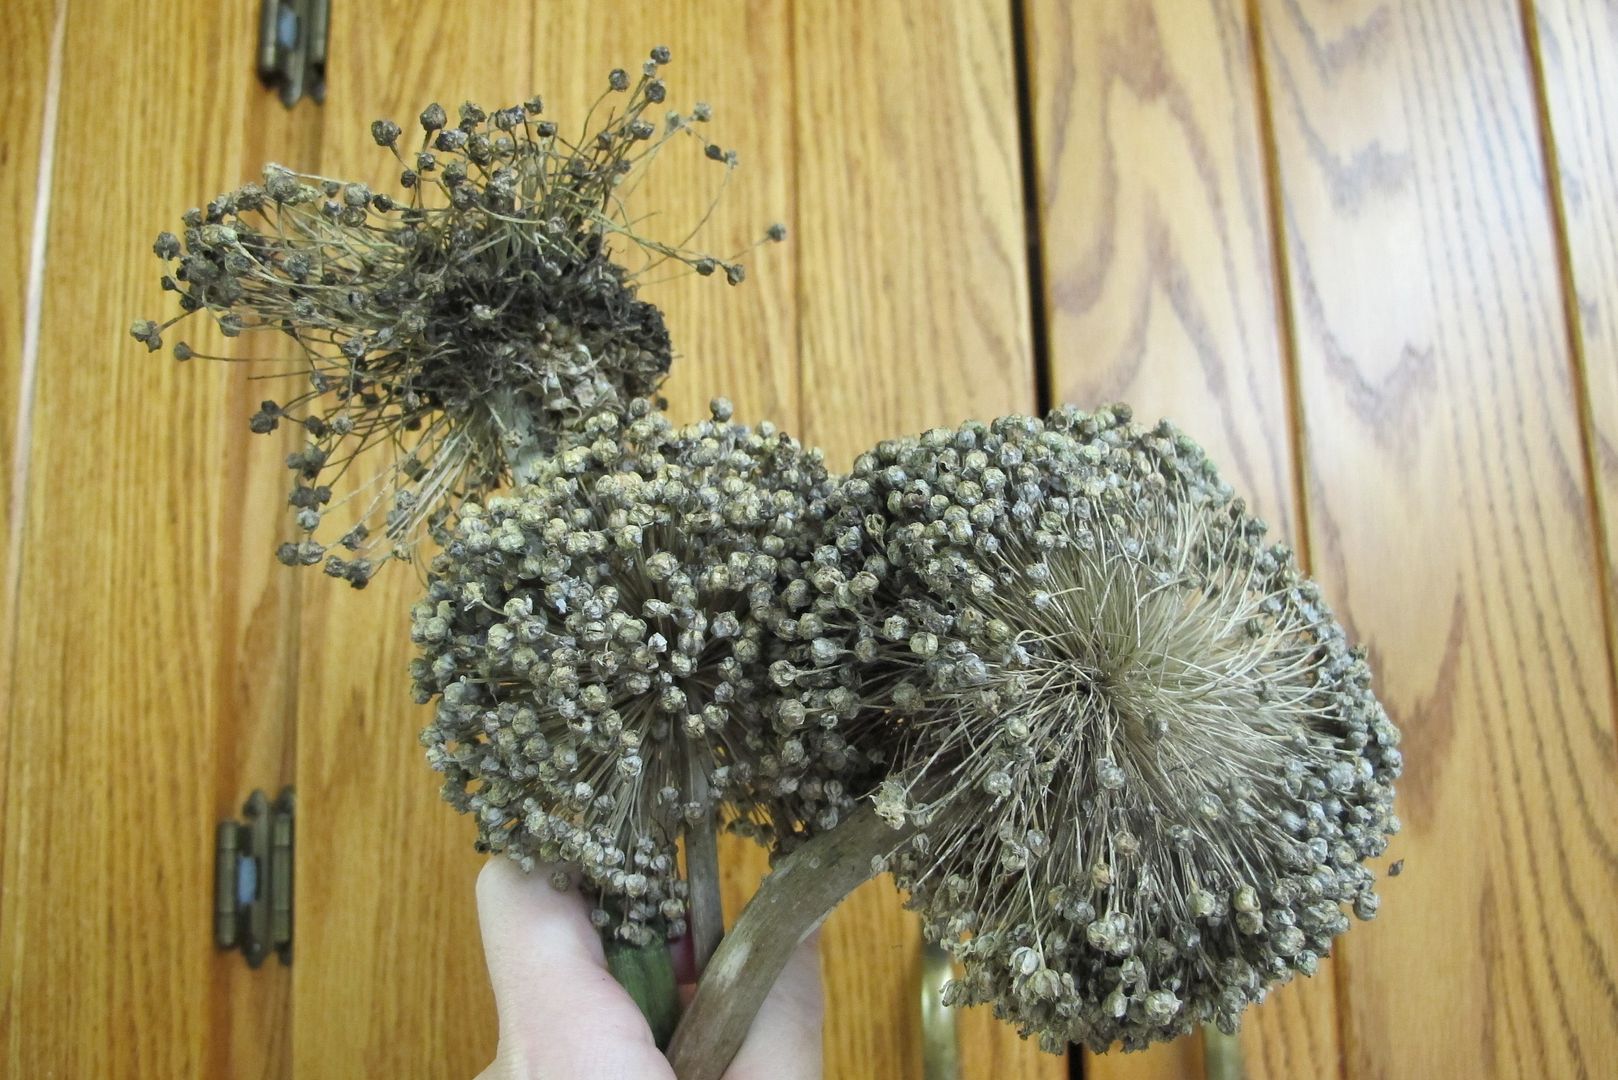
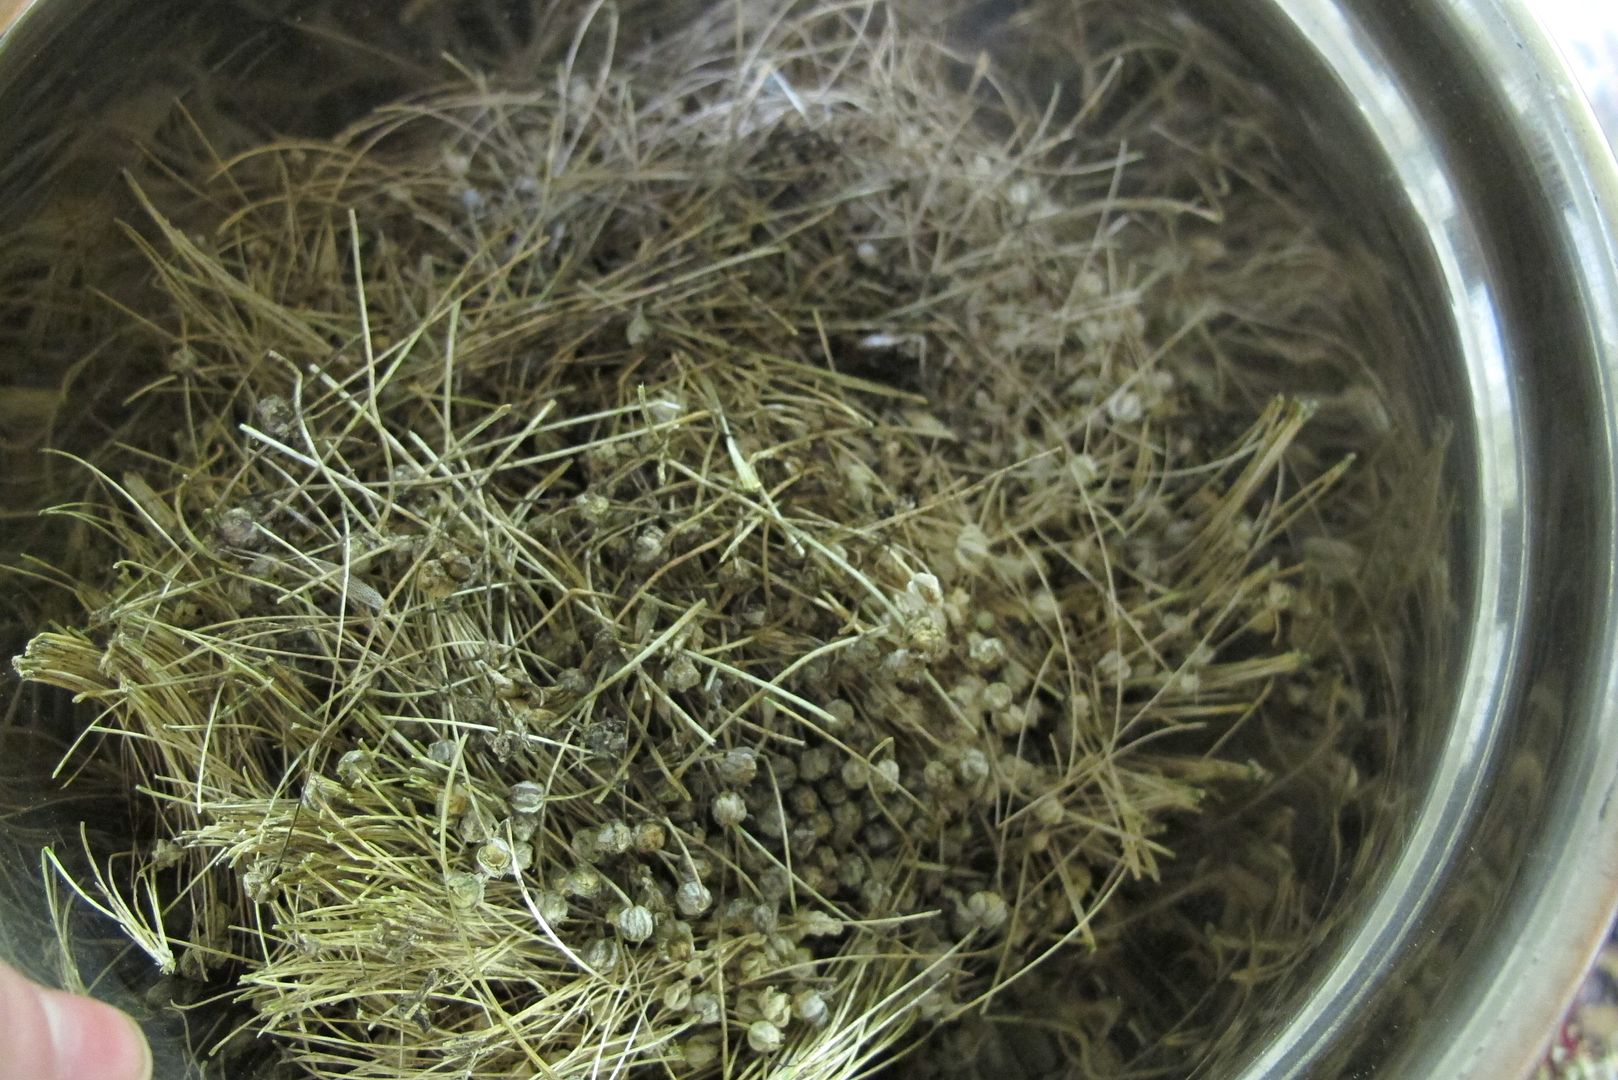
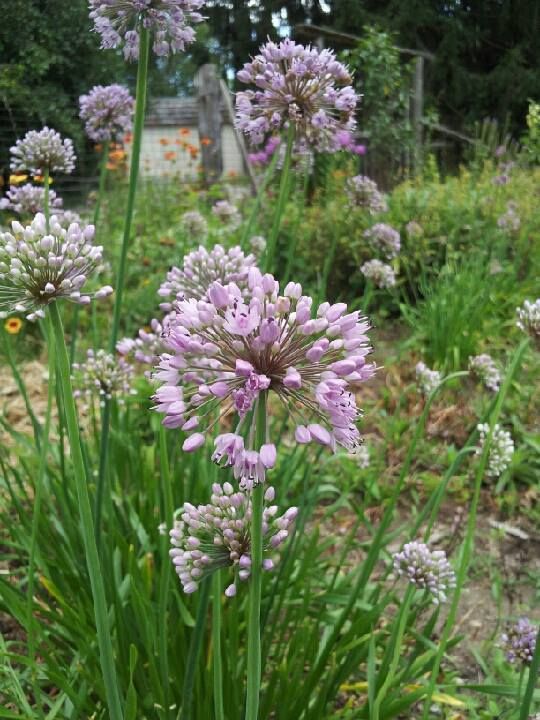
I started with the Allium nutans - a very pretty edible, perennial onion with strap like leaves and semi nodding pink flowers that straight as they mature. They have typical spherical allium seed heads that open to reveal dark 'wedge' shaped seeds within. When nice and dry, the seed heads are easily shattered into a bowl.

Seed sorting techniques, in my opinion, are all about making it less tedious ie, faster! They can be broken into three components: harvest, thresh and winnow.
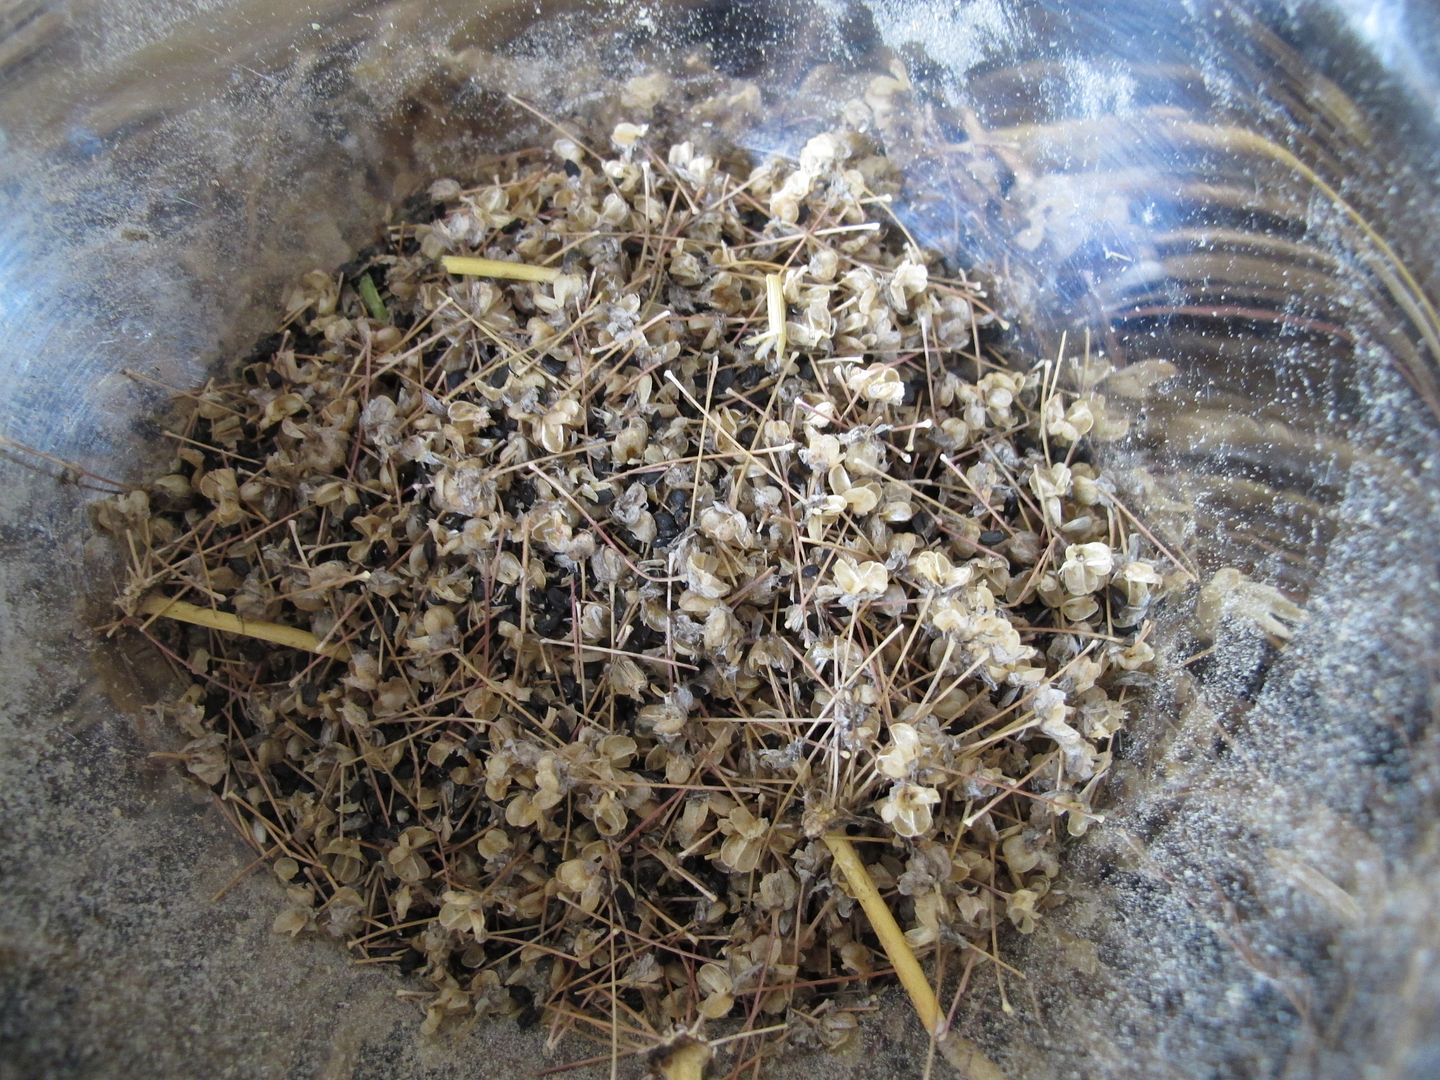
 photo file-11.jpg
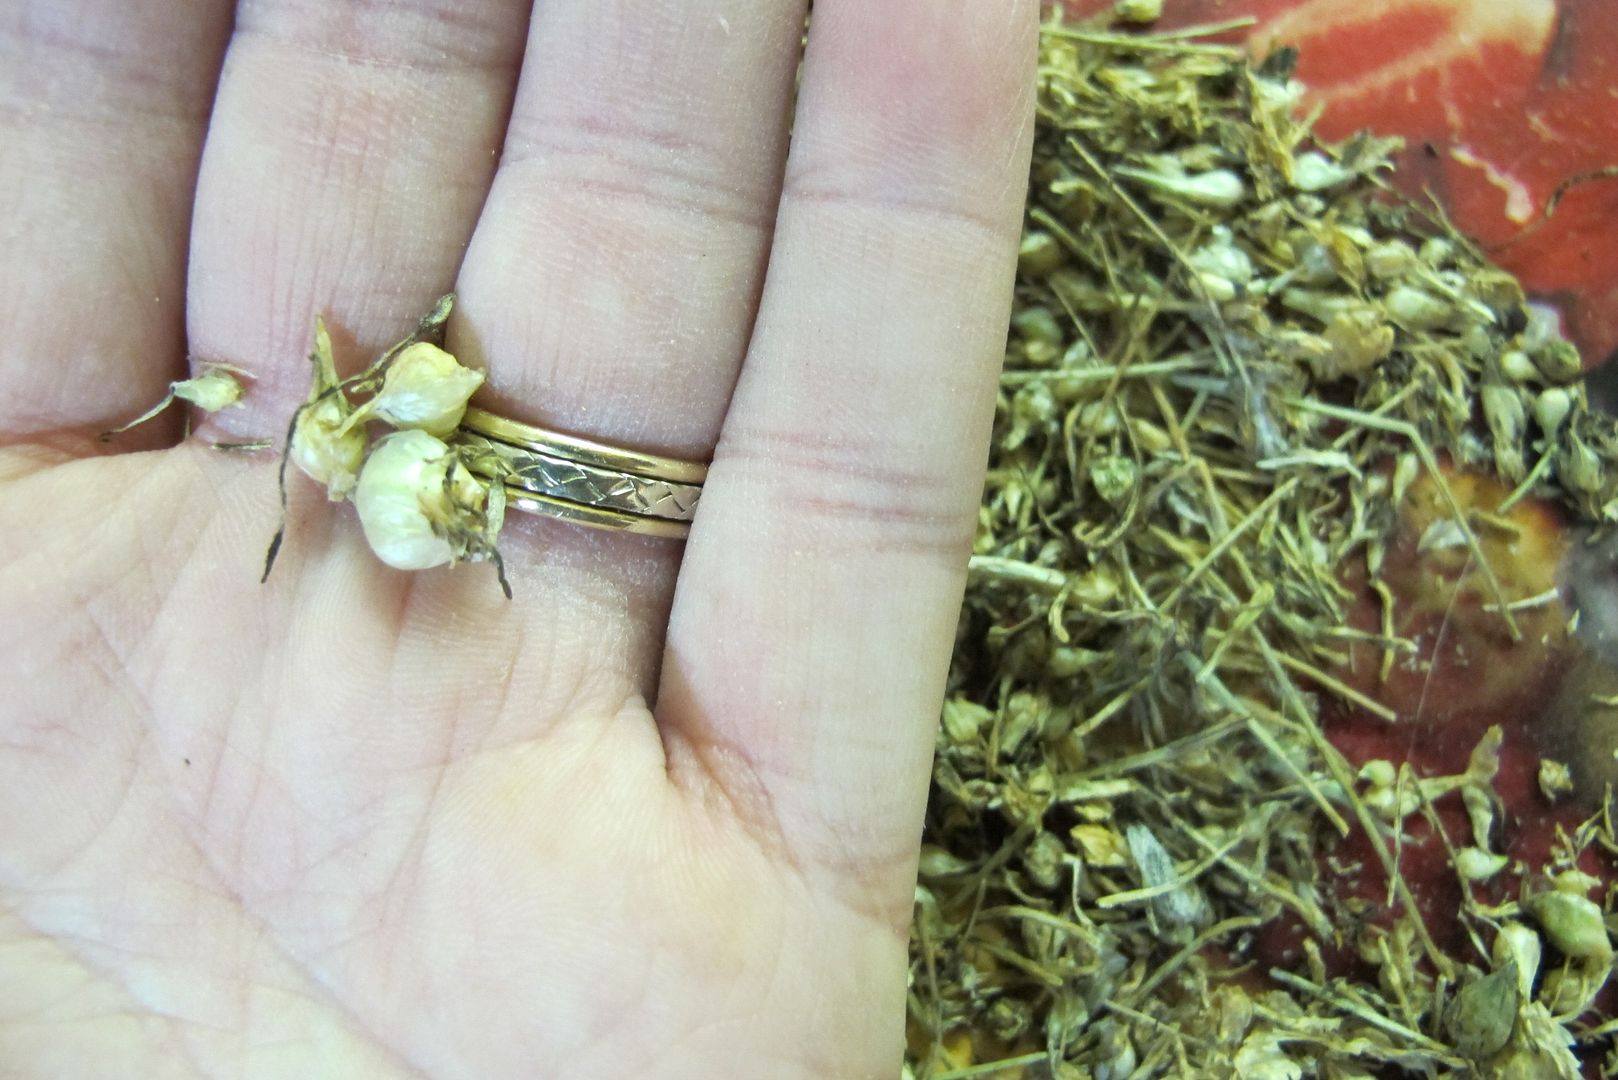
Allium nutans seeds and chaff ready for processing. 
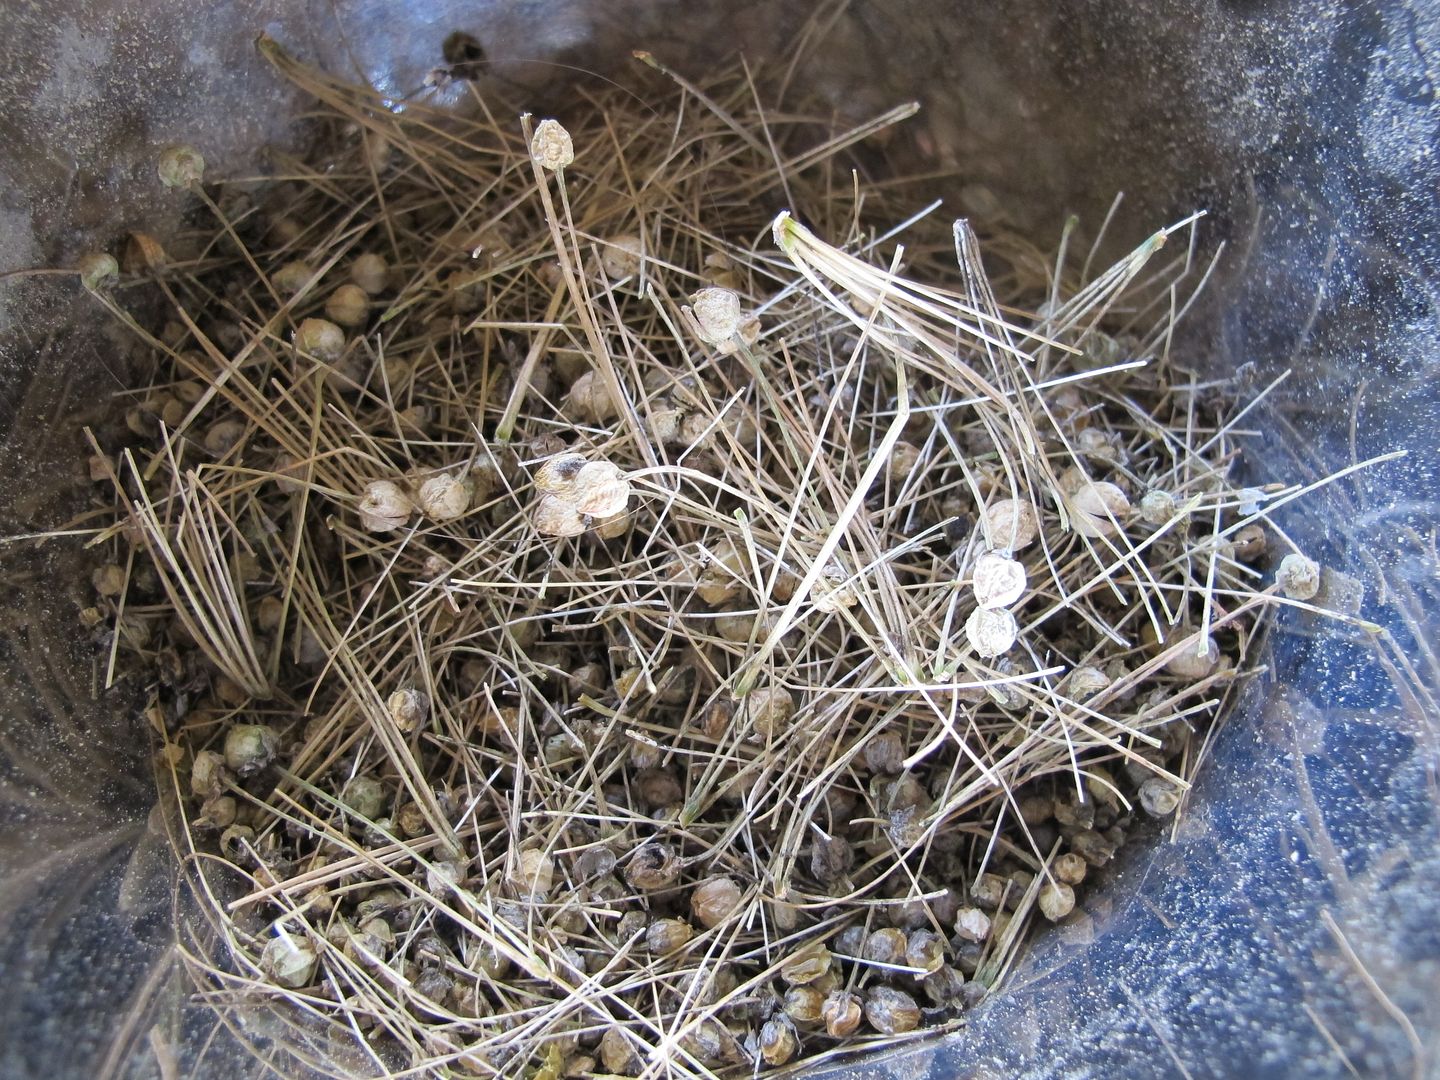
 photo file-20.jpg
Allium ampeloprasum for comparison.

Harvesting:

Some seeds will ripen irregularly meaning that part of the seeds on a stem or group will be dry and ready while others won't. Lettuce does this producing a few fluffy flowerheads ready to pluck while the rest remain sticky and green. If you are desperate to collect as many seeds as possible, you can collect these early ones and then wait until the majority of the stem is dry and collect the rest of the stem OR you can just ignore the first ripe ones and wait until the majority of the stem is ripe OR you can tip stem into a paper bag (carefully so the stem doesn't break) and kind of shake vigorously every once in a while.

Back to Allium nutans. There were a few precocious seedheads but for the most part, they all ripened at once. I pulled the ripe stems and put them in a clean bucket ready for the purpose then I brought them inside and ignored them until they were really really dry. The ignoring part is important or at least dryness is.

Some were used in seed saving demonstrations and the others languished in the drying corner until yesterday.

Threshing:

Also known as separating the chaff - stem, seedpod etc.. - from the seed. There are lots of ways of doing this. When I have tonnes of the stuff, I put in a large container and get a kid to shuffle on it. The kid is not necessary but they do seem to get a kick out of it.
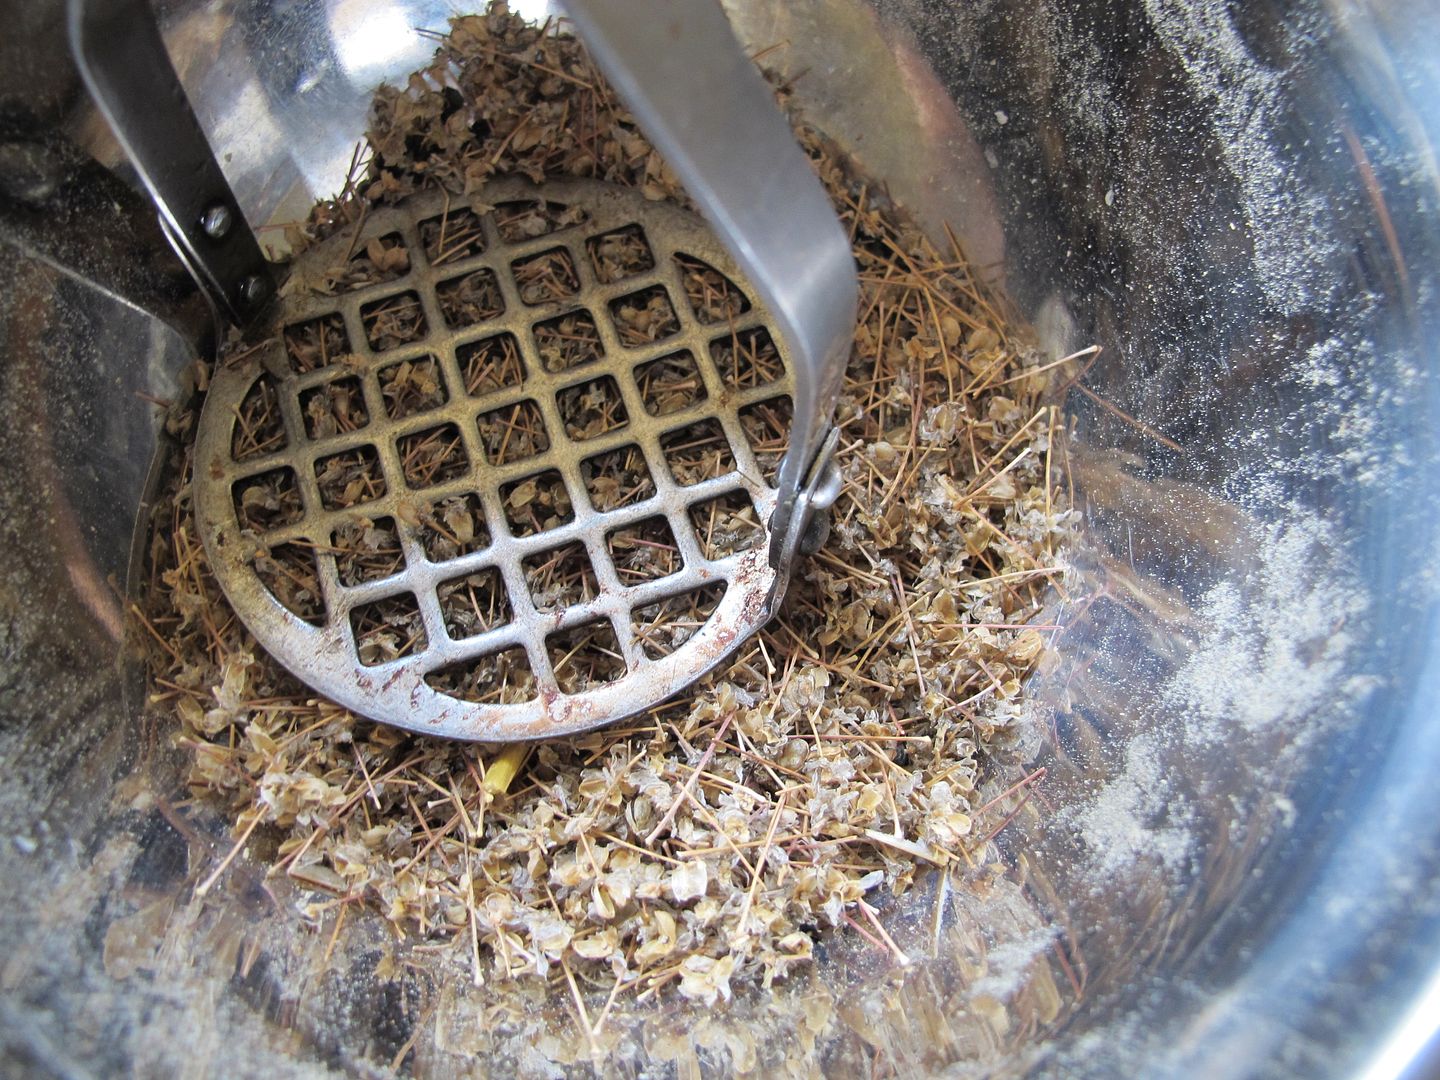
 photo file-12.jpg
Allium nutans getting the gentle smash treatment to help loosen seeds from chaff.

It helps to strip seeds from stems first if you can (bother). It will save you work later but it really depends on the amount of seeds that you are processing. You can also use various sieves such as screens, or in this case a rubber matt, to break open the seedpods and separate the big chaff. Sometimes I'll rub seed pods together in my hands over a bowl.
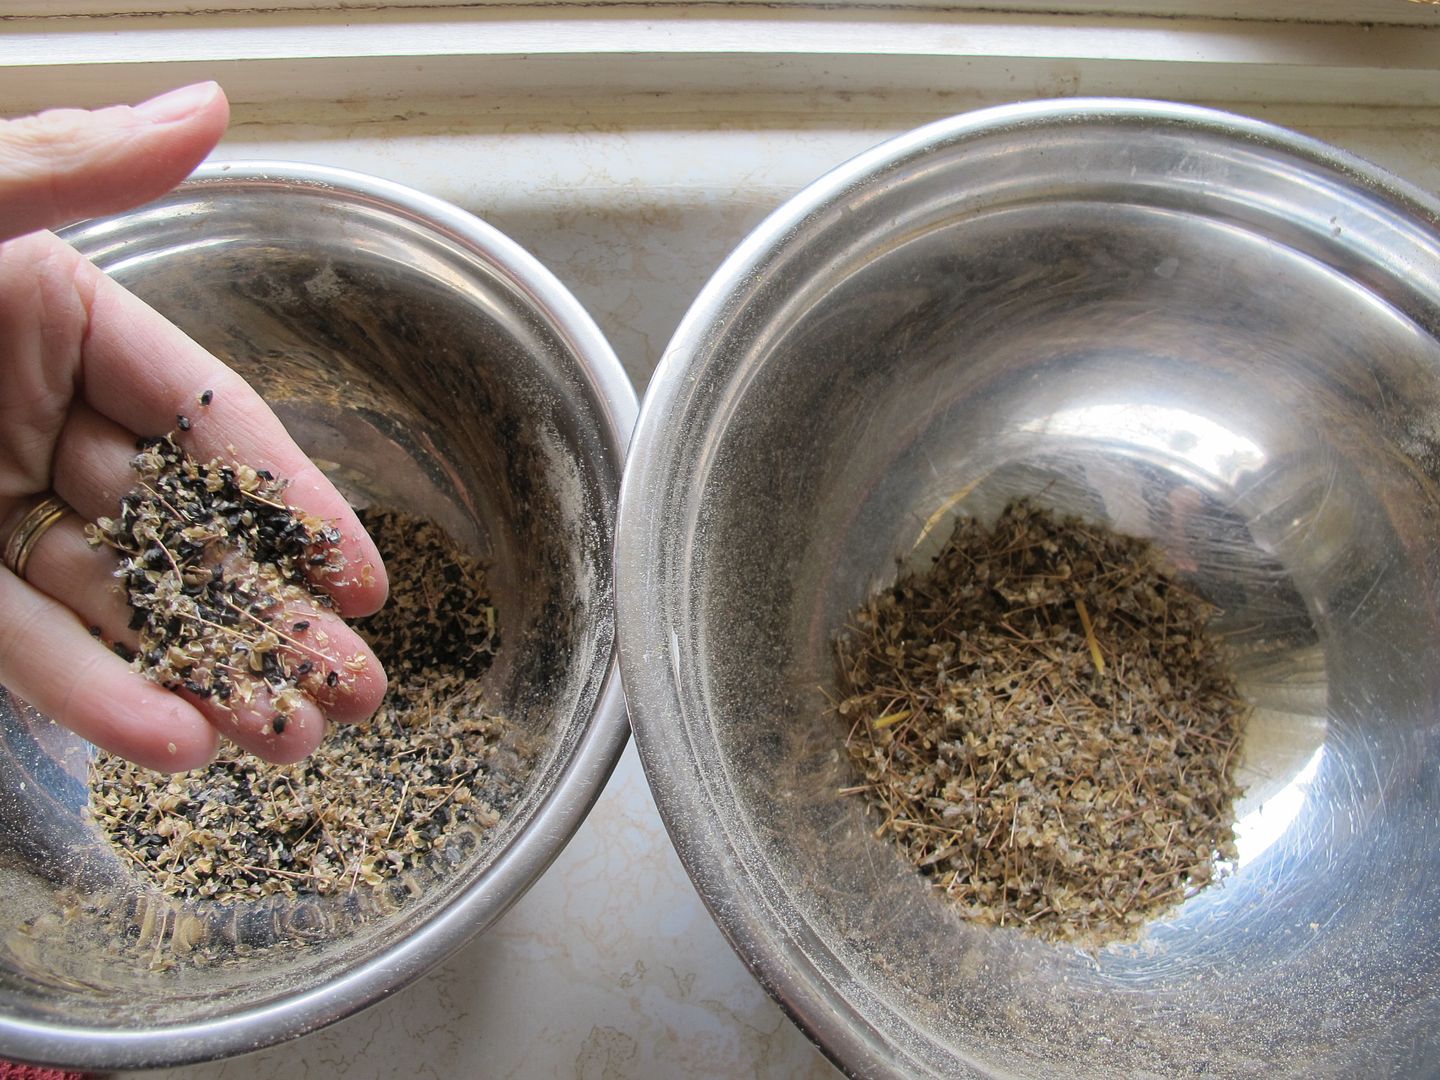
 photo file-14.jpg
After big chaff has been removed from the top.

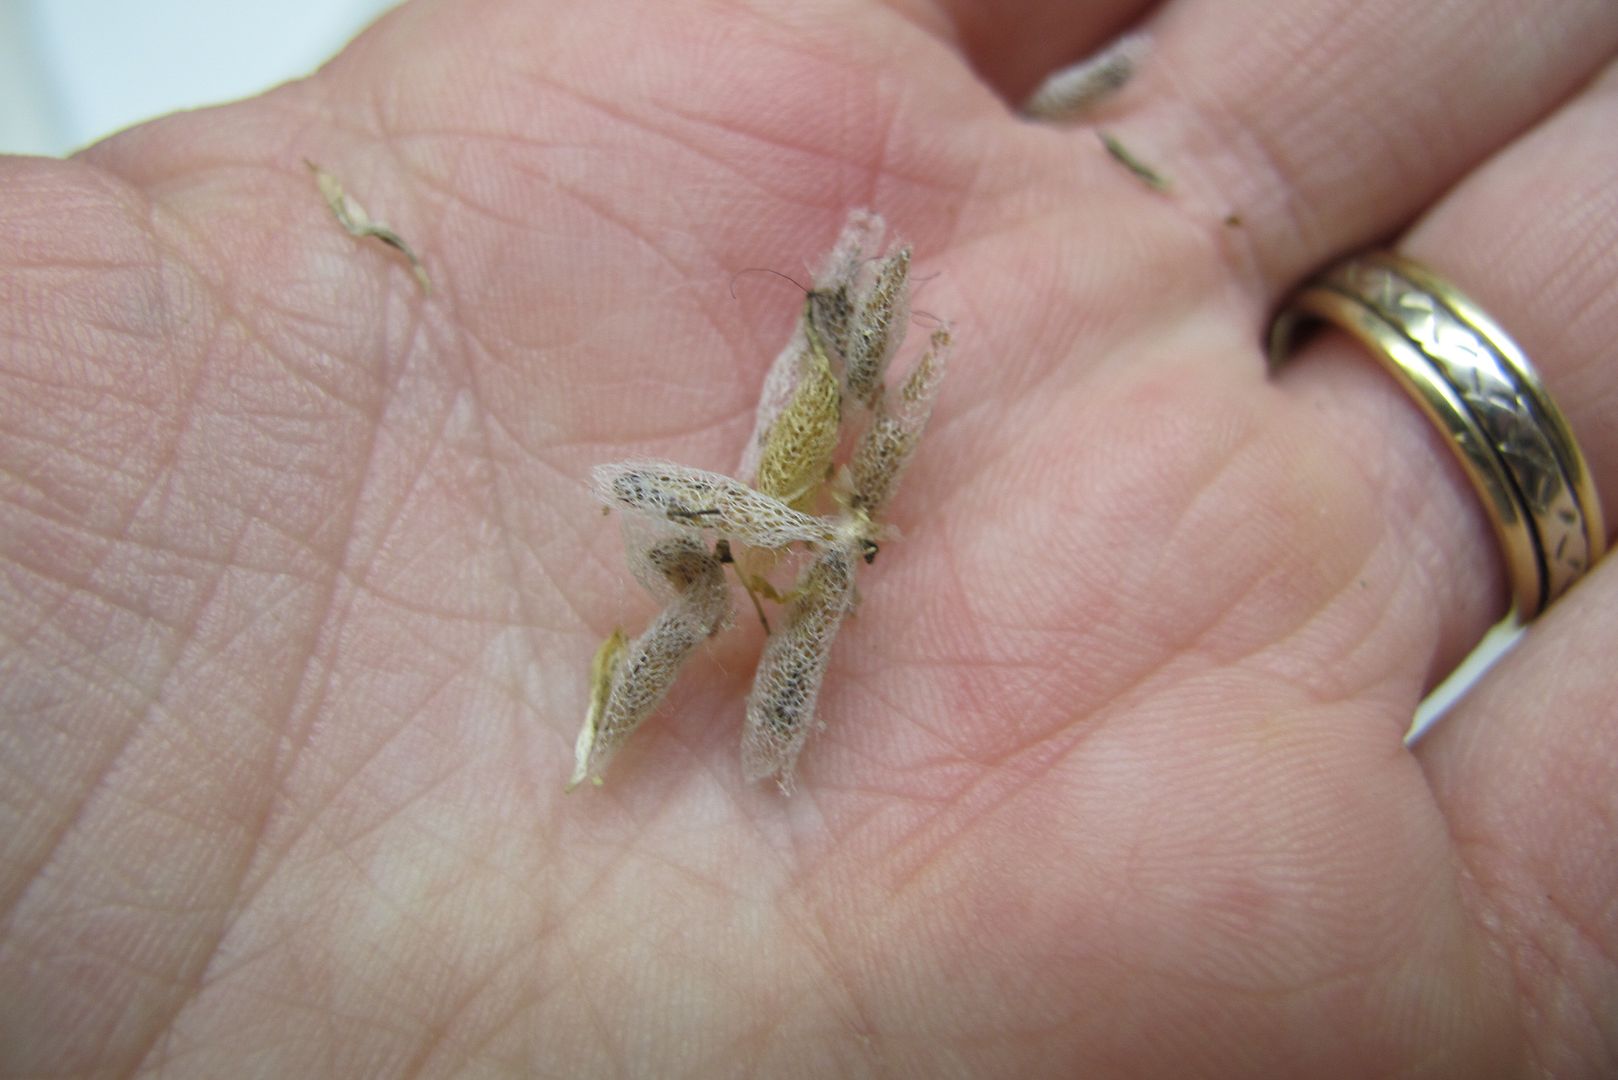
With the Allium nutans, I just stripped the seedpods and rays from the stems then gently used a masher to encourage further separation. With the Allium ampeloprasum (leeks) that I harvested today, I placed them in a paper bag and rolled them with my rolling pin. The leek seedpods were wrapped more tightly in their pods so need a bit more processing.
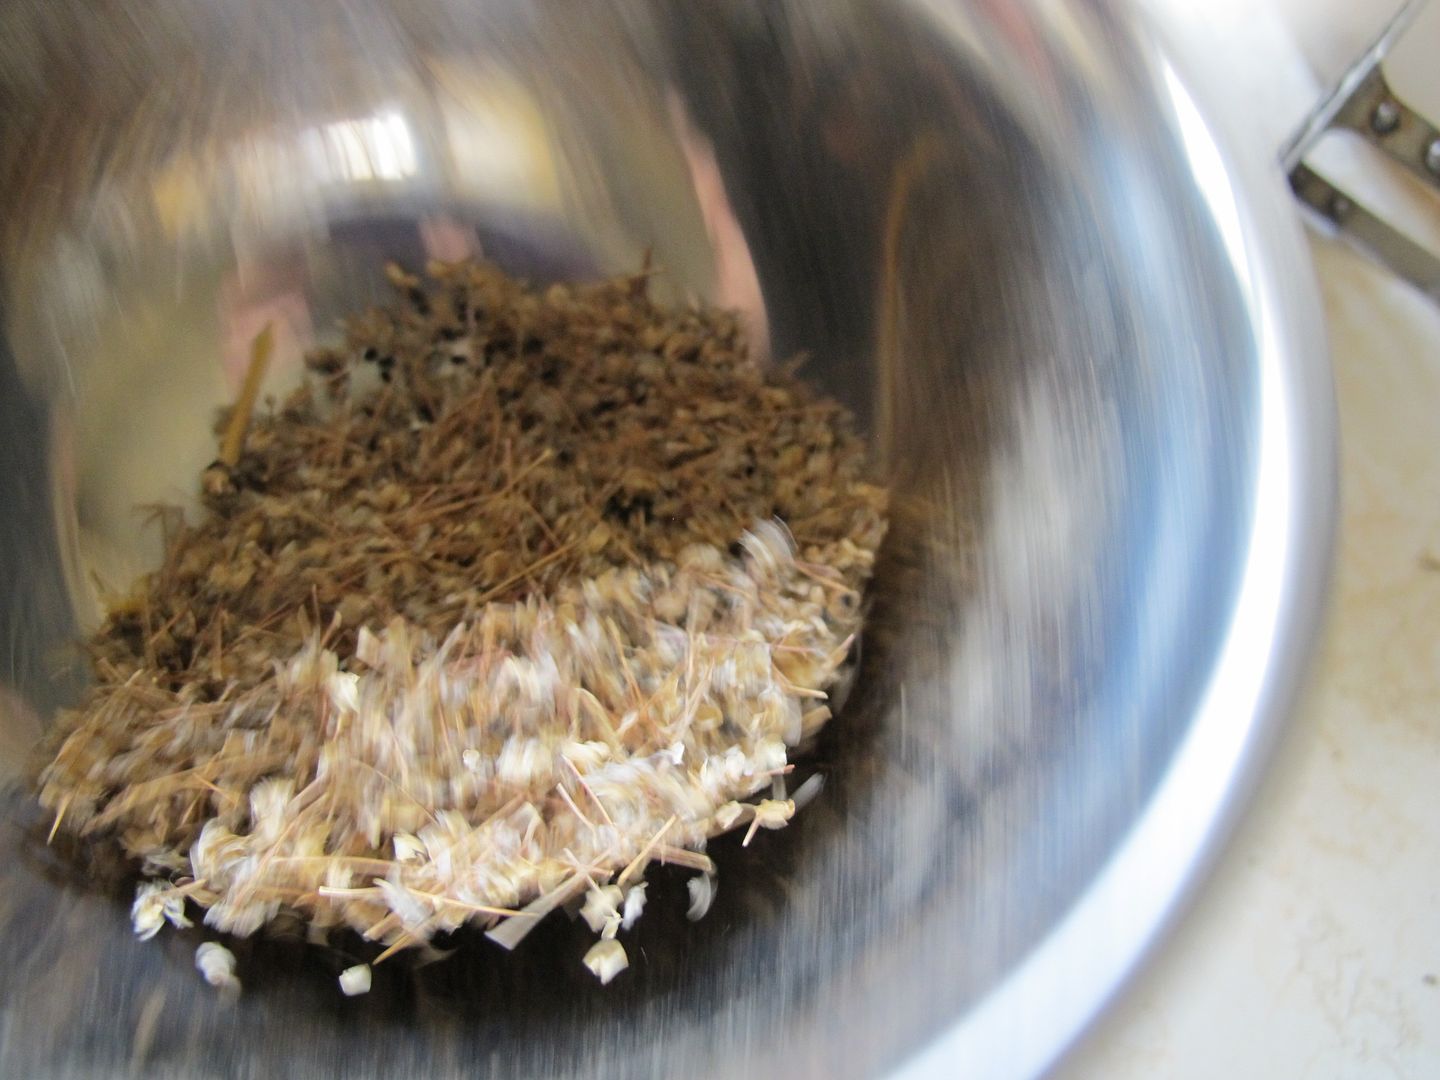
 photo file-13.jpg
Life action shot of The Swish to help sort seed settle to the bottom.

Pour remaining chaff and the seed into a bowl and do the swish. If you have a lot of seed in a bucket, then you can do the tap or the shake. The latter is when you jostle the bucket to get the heavy, smaller seed to settle at the bottom and the larger chaff to 'float' to the top. The swish is when you shake the bowl in a circular motion collecting the chaff in the middle. This is useful not only for the initial chaff removal but later in the process as well.

Winnowing:

Either lots of fun or like getting a stick stuck in your eye - small chaff sized sticks. Anyhow, the easiest way is to get to bowls/buckets and a breeze. Pour the seed and chaff from one container to the other letting the breeze sort the seed. Adjust the height of the pour to the strength of the breeze and the relative heaviness of the seeds. If this just won't work, look into water sorting.
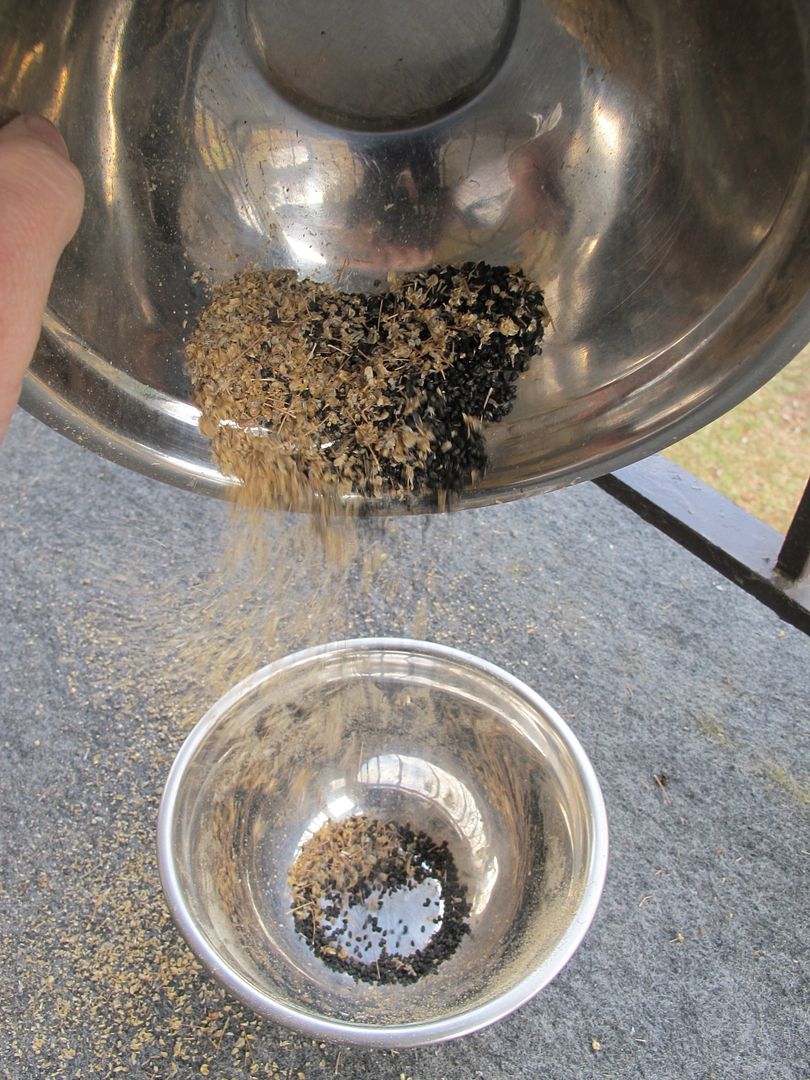
 photo file-15.jpg
When the breeze cooperates, winnowing is a beautiful thing to behold.

Worked just fine for Allium nutans species.
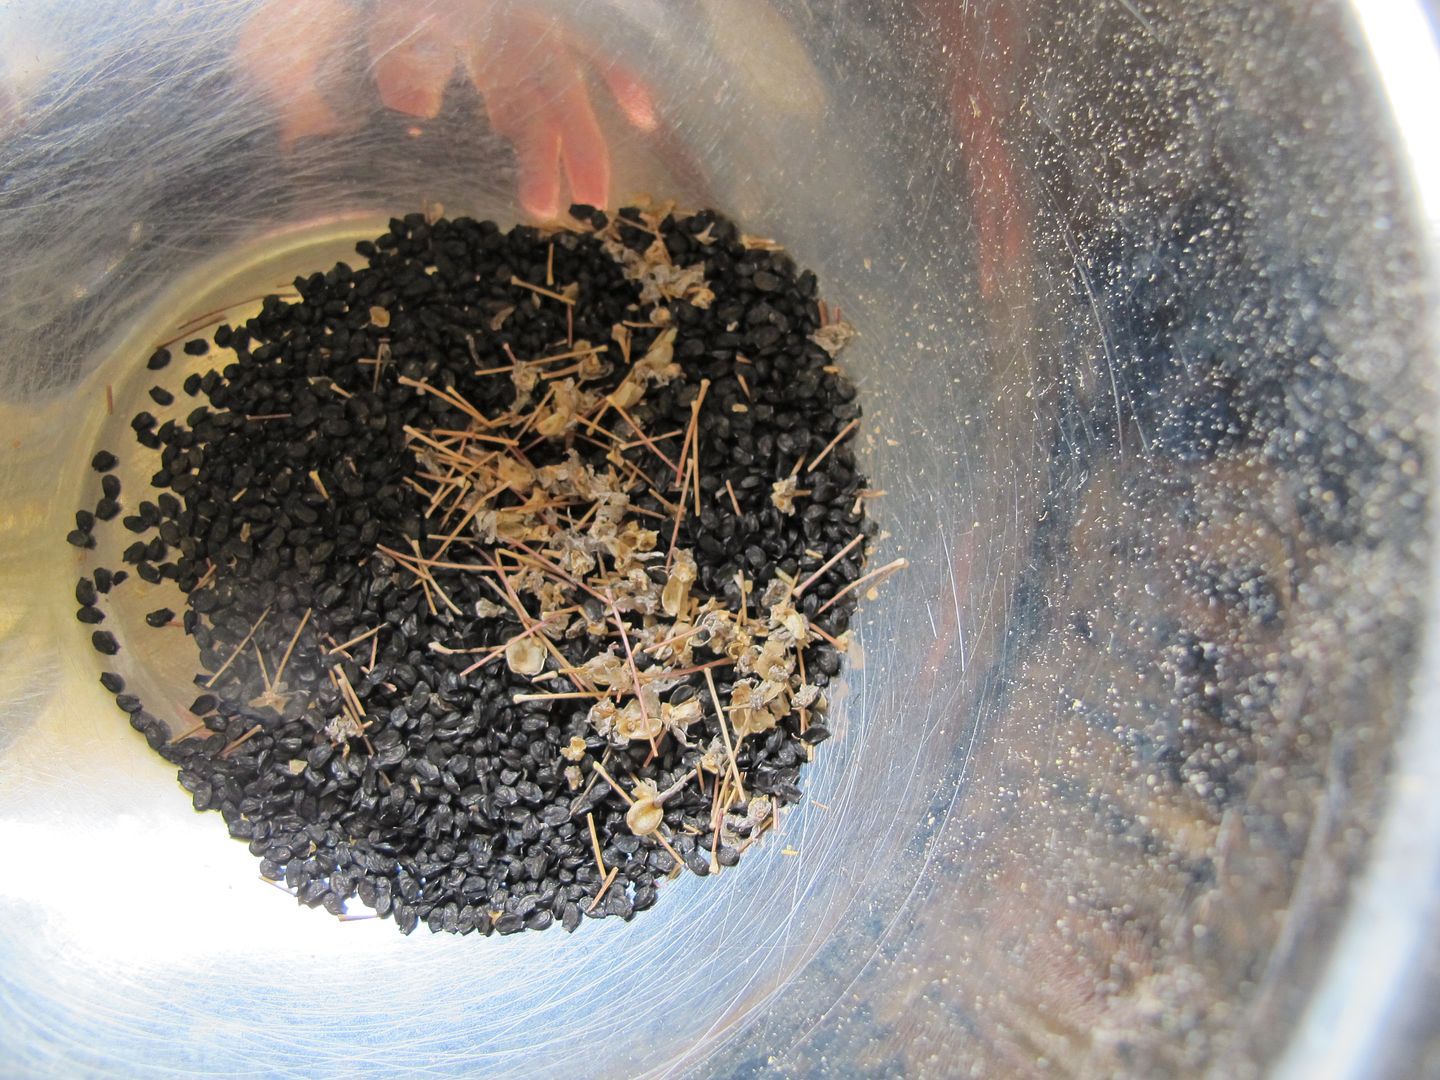
 photo file-17.jpg
The remaining seed and chaff after I did the swish again to concentrate chaff in the centre for easier removal.

I've also blown on it especially at demonstrations when the wind was not cooperating or you can use other wind making devices such as a fan etc... You can even build a seed cleaning machine in your spare time. If you do, might as well make two and send me one. Thanks!
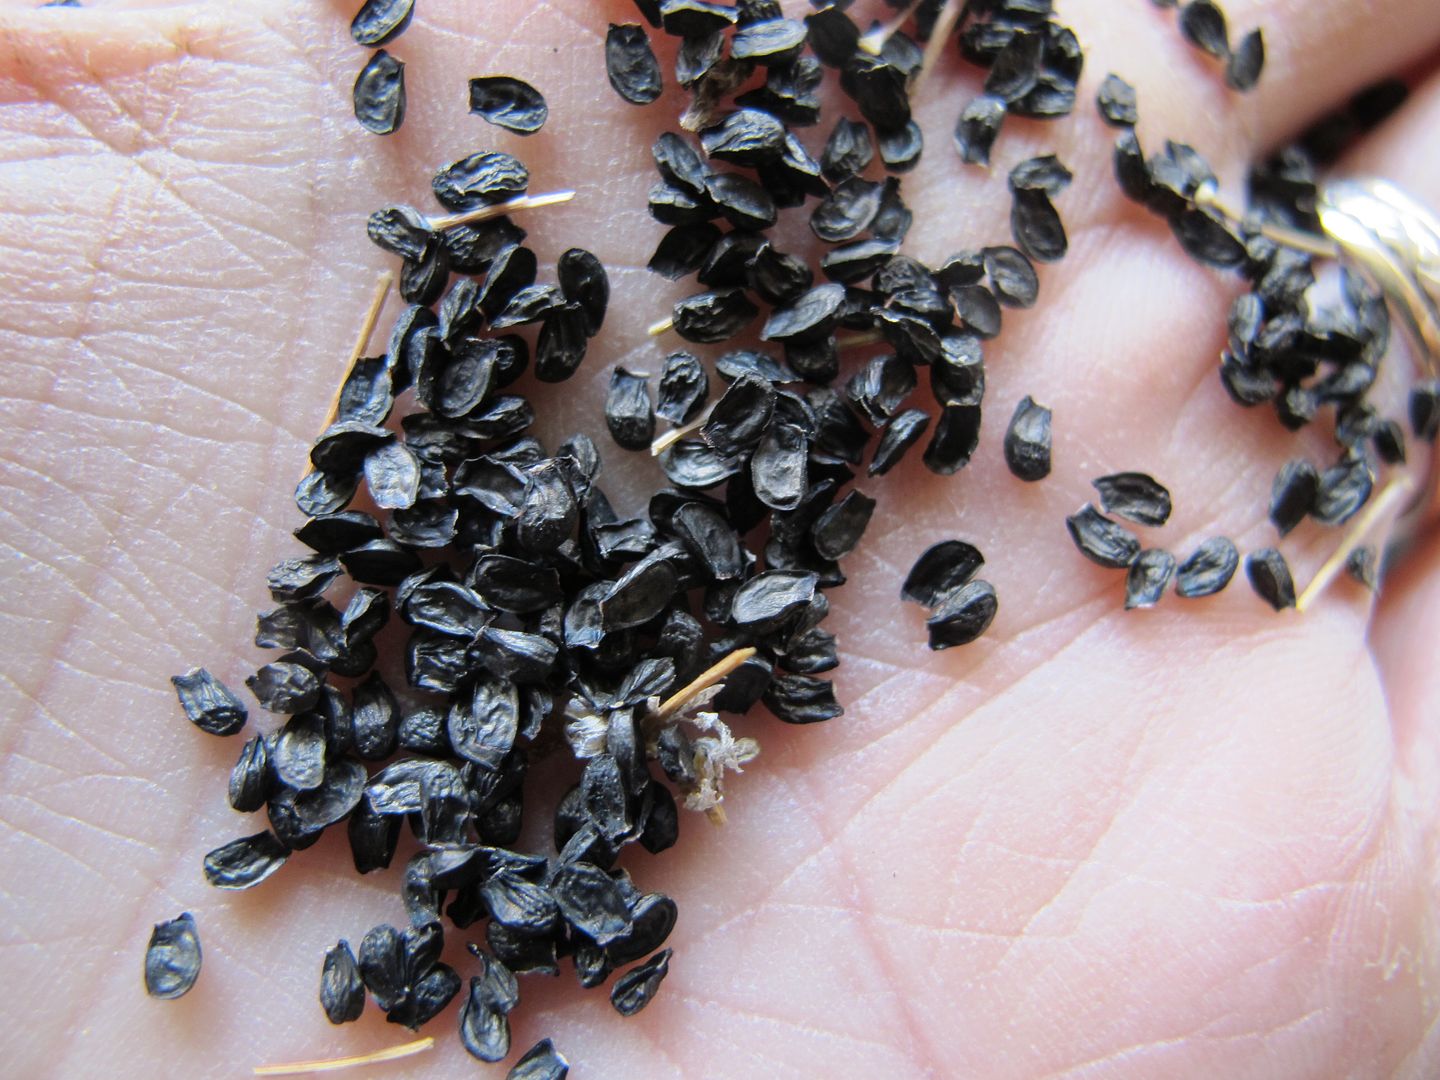
 photo file-18.jpg
The mostly cleaned seed of Allium nutans.


Wednesday, October 9, 2013

The truth about Zumpkins

 photo file-5.jpg
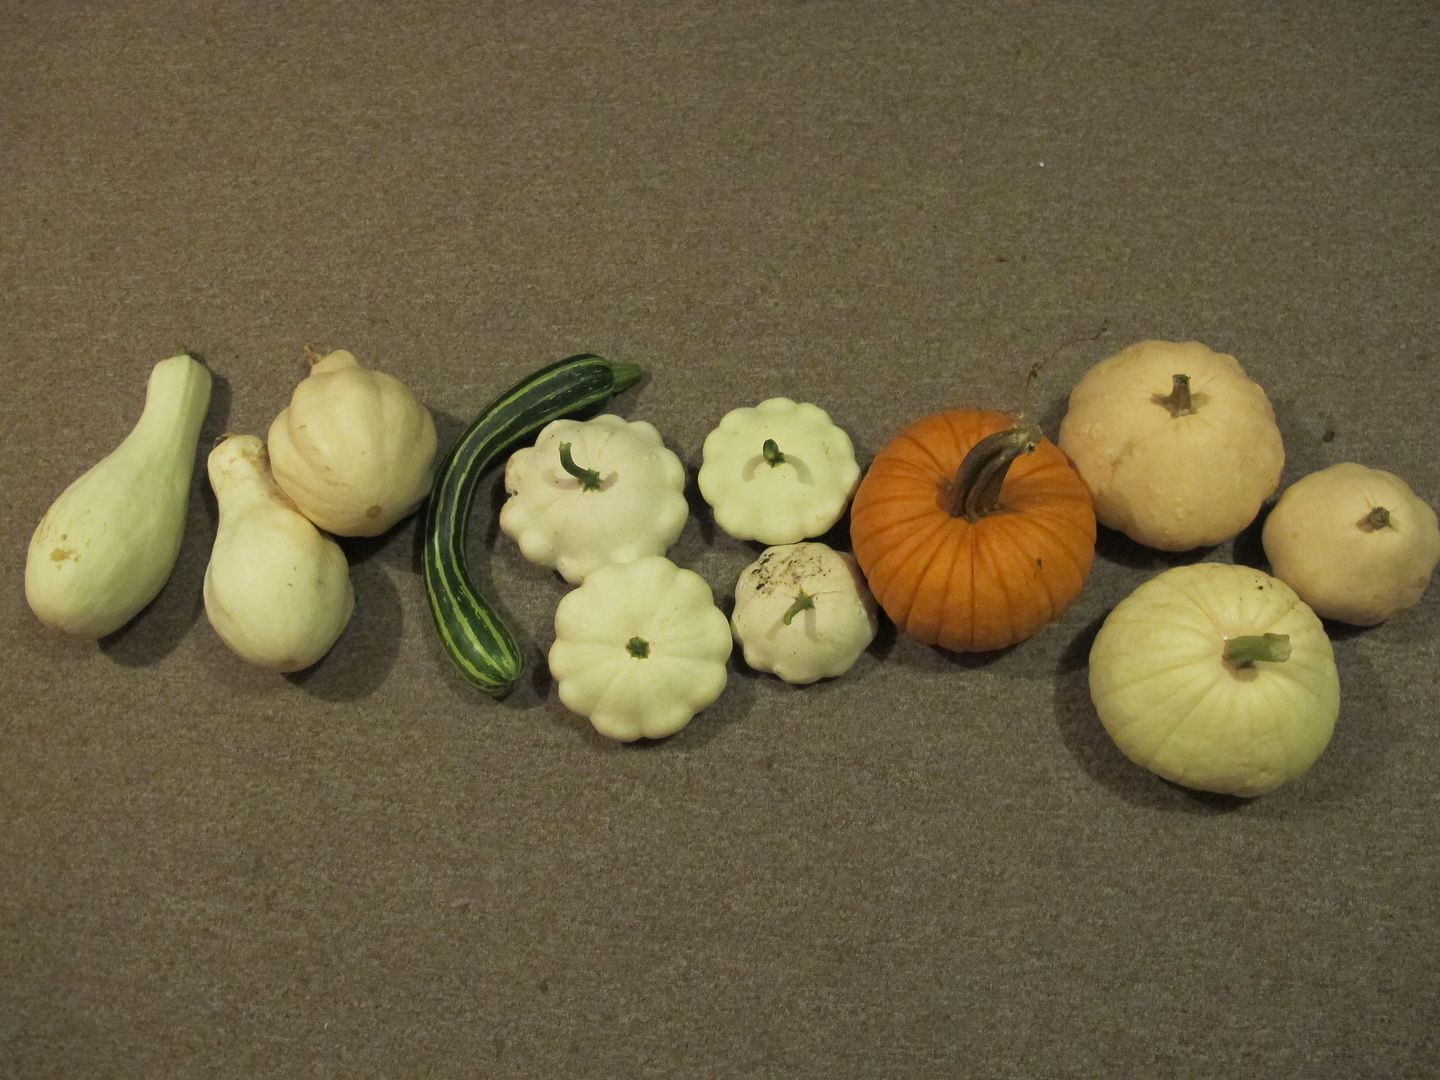
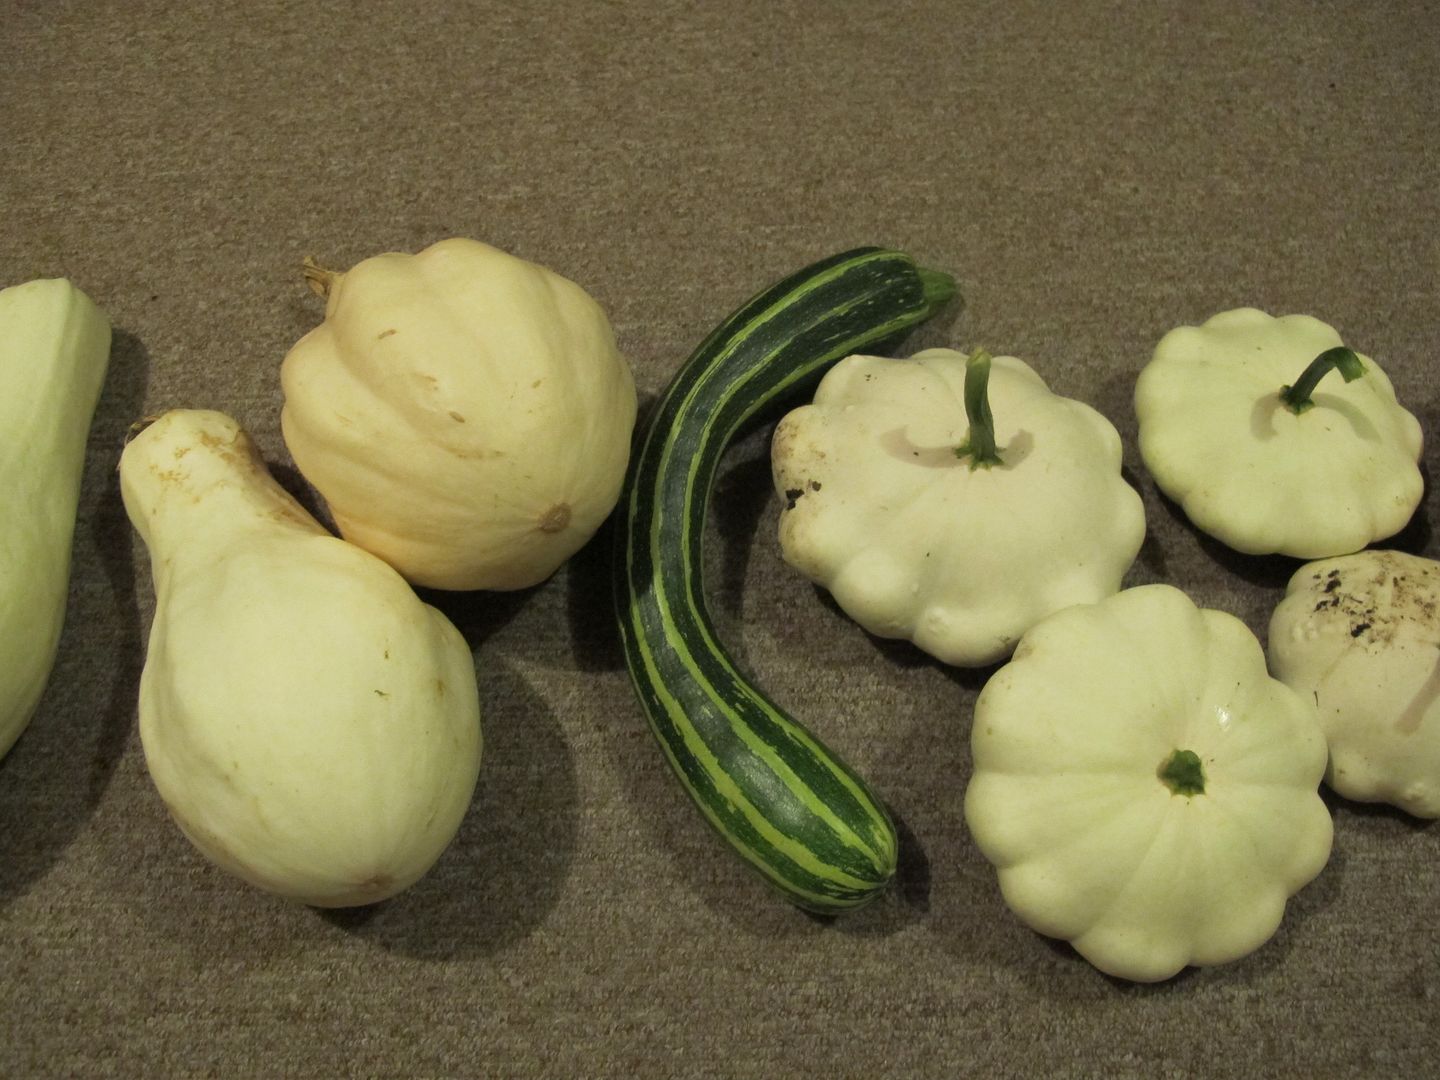
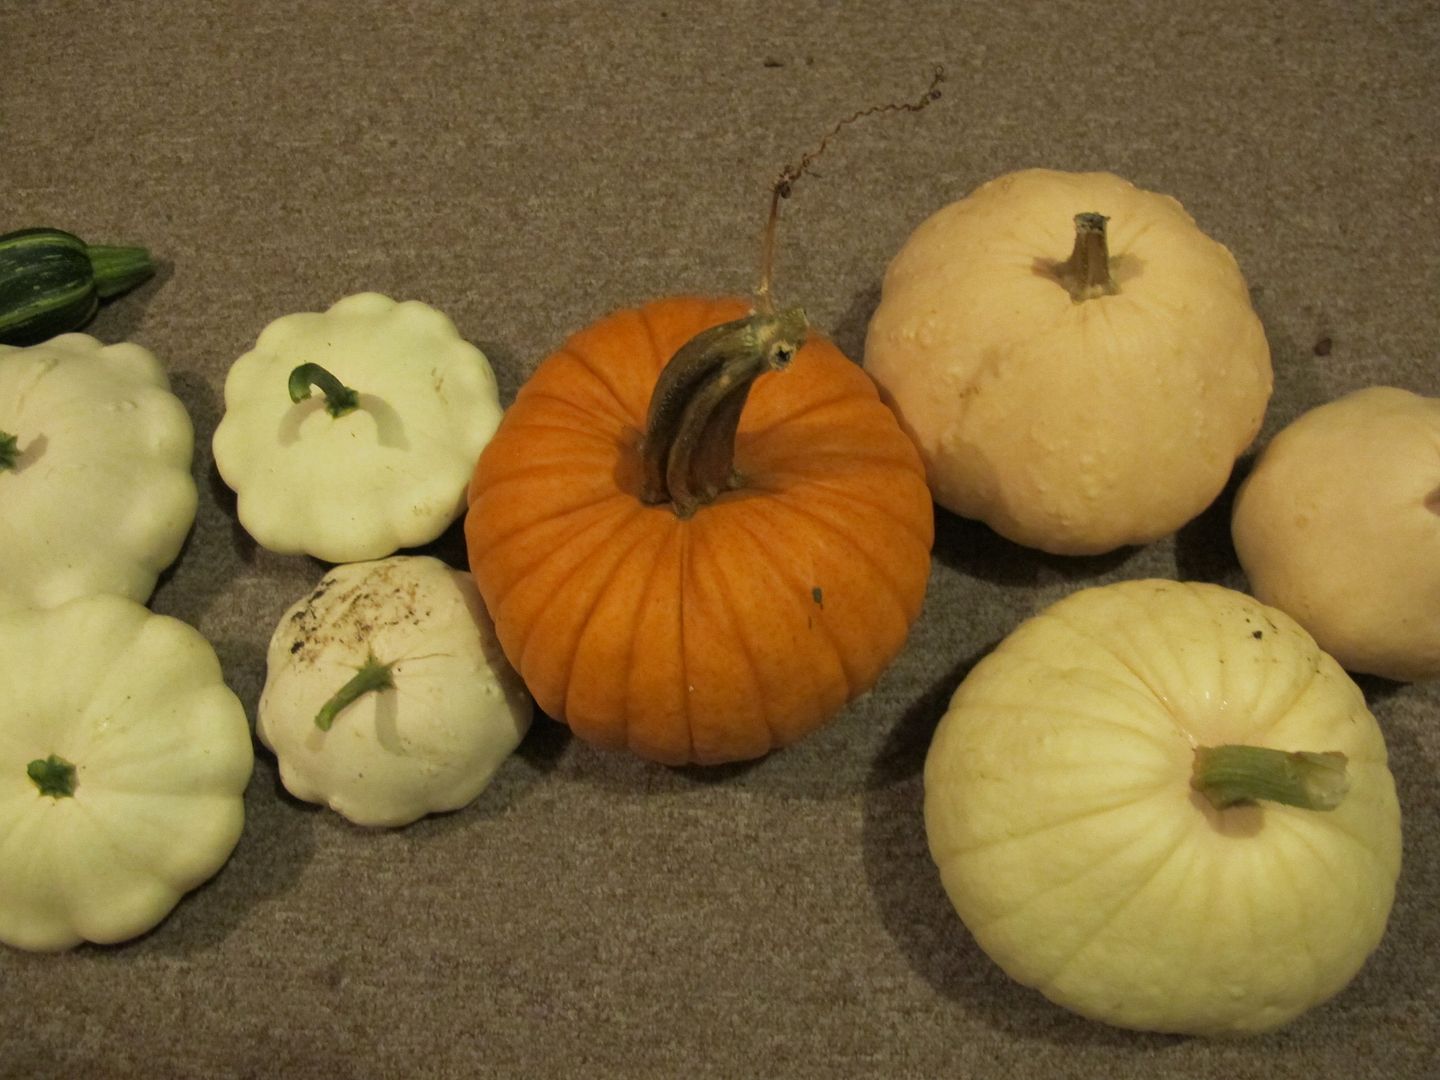
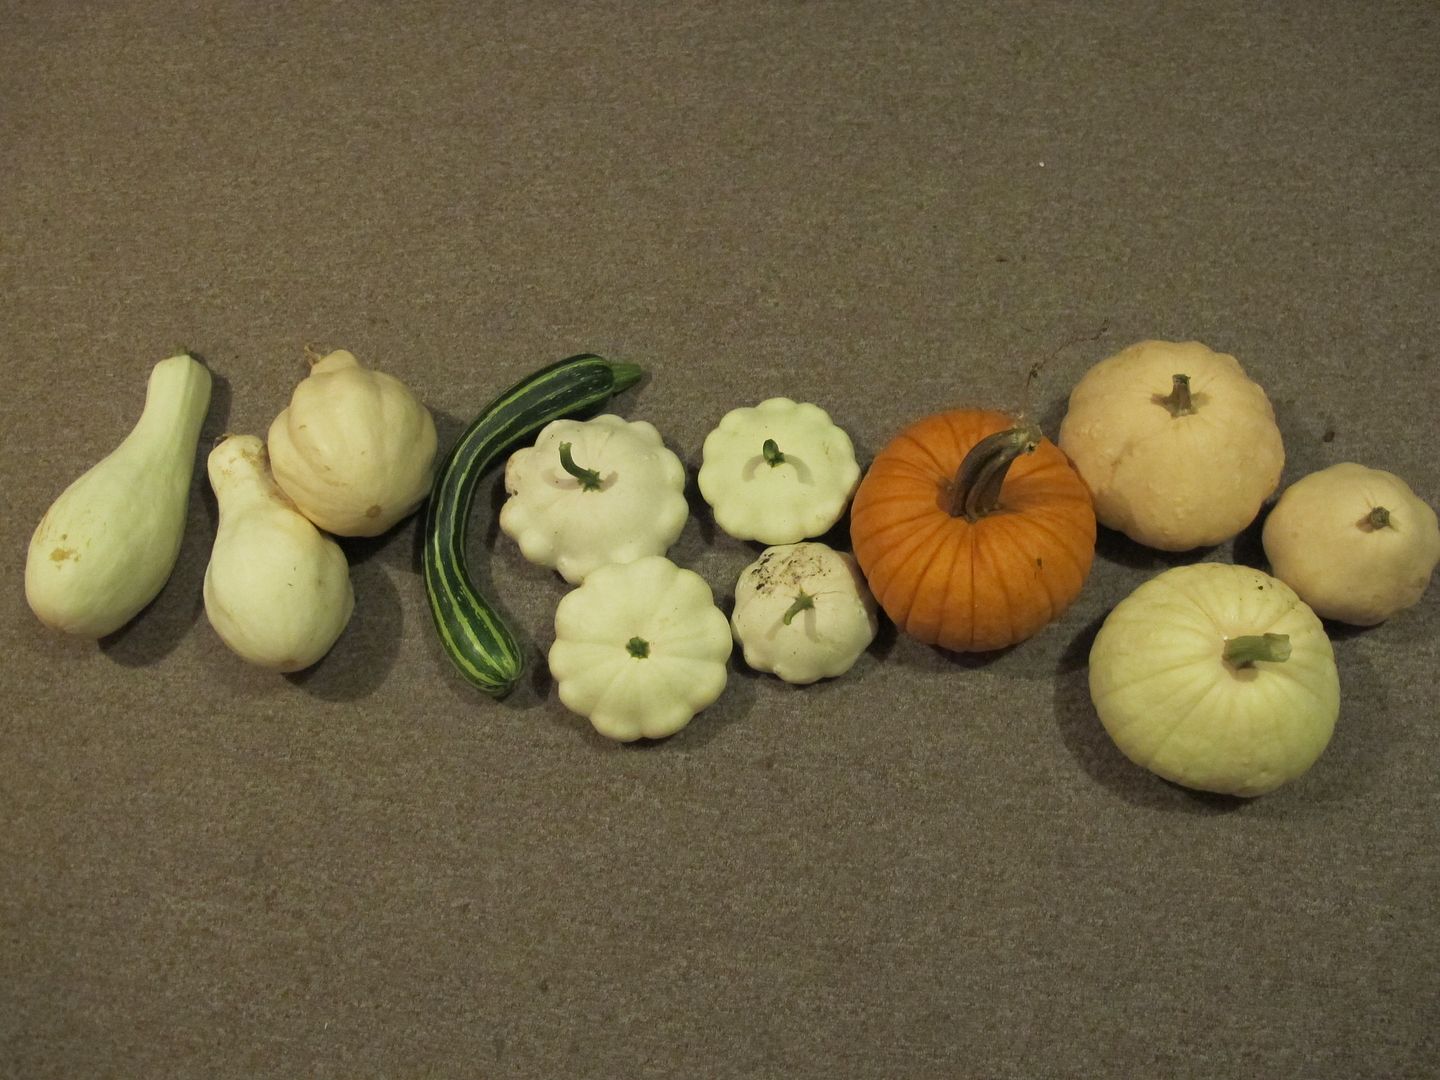
Family reunion - a selection of pepos and crosses

Here's a question you hear a lot:

"My zucchini looks funky. Did it cross with my melon?"

"Will my pumpkins and cucumbers cross if I grow them together?"

"Are my melons not sweet because I grew them with cucumbers?"

"Could my butternut have crossed with my pumpkin and that's why it is ripening/growing/looking weird?"

Okay, I admit that I am paraphrasing somewhat but these are all inspired by real life questions I have read or seen or answered on countless occasions. So to set the record straight, I give you the truth about the zumpkin.

 photo file-6.jpg
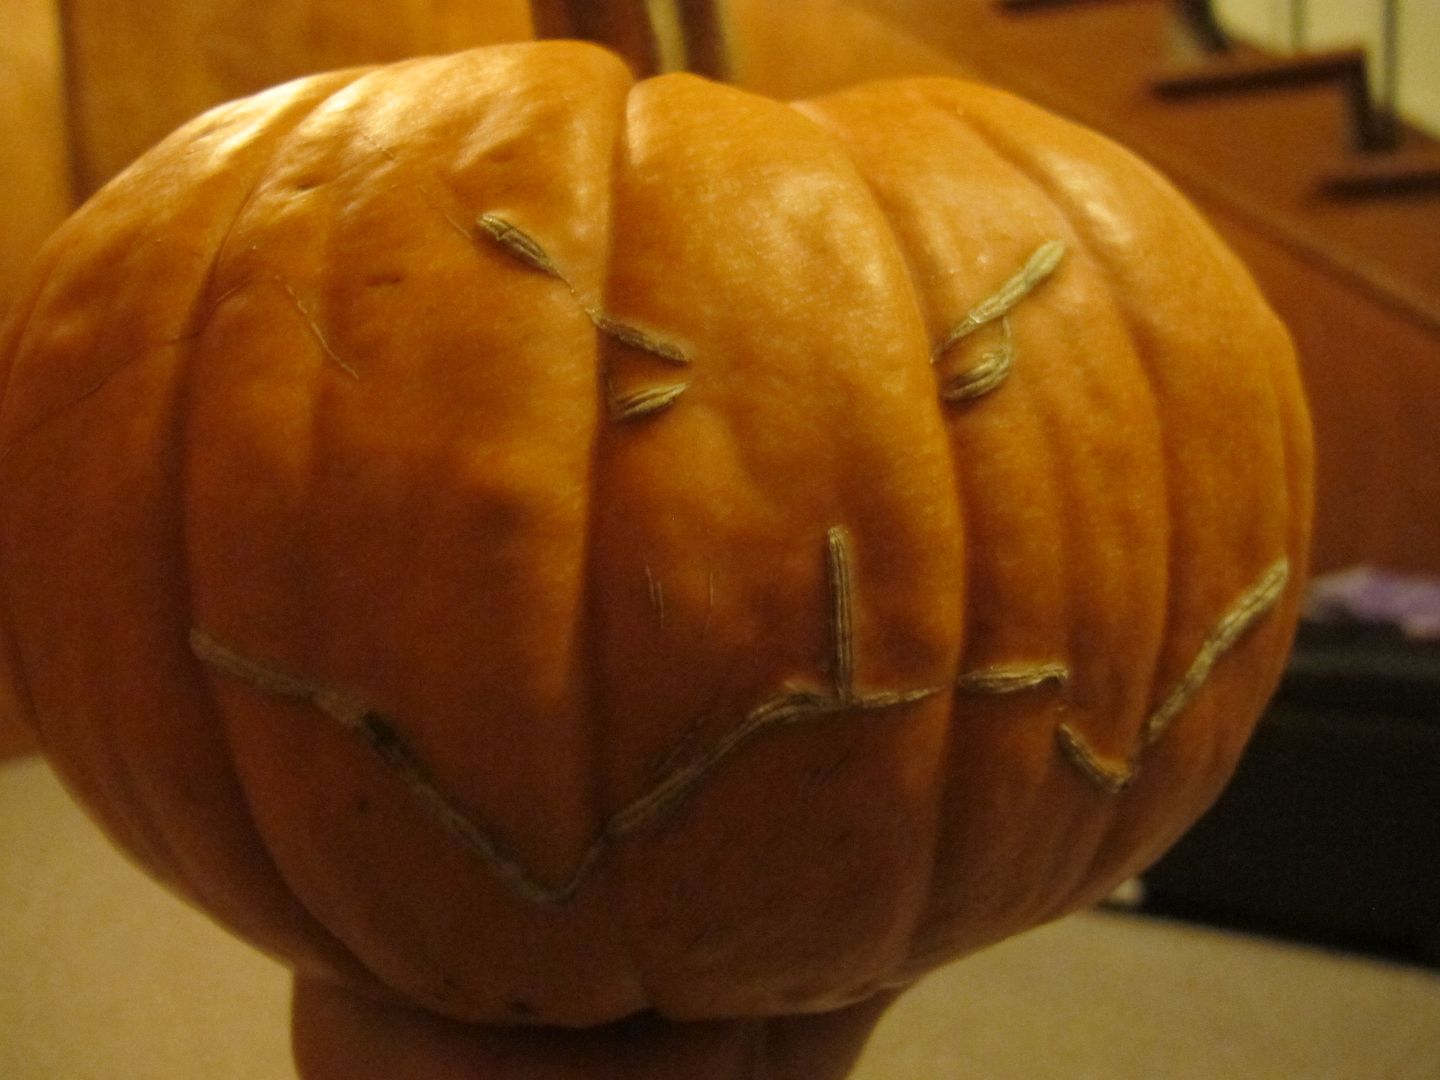
Immature pumpkin scarred by design and by that I mean that we etched this face into it when it was green on the vine not that we intended on hurting it emotionally... 

Not all vines are created equal

I'm not suggesting that they fall into a heirarchy; what I'm referring to is how closely related they are. Cucumbers, melons, squash, zucchinis, pumpkins and more might look similar in that they are all leafy vines that produce (mostly) yellow flowers of which the female flowers swell into fruits but this does not mean that they can all cross.

In fact, crossing is usually only restricted to members of the same species. Just like how a rabbit must mate with another rabbit not a monkey to produce fertile offspring even though both rabbits and monkeys are mammals. (No jumping ahead, we'll talk about interspecies crossing in a minute.)

Plant: Genus species

Cucumbers: Cucumis sativa
Melon: Cucumis melo
Armenian cucumber: Cucumis melo (see it's tricky sometimes)
Watermelon: Citrullus lantana
Many (but not all) zucchini: Cucurbita pepo
Most halloween pumpkins: Cucurbita pepo (hence zumpkins)
Squash: Cucurbita pepo, Cucurbita moschata, Cucurbita maxima, etc...*

That's not to mention gourds (some decorative gourds are actually pumpkins), other things called melons and some more unusual cucumber like things such as mouse melon, aka Melothria scabra.

The more closely related something is, the more likely it can cross assuming that the reproductive mechanisms are conducive to such a union and there no other barriers. Peas, for example, don't tend to cross because they self pollinate even before the flower opens giving the bees no chance to create mayhem**! The vining crops mentioned above, on the other hand, are busy with pollen dusted buzzers moving between plants so cross pollination most certainly can happen if it is possible.

If they have the same Genus and species such as a pattypan and spaghetti squash and zucchini, they can easily create cross cultivar hybrids***. Some people let same species cross on purpose or just because they don't care but if you want to keep your seed pure, you have to isolate your varieties.

Sometimes you even get an wide-cross which is a cross between two different species. This is more likely between closely related species such as two types of Cucurbits rather than between a cuke and a watermelon. To go back to our mammal examples, sometimes you see a zonky (zebra + donkey) but no elephantice (elephant + mice)****. This species hopping hanky-panky is actually quite infrequent and apparently highly cultivar dependent according to what I've read (see link below).

 photo file-8.jpg
Romanpan f1 = Romanesco x Patty Pan

Naughty neighbours?

What this does NOT mean is that if you are growing an Armenian cucumber beside your pickling cucumber that the fruit that forms will be some crazy mix between the two. It won't. Instead you will get just what you expect EVEN though you are growing two varieties.

The first year you grow two potentially cross pollinating plants will give you no pumpkin surprise. Honest. Growing pumpkin beside your zucchini will give you pumpkins on your pumpkin plant and zucchinis on your zucchini plant. Yup. Boring.

 photo file-9.jpg
Patty Pan x Halloween Pumpkin = warty dumpling and ribbed white or Hallopans collectively

Hiding in the Seed

Actually not so boring. Those plants might be hiding a secret in the seed. You see, the next year when you grow out your pumpkin seeds, you may get fruit that doesn't look anything like you were expecting. It is year two that you get the Zumpkin.

Busy Bees pepo cross:

 photo file-10.jpg
All together now: Romanpan f1 -> Romanesco -> patty pan -> halloween pumpkin -> Hallopan f1

To illustrate, in 2012, I grew white pattypans, romanesco and halloween pumpkins: all Cucurbita pepo. Some of my white pattypans were tossed to the chickens. The next year 2013, I moved their chicken run and out of it grew a great mound of volunteer pumpkin vines. Off the vines sprouted mainly what looks like pattypan x romanesco but there were also a few pattypan x pumpkin. I love the white pattypans not as immature little roasters but because they store exceptionally well mature holding their texture. We keep them in the cellar, peel and use as winter zucchini.  However, the shape is annoying as you have cut off a lot of the flesh. The chance cross of romapan-pattyesco gave me a better shape. We'll see if it stores and tastes as good.

From further a field, some pumpkin pollen made it to a pattypan flower creating a couple other variations which I'm less interested in but they look neat. Here's one below with a very thick hard rind but decent texture. Flavour is average zuke.

Now, I didn't isolate as I didn't realize what I had until later but I intend on saving seeds, growing out and doing some selection in years to come.

 photo file-7.jpg
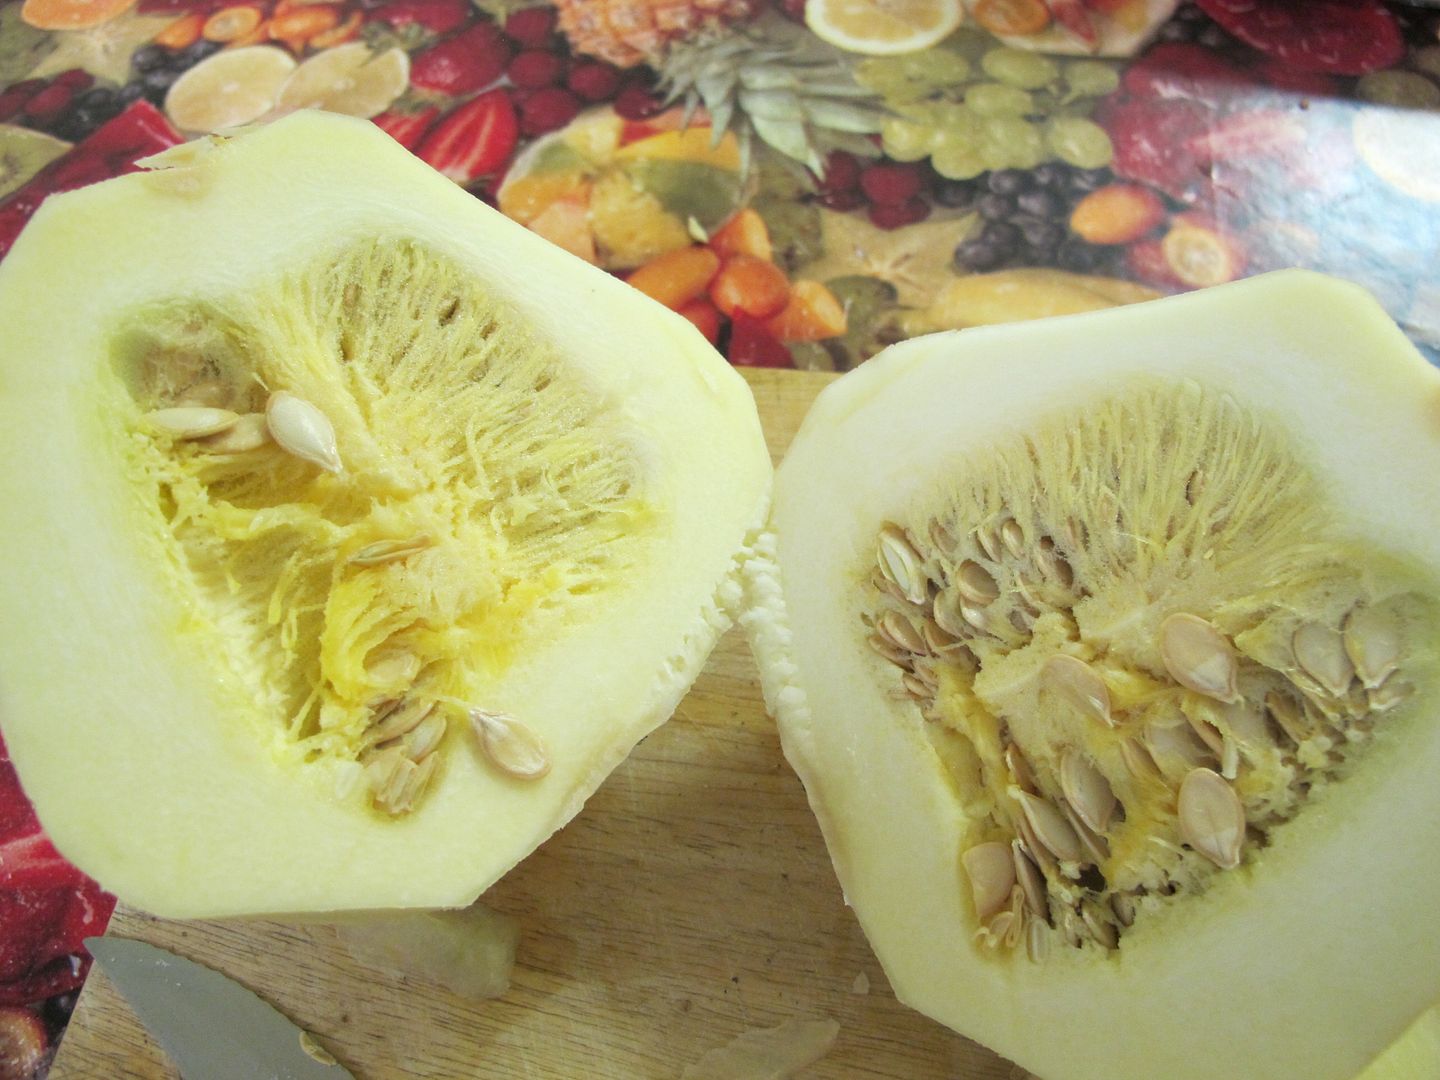
Inside one of the hallopans that we ate for supper. It's flesh was very pale but cooked up a bit darker. It held its texture well and tasted just fine.

A whole lot about Cucurbita seed production

* You are likely to grow these kinds but there are others as squash is a moniker given to a lot of fruit.
** That's not to say that crossing never happens and I seem to remember a reference to nectar stealing insects in beans that can trip up self pollination at the source which might also happen in peas. If you really, really want pure varieties of peas, there are suggested isolation distances.
*** Did you say hybrid?
Yes I did.
Aren't hybrids bad?
Depends on what you mean. A hybrid is just the crossing of two varieties. Anytime you don't isolate two cultivars of the same species, you might get a hybrid.
But?
Yes, agricultural hybrids that don't breed true and force people to buy their seed again so they become dependent on the system have drawbacks. That's the hybrid that people rally against in favour of what they call OP - open pollinated. The kind of hybrid above is just kooky. You are welcome to save seeds from it but no guarantees about what offspring you'll get. That's true of most commercial hybrids by the way too. Which is not to say that you can't try to select and stabilize a new OP variety from your crazy mix. That's fun too.
**** Yeah, yeah. I know. There are several reasons for that.


Friday, September 27, 2013

Collecting Hablitzia Seed

 photo file-2.jpg
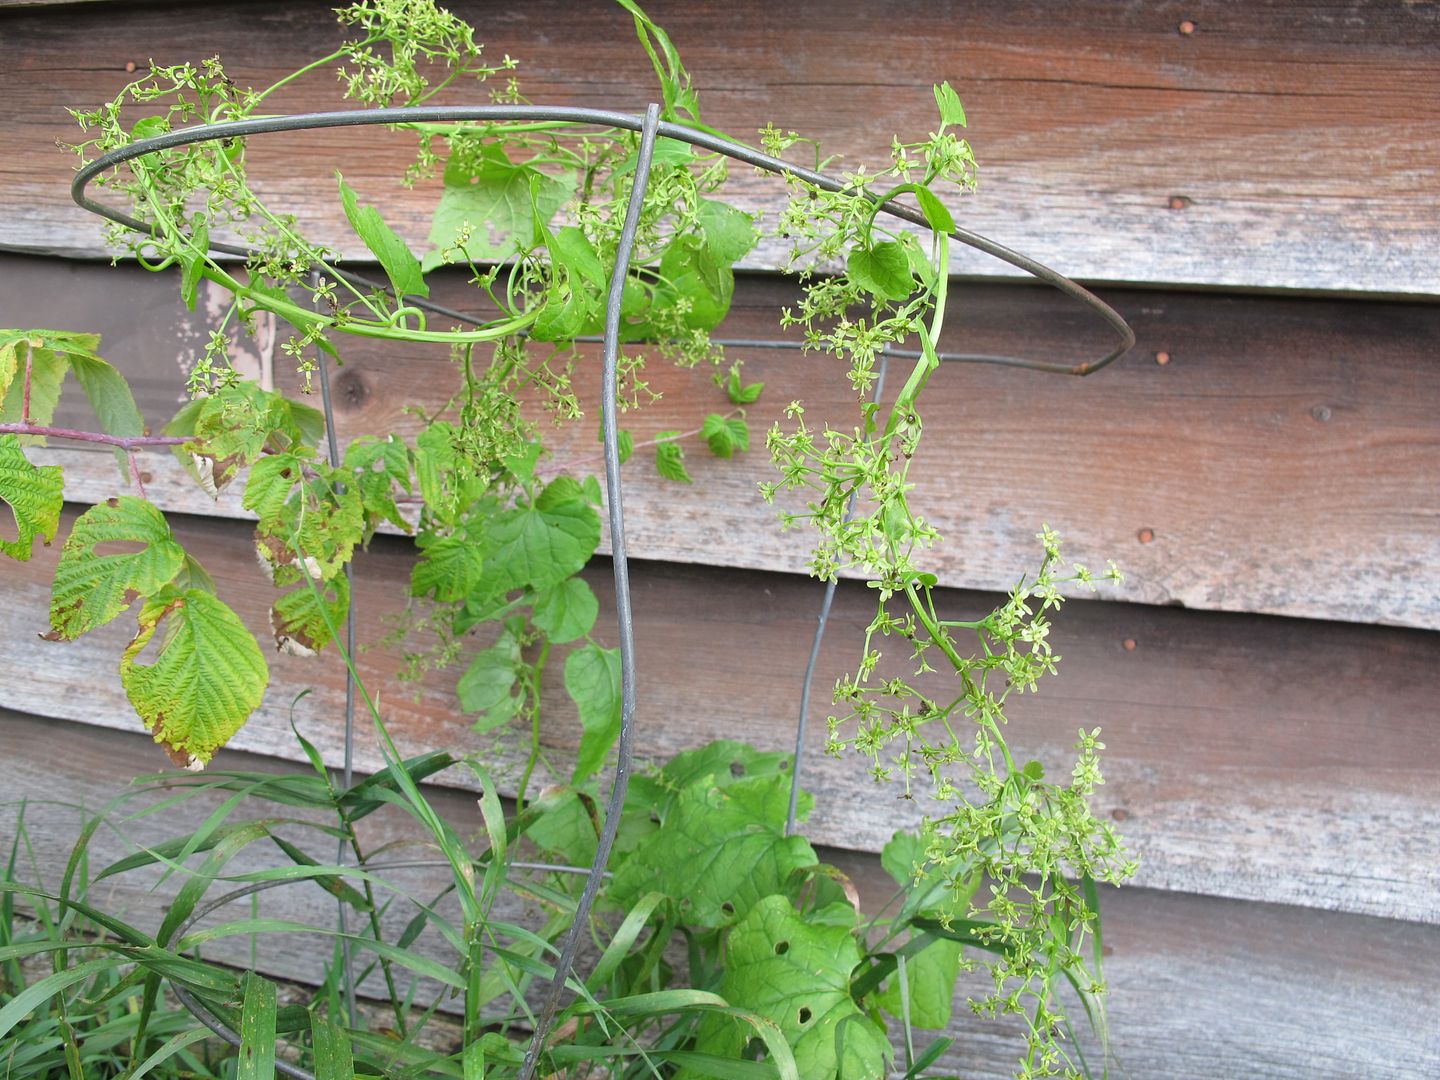
Hablitzia plant on the north side of a shed.

Have you heard? My Hablitzias have set seed and they look good! You haven't heard? That surprises me considering how loud I shouted when I discovered it but maybe you were listening to music or something or mistook me for an angry raven. Anyhow, on the off chance, you haven't heard:

"My Hablitzia tamnoides gave me seed!!"

 photo file-1.jpg
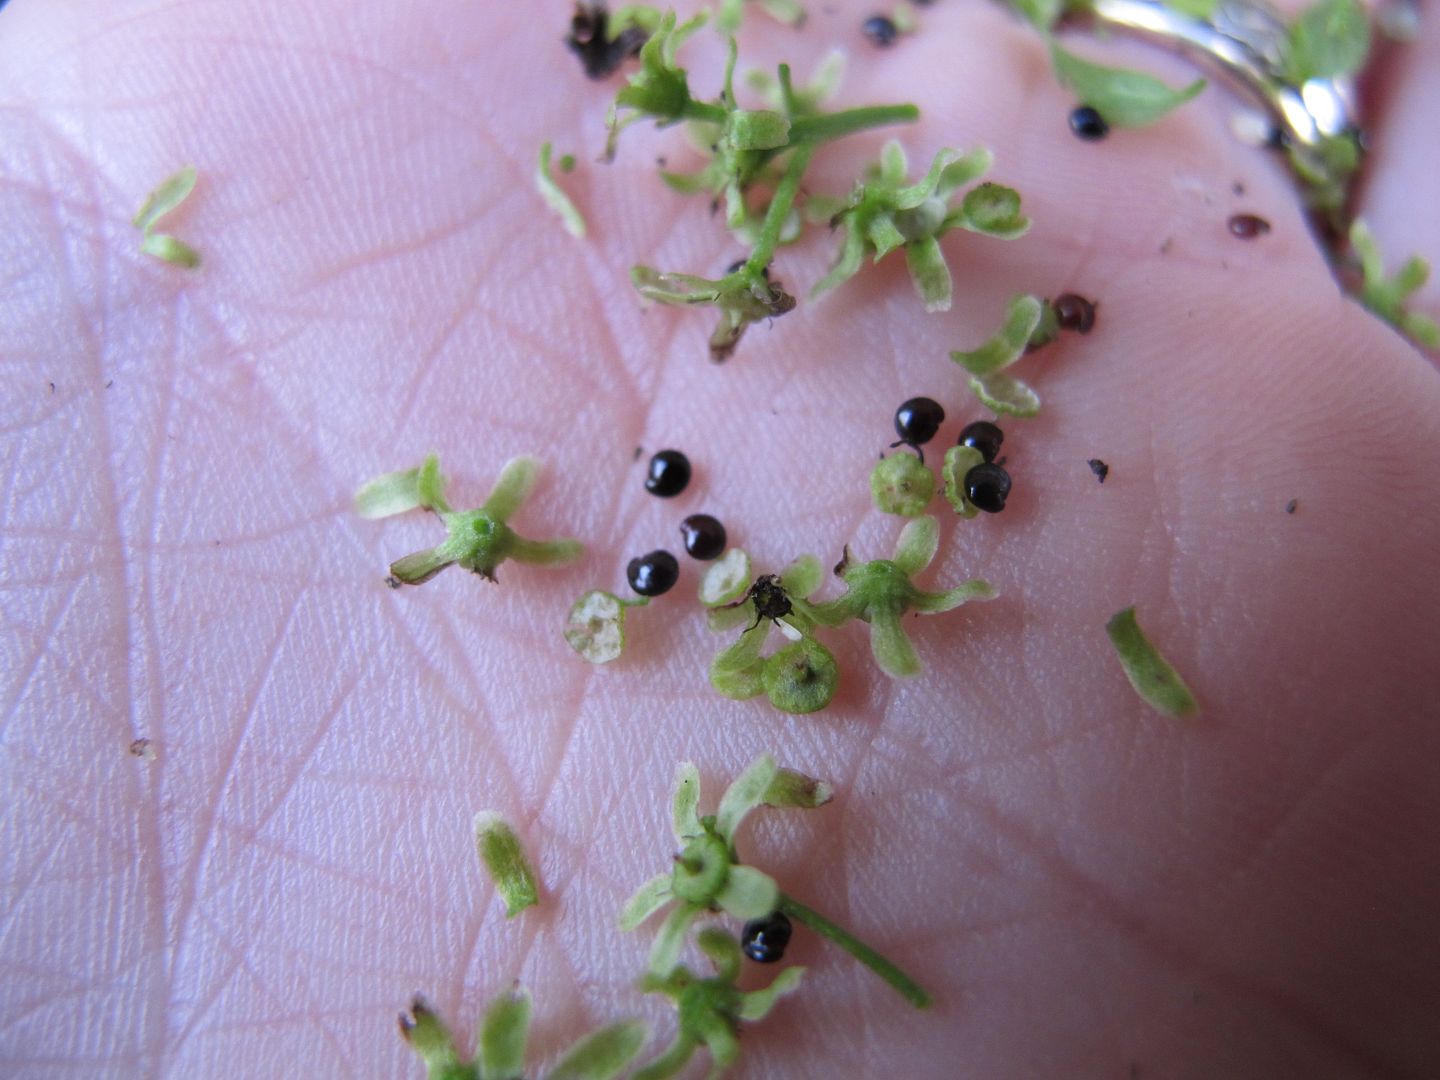
Closeup of seedpods and seed.

You don't know what I'm talking about? Spinach from the Caucasus? Perennial, shade tolerant green? Our friend Habby. Stephen Barstow is always going on about it.

Stephen? Extreme salad man? Okay so now you're intrigued.

Let's go back to the Habby seeds.

Aren't they lovely?

 photo file.jpg
Before I winnow, I'm going to let it dry down a bit more but looks promising.

Next year, all going well, Habby plants will be exiting my greenhouse (still under construction and by under construction I mean shovel yet to hit the dirt but I have days marked off on my calendar so soon) in the spring for sale. Woohoo!

***

Friends of Hablitzia


Thursday, December 6, 2012

Finally Threshing Leek Seeds

Photobucket
Flowerhead standing at about 4 feet and attracting the bees in Summer 2012

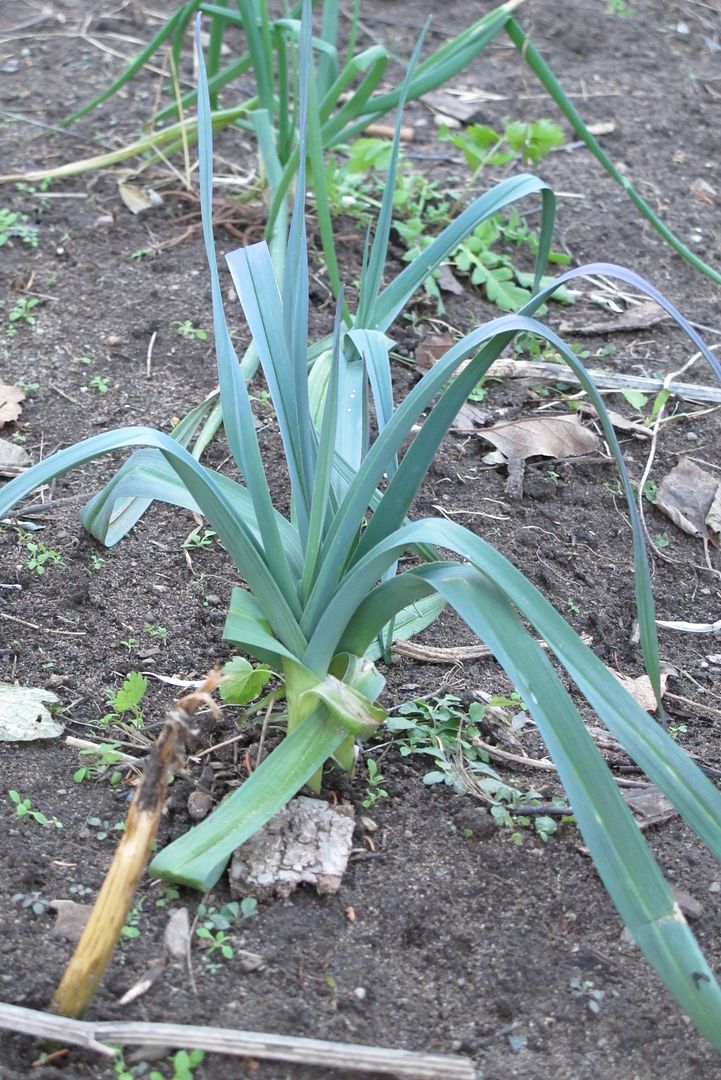
In Summer 2011, I grew a nice crop of leeks mostly blue leafed, winter hardy sorts such as the Long Island Seed Project's blue leek seed. In fall 2011, I left some of the nicer blue ones to overwinter and they produced flowers this year. A portion of them were partly *hairy.* That is instead of having flowers, they produced green baby leeks.

Photobucket
Fuzzy picture of leek trying it both ways: sexual and asexual reproduction.

Apparently you can induce leek to grow this grass by trimming flower heads so I'm wondering if these flower heads were partially damaged. This technique is used to make leek lines for exhibition.

Photobucket
Sitting around on the bookshelf until I finally had time to thresh

Turns out that the leek grass made bulbils (rather like garlic bulbils). After harvesting their flower heads, turns out that they had also produced offsets - little leek bulbs produced beside the main one rather like a potato onion or garlic once again.

Photobucket
I wasn't expecting leek bulbils even though I'd seen the hairy green baby leeks growing up from the flowerhead earlier in the year.

I put aside the bulbils to see if they will still grow - some had bitty roots on them - and separated the seed capsules from the stems.

Photobucket
Seed capsules waiting in a bowl.

There were also many leek moth cocoons that did not appear to had produced fully fledged adults (no I'm not sad).

Photobucket
I had picked off a bunch of these during the year from stems and leaves but didn't see them on the flower heads. These were clearly not happy little munching moth larvae. 

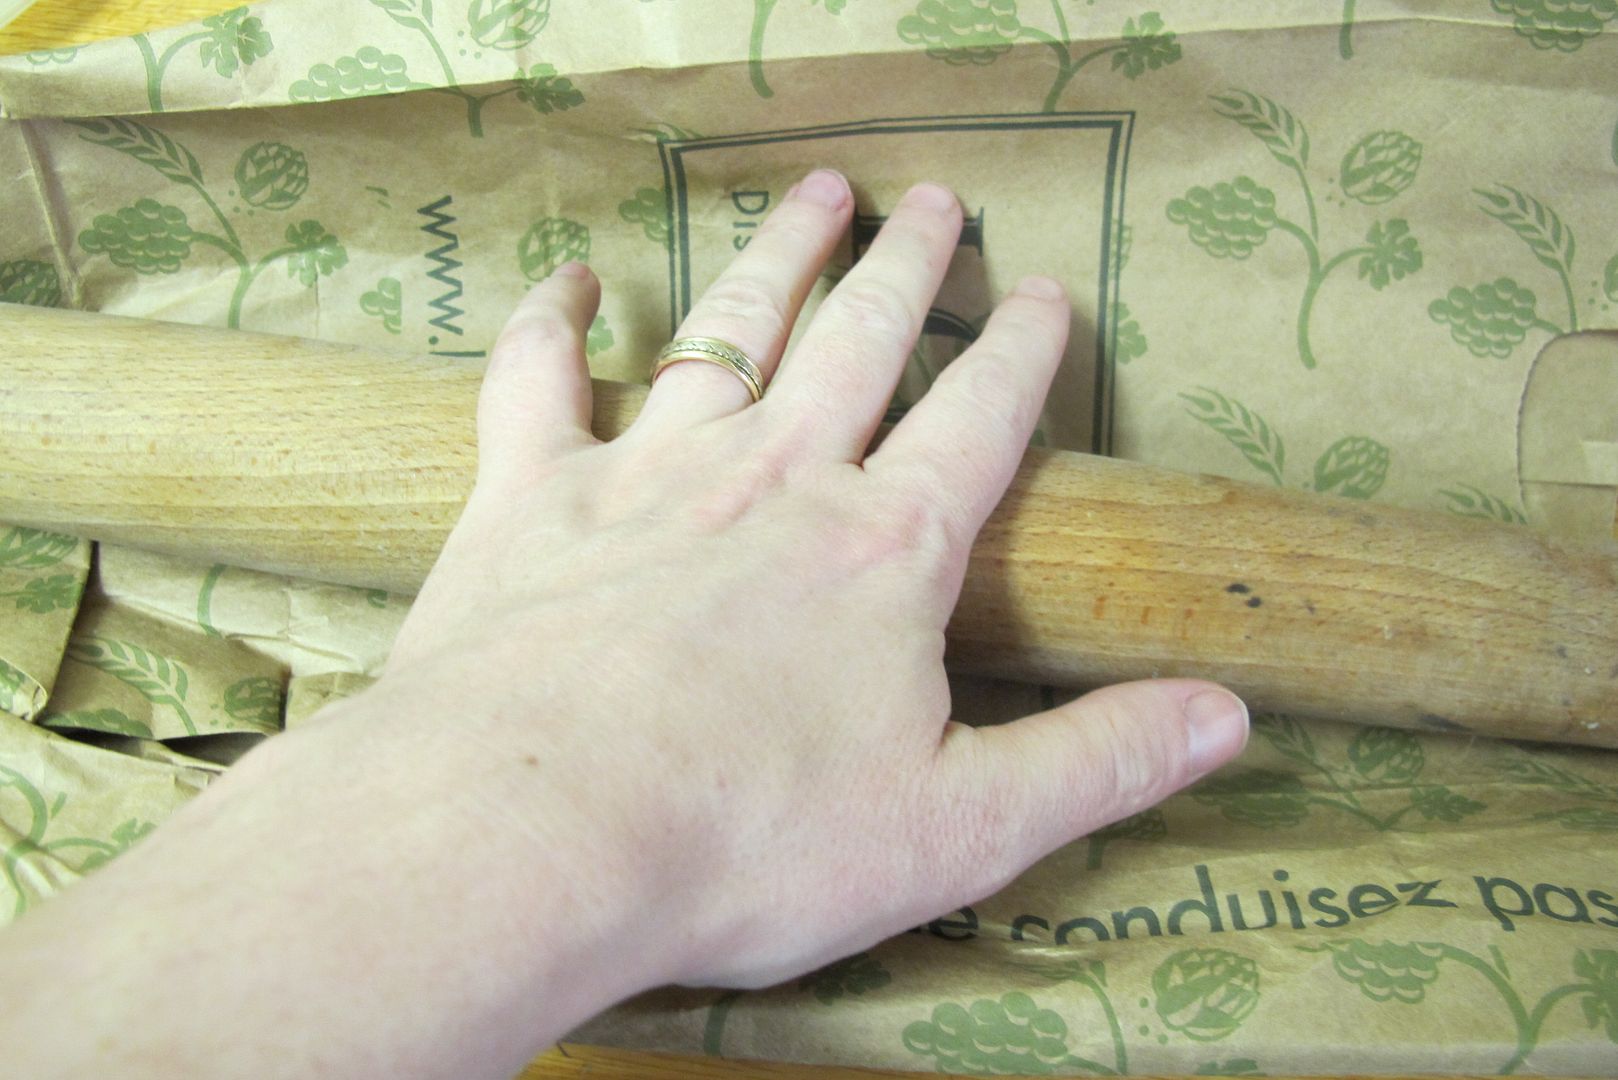
If you have only a few, you could rub them between your fingers (or with gloves depending on how hard they are) and remove the seeds that way. Given that I was not feeling very zen, I stuck mine in a LCBO bag - nice sturdy paper - and applied my rolling pin.

Photobucket
I first used a lunch bag but the LCBO bag was much better. You want to spread them rather thin and proceed lightly if you have a heavy hand.

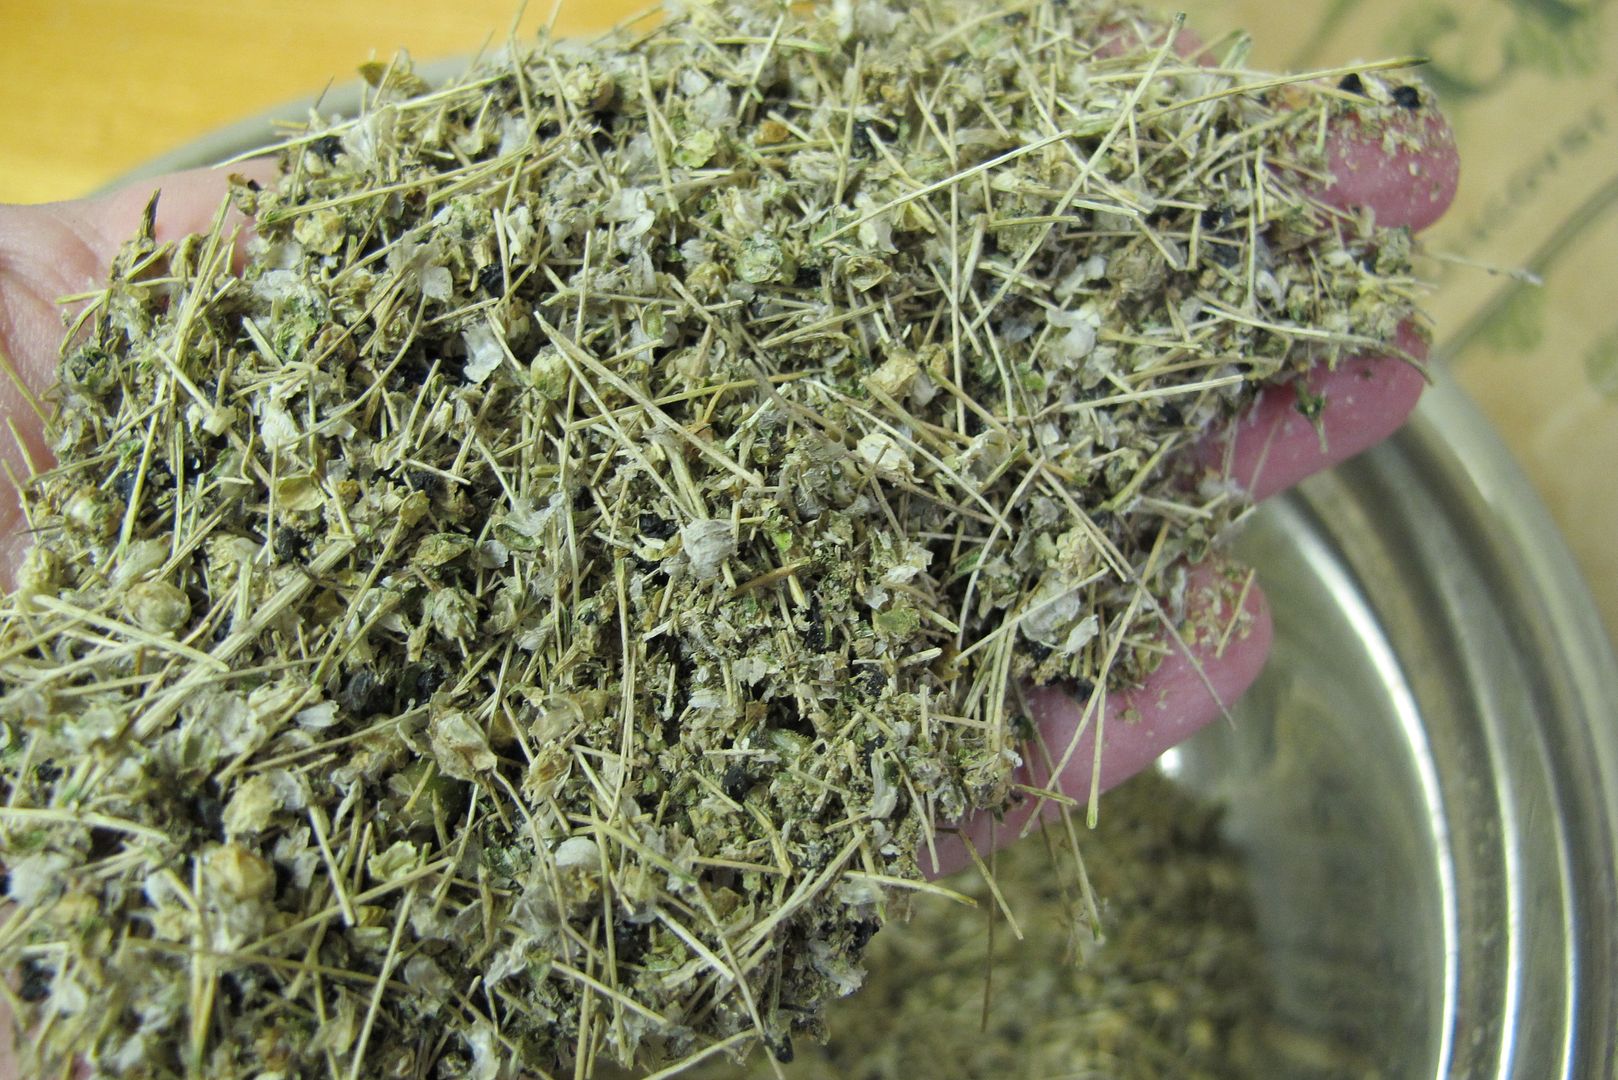
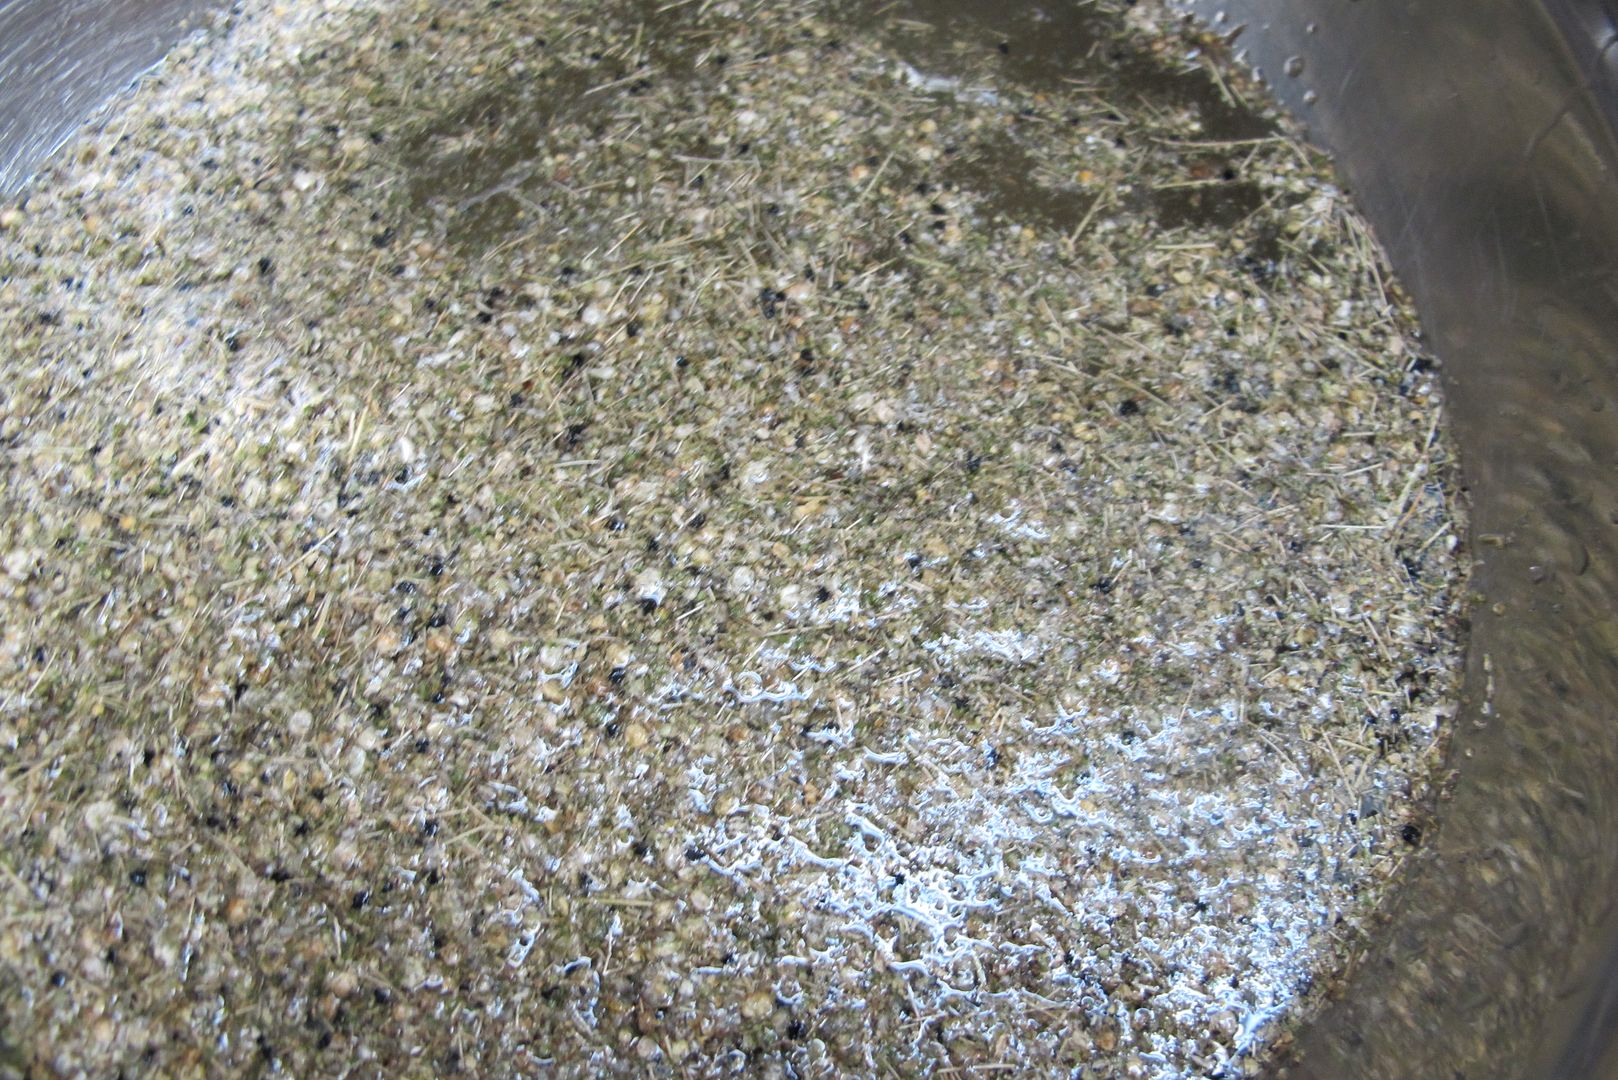
Afterward, I took the chaffy mess and put it in water. The chaff was pretty light, so you could probably use other methods such as blowing, wind or fan but I was inside so I used water separation.

Photobucket
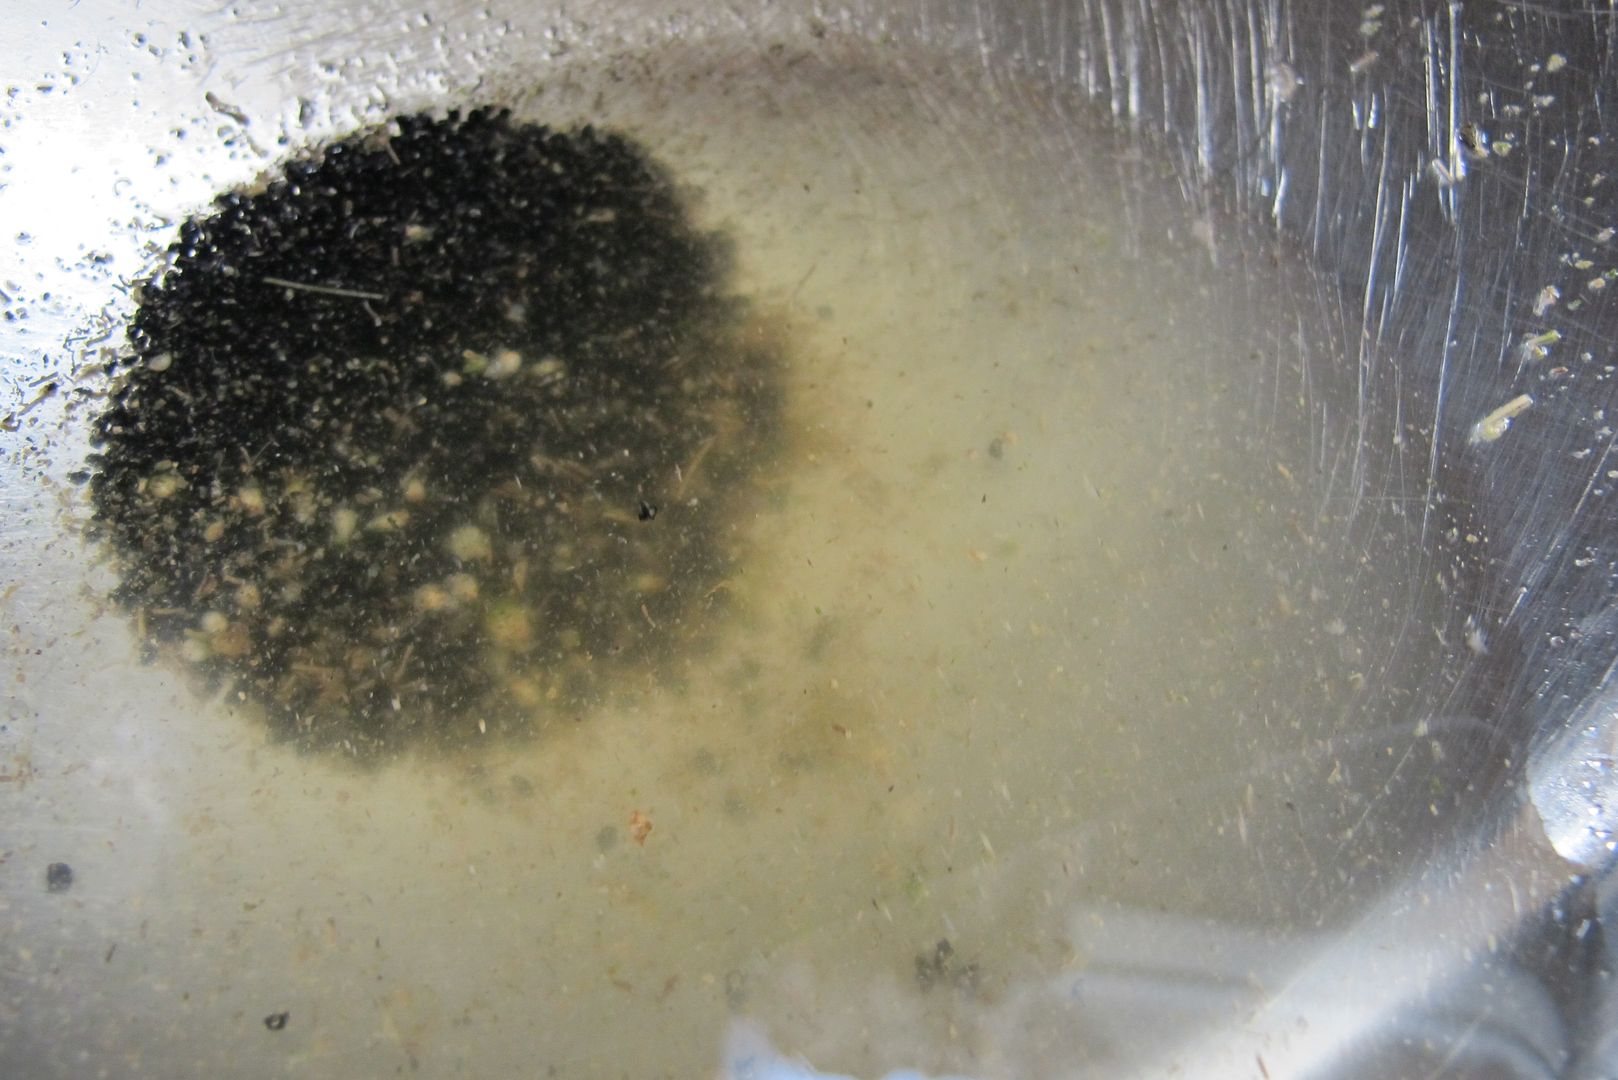
I don't bother to do this if seed sinks to the bottom of the bowl but in this case, it couldn't so I used the fact that the chaff was more buoyant to separate the seeds.

Pouring it all in a bowl then filling with water, give it a swirl or two, then let settle for a short time. The viable, heavy seed will mostly sink. Remove chaff from the top and set aside.

Photobucket
Mess of chaff, seed and water, prepare to be sorted.

Carefully pour off water. Use a sieve if you need to for the last part.

Photobucket
Plenty of heavier seed on the bottom and a few bulbils.

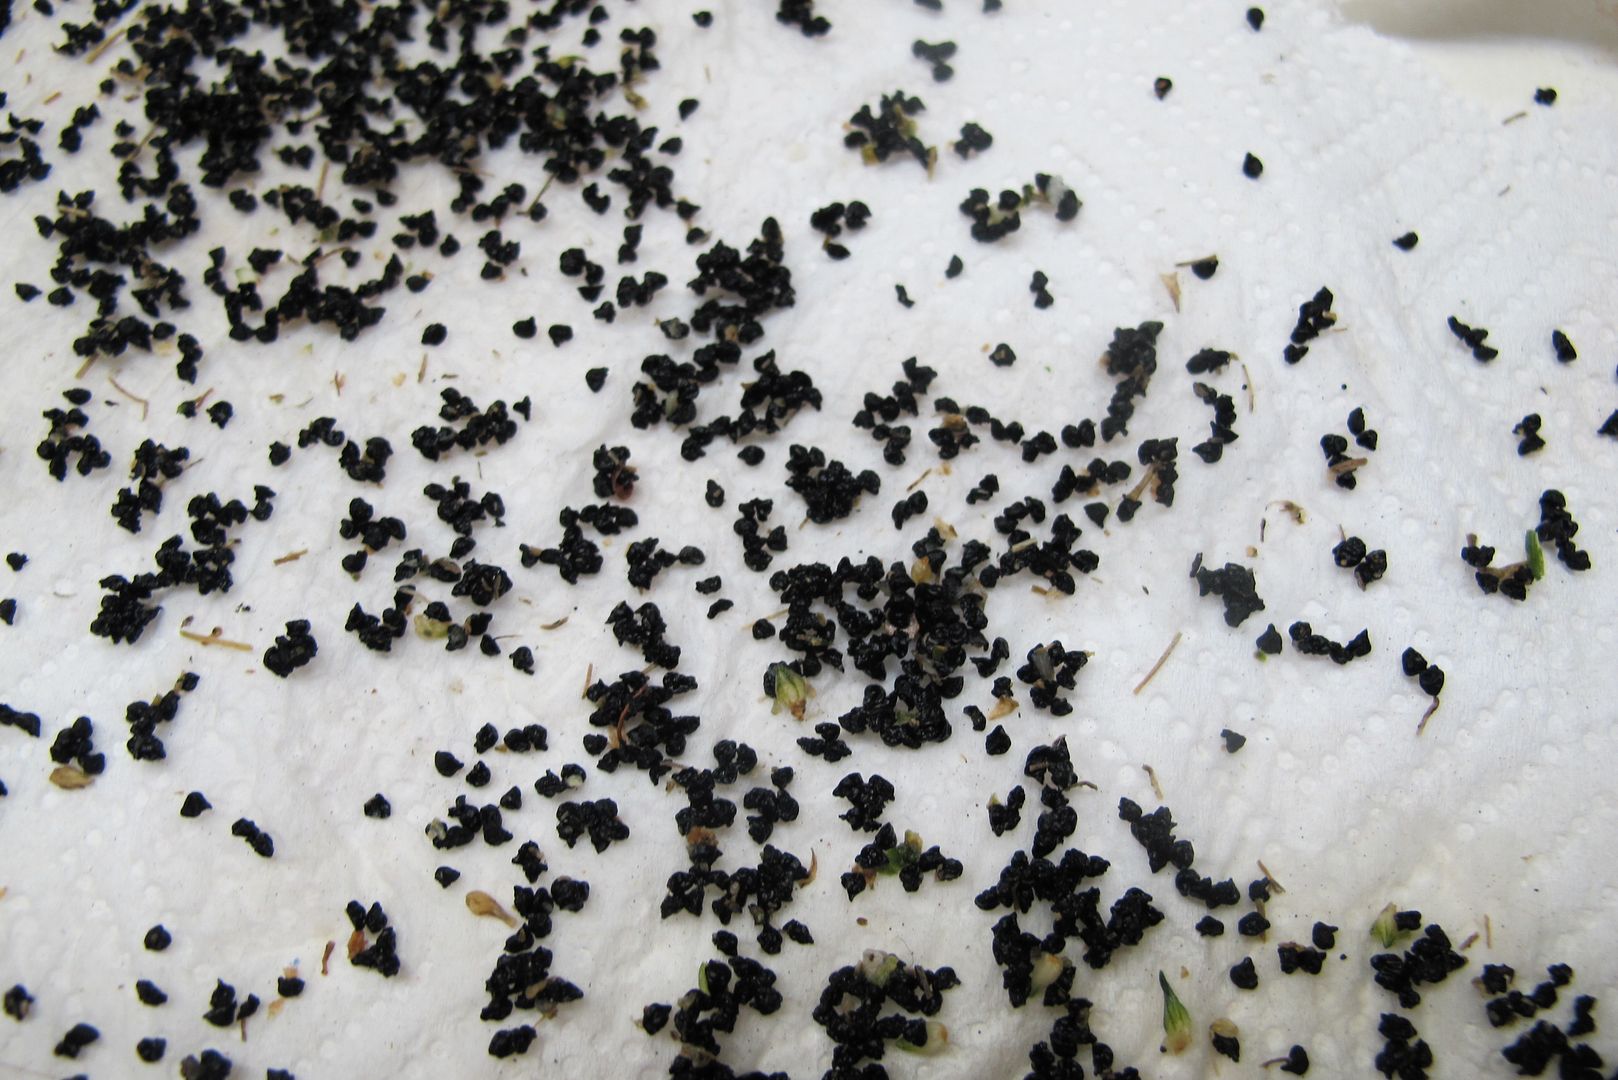
Then spread out somewhere to dry such as coffee filters, paper towels or paper plates.

Photobucket
Leek seed drying on paper towel. It's better on heavy paper type stuff so you won't risk sticking.

After they dry really, really, really well, they'll be labelled and started again next year.

Photobucket
These are the 2012 offsets from the 2011 leeks.

Long Island Seed Project

Friday, July 13, 2012

Dry peas for seed storing

Photobucket
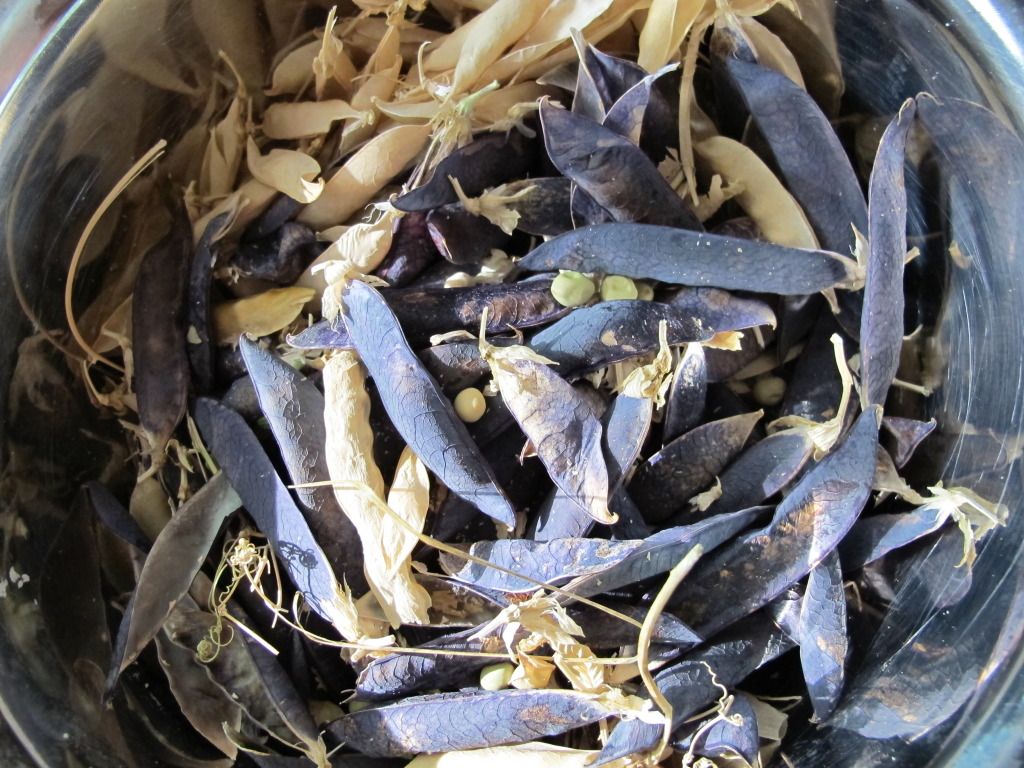
Bowl full of dry peas for seed saving

In my usual highly organized way, I was walking by a pea patch and noticed that it was ready to be harvested for dry peas. In fact, some of the pods had shattered so in order not to lose any more, I hastily started stuffing them into my shirt. This got me thinking about other pea patches so I went to those too and added to them to my shirt basket. After all, I'll be able to tell them apart right. Right? Actually, the varieties I grabbed are pretty easy to identify but I don't recommend this as good seed saving technique.

Photobucket
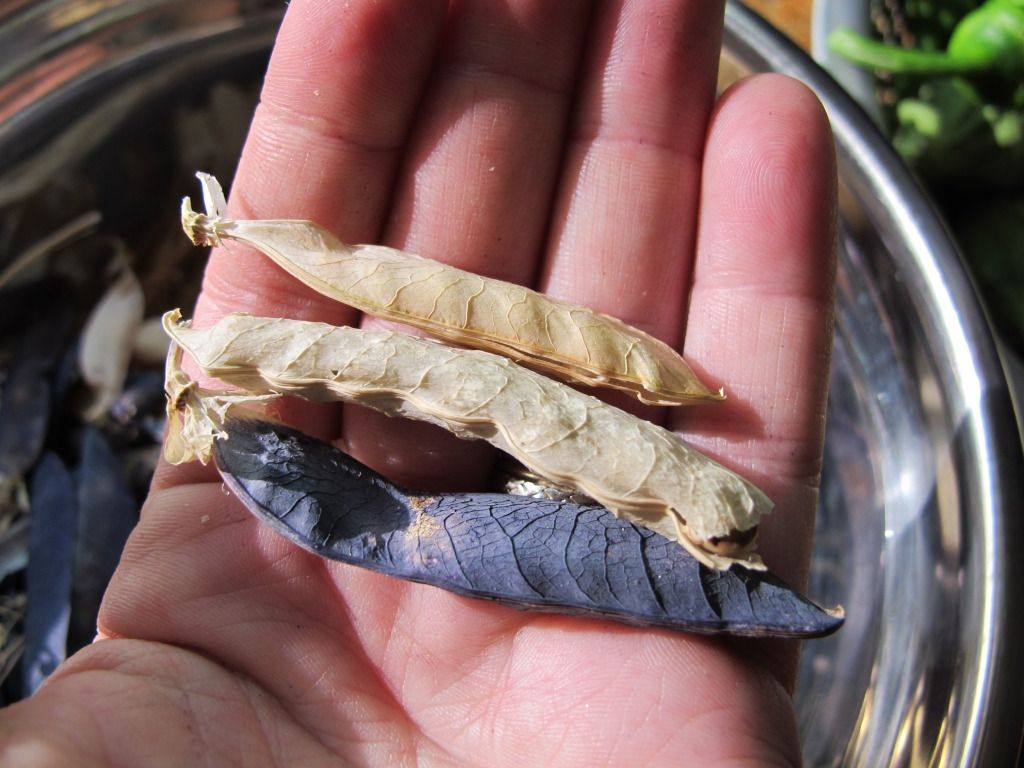
Three pods: top to bottom: golden podded (originally from Cottage Gardener), arbogast (originally from Extreme Gardener) and purple podded (originally from Bifucated Carrot

Good seed saving technique begins when you notice a plant, or better yet several plants, growing exceptionally well in the way you want it to. Either it has disease resistance, high productivity in difficult weather, pest resistance, an interesting pod, leaf characteristic or growth pattern. You would mark that plant with a piece of coloured string, for example, and say, "I will not pick these. These will be my mother plants."

Photobucket
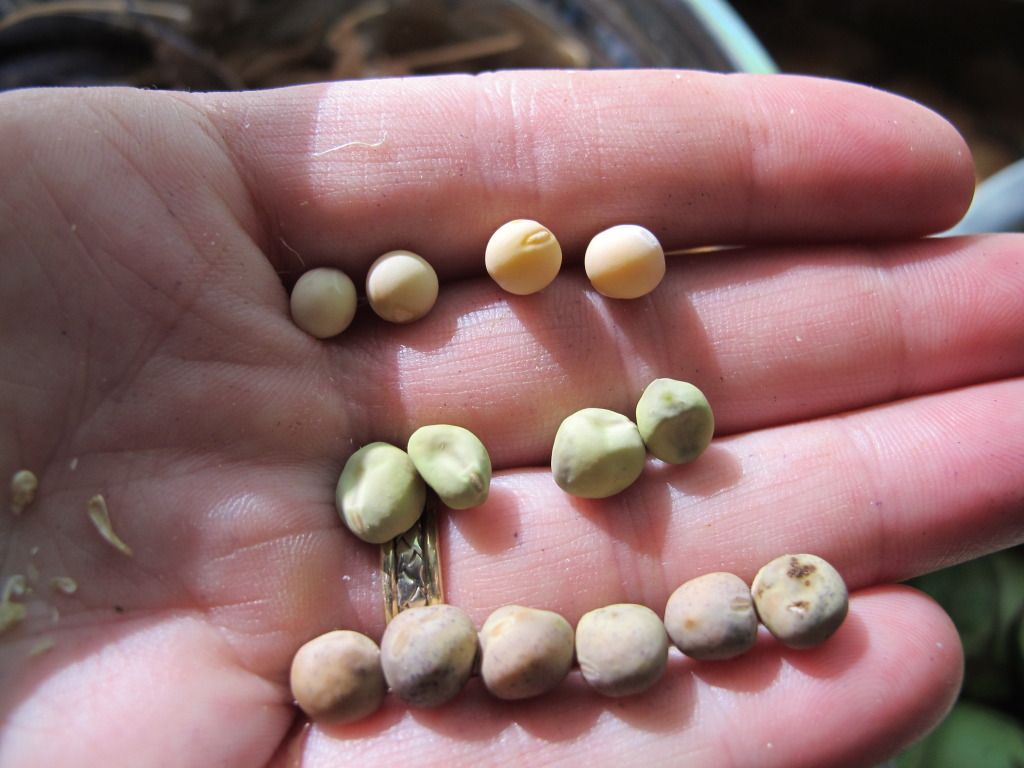
The peas within: Golden Podded, Purple Podded Soup and Arbogast (one has some feeding damage at the end).

Then you will watch nervously hoping that nothing happens to your plant(s). When the peas are fully ripe and dry - easy to accomplish in this weather - you will gather them. Most years, because we have that thing called rain, I have to hedge my bets and pick when fully ripe and mostly dry but before the seeds germinate inside the pods or otherwise get ruined. You can pick them while still leathery but ripe to dry someplace before shelling. Just make sure they are hard as a pebble dry before storing in something air tight. I often store my peas in paper envelopes in order to help prevent rotting. Some people add desiccants to their seed storing containers. If I am going to store for more than a year, I usually transfer them to a glass jar at some point. Of course, the rule is cool and dry for seed storing. Did I mention dry?

Rouge out any seeds or pods that look diseased or eaten. Carefully check pea seeds for little holes that might indicate an insect interloper.

Photobucket
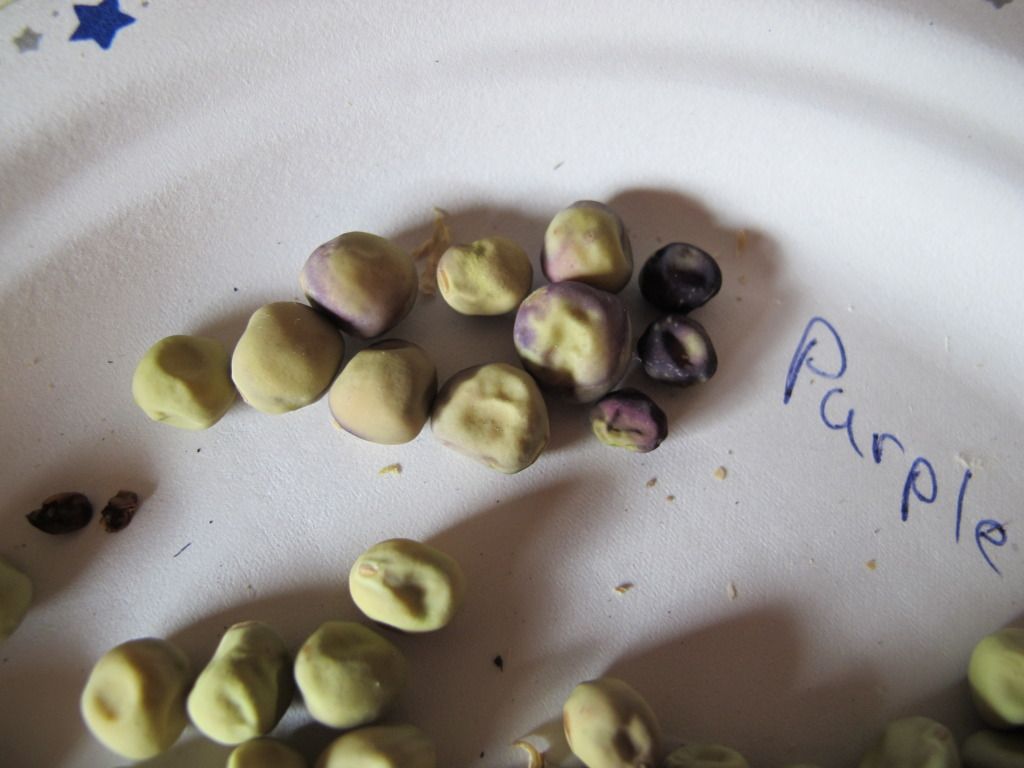
Interesting variation in my purple podded soup peas: the peas at the top have purple coloration as well.

The non-model gardener way (my way usually) is to note a particularly nice plant or patch of plants such as the yummy Blonde* pea with its luscious pods or that Petite Pois (I think) that was growing in a horrible part of the garden so well then say to myself "I must remember to leave some of those to grow on." Hopefully the children don't entirely raid them before I can communicate my intent.... like with the Petite Pois though I did manage to salvage sufficient planting material. Then I neglect them for awhile until I notice that I really should collect them.

Labelling is super important of course. I usually write not only the name of the plant but also pertinent growing information such as "was prolific in dry weather" or "very early" followed by the year I collected them. This is one thing I am becoming MUCH better at as I am tired of renaming my seeds 'mystery XYZ.'

Now, if you want to get fancy, you can do some pea breeding and experience a little Mendelian joy. A science project for the kids assuming they have long concentration spans. Here is a blog by pea breeder and organized person Rebsie: Daughter of the Soil. She's also into TPS (True Potato Seed - go ahead, throw that acronym around at parties) and more.

Another - Andrew's Blog - plant manipulator.

Thursday, March 29, 2012

Interviews with Great Gardeners:
Farming seed to seed with Joseph

Over the years, I've grown to respect Joseph's bold and interesting approach to developing his own seed strains - adaptivar landraces - which enhances genetic diversity along with yield and taste to provide his family and CSA with great fruit and vegetables. There is a lesson in good seed stewardship for all of us.

Where do you farm and when did you start?

[image]

I started farming as a toddler in Paradise Utah, a small village in a mountain valley. Cold air from the surrounding mountains settles into the valley, so the growing season is short and cold. Due to the low humidity during the summer, we get bright sunlight during the day and intense radiant cooling at night. I am still farming in Paradise.

[image]

I grew up on the farm that was settled by my 3rd great grandmother. We raised a huge vegetable garden to feed the family. The rest of the farm was in pasture, wheat, alfalfa, woodlot, or fallow where the mountains are too steep. My primary responsibility was to milk the cow once a day, every day, year after year after year. I love the intimacy of milking, and the gentle rhythm of it, but it ties you down something fierce.

We raised or hunted just about everything that we ate: pigs, sheep, cows, vegetables, chickens, deer, eggs, milk, fish, etc. We bought bread and noodles. We canned, froze, and dried lots of food. We had a root cellar, and a pantry.

[image]

We kept a couple of ponies that we rode all over everywhere when I was young. They were named Sunshine and Stormy, after the weather when they were born, which just happened to match their temperaments after they grew up. I usually rode bareback.


Tell us about adpativar landraces and your seed to seed practices.

I had always bought my seeds from The Company. Some years ago I was looking for a more exciting sweet corn, something with a bit of color to it. I read about the pedigree of a variety called "Astronomy Domine" which was being grown by Homegrown Goodness in Pekin Indiana. It contained the offspring of many dozens of varieties all jumbled up and inter-pollinating each other.

[image]
Astronomy Domine

That got me wondering about whether I was harming my garden by planting the highly inbred varieties that the seed companies were offering. So I started doing some plant breeding experiments with cantaloupe. The first year I had only harvested a few fruits before the garden was killed by frost, but I saved the seeds and replanted, and added about 60 varieties as a trial planting. Most of the varieties did extremely poorly, failing to produce seeds or even to germinate in my cold soil. The second year I harvested about two bushel of cantaloupes. There were a few plants from my saved seed that grew vigorously and were highly productive: One plant produced more fruit than an entire row of store bought seeds. So I saved the seeds from the best, and from anything that produced fruit and replanted. The third year I harvested around 15 bushels of ripe fruit. Wow!!! I could finally grow cantaloupe in my cold short season garden.

[image]
Mal-adapted cantaloupe

[image]
Well-adapted cantaloupe

[image]
The fruit of his labour: cantaloupe!

After seeing how successful the cantaloupe experiments were, I decided that I would grow all of my own seeds for my garden, and that I would grow landrace varieties. An adaptivar landrace is a food crop lots of genetic diversity which tends to produce stable yields under marginal growing conditions. Landrace crops are adaptively selected for reliability in tough conditions. In the case of mostly self-pollinating plants like peppers, tomatoes, beans, wheat, and peas a land-race may be thought of as many distinct varieties growing side by side. In the case of out-crossing plants like cantaloupe, squash, or corn, a land-race can be thought of as an open pollinated population with tremendous genetic diversity.

I have had great success with other varieties. For example, I planted every variety of moschata/butternut squash that I could get my hands on and allowed them to freely cross-pollinate. 75% of the varieties didn't produce offspring in the 88 day frost-free growing season that year, and of those that did survive, some of them only produced one fruit per seed packet. But I saved the seeds from the survivors and had a tremendous harvest the following year.


How do your clients react to the diversity of your vegetables?

Judy told me that I am a "bad farmer" for letting colored pollen from the Indian corn get into Astronomy Domine... But for the most part people are pragmatic. My brightly colored and genetically diverse vegetables taste better than the bland grocery store offerings, and so I am readily forgiven if one melon in a basket has a funky smell. If diversity is the price that has to be paid in order to harvest ripe melons in our valley then it's an easy bargain to make. And if I get the chance to share my belief that brighter colors equals higher nutrition and better taste, then people are nearly always willing to entertain the notion. When word of Astronomy Domine sweet corn got around, a local newspaper sent a reporter out to do a story about it.


Any project on the go that you'd like to share with us?

I am currently working on turning every species I grow into reliable landrace varieties for my garden, but the species that I am most excited about is watermelon. I was able to harvest 5 fruits from the 600 seeds that I planted last spring. That is great odds for a breeding program! I am collaborating with two other growers in similarly cold short-season gardens, and with one grower in a warmer climate. We are all growing each others seed and sharing seeds from the survivors with each other.

[image]
Mal-adapated watermelon


[image]
Well-adapted watermelon

[image]
The fruit of his labours: watermelon!


What advice would you give to young farmer's beginning a CSA or other local food farm?

Farm because you love to farm, not because you think it would be a lucrative career. I estimate that I make around $2 per hour. That figure is slightly misleading, because I also eat from the garden, and I have much lower expenses because I grow my own seeds, and because I have developed varieties that thrive without pesticides, herbicides, fertilizers, weed-mats, etc. Farm-gate sales are much easier on the main highway than from a back-field somewhere. You can develop your own clientèle and your own way of doing things, regardless of the traditions of the other farmers in your area.

Read more at Homegrown Goodness

Tuesday, December 13, 2011

Tomato Seed Trade

Anyone up to giving some of my tomato seeds a new home? I've gone through my seeds and I am embarrased to say that the list is nine pages long (yes single space, normal font). At any rate, I thought I'd thin out the Solanum lycopersicum section. I'll be growing out some of these so quantities will vary. No trade or postage required but if you are in a sharing mood, I've listed what I'm looking for below.

Tomatoes available:

Lots of interest in re-homing those tomatoes so updated list follows:

Gold Nugget Cherry
Purple Smudge
Yellow Brandywine - all out
Italian Friend - ?
Tommy Toe
Teton or something like it
Brown Berry
Mortgage Lifter, pale leaf - very old seed
Novosadski jabujar
Lutescent - very old seed
Stick
Black Cherry
Red Cluster Pear - all out
Phoenix Pink Mix
Yellow Grape
Sub-arctic - all out
Smokey Mountain
Cheetham’s Potato Leaf - all out
Giallo a Grappoli
Aussie - all out
Pixie
Red Robin - all out
Rondoc - all out
Hartman’s Yellow Gooseberry
OSU
Chocolate Cherry
OSU x Green Zebra
Principe Borghese
Hundreds and Thousands - all out
Purple Calabash - all out
Velvet Red - all out
Bushy Charbarovsky - all out
Dwarf Champion
Window Dressing - Wagner
OSU x Make my day
Make my day
Sweet Cassidy
Tigerella - all out
Yellow Grape Tomato
Tiny Tim
Taxi
San Pedro
Bradley - all out


If you're offering, here's some of My Want List

Cucumbers: prolific and early
Beans: very early 'green' eating type
Dandelion: anything unusual in flower or leaf form
Red stemmed chicory
New Zealand Spinach
Red Malabar Spinach
Edible Hibiscus - sunset, cranberry, other
Skirret clone

***

Email me - right side bar with your address and list of tomato dreams.

Friday, August 12, 2011

The Mystery Bean and other Seed Stories

I normally plant three types of pole beans (and many other bush beans but we'll leave that exciting tale for another installation): Hunter - a green flat pod with white seeds, Cherokee Trail of Tears - prolific, small black bean with round pods and some sort of 'cranberry' that I originally got at a fruit/veg store. This year I harvested five kinds of beans. I have been saving these seeds for many years and never remember this happening before. I figure that it must be one of two things: 1) I forgot that I planted other varieties, or 2) some pollination shenanigans has been going on.

Photobucket
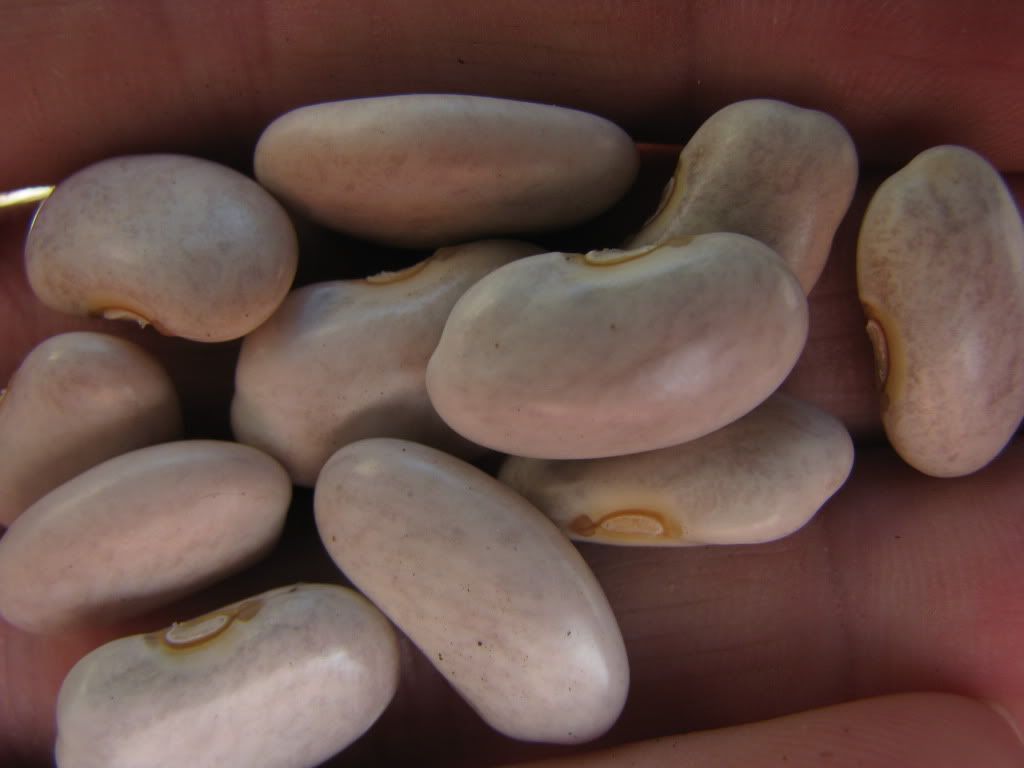
My mystery bean

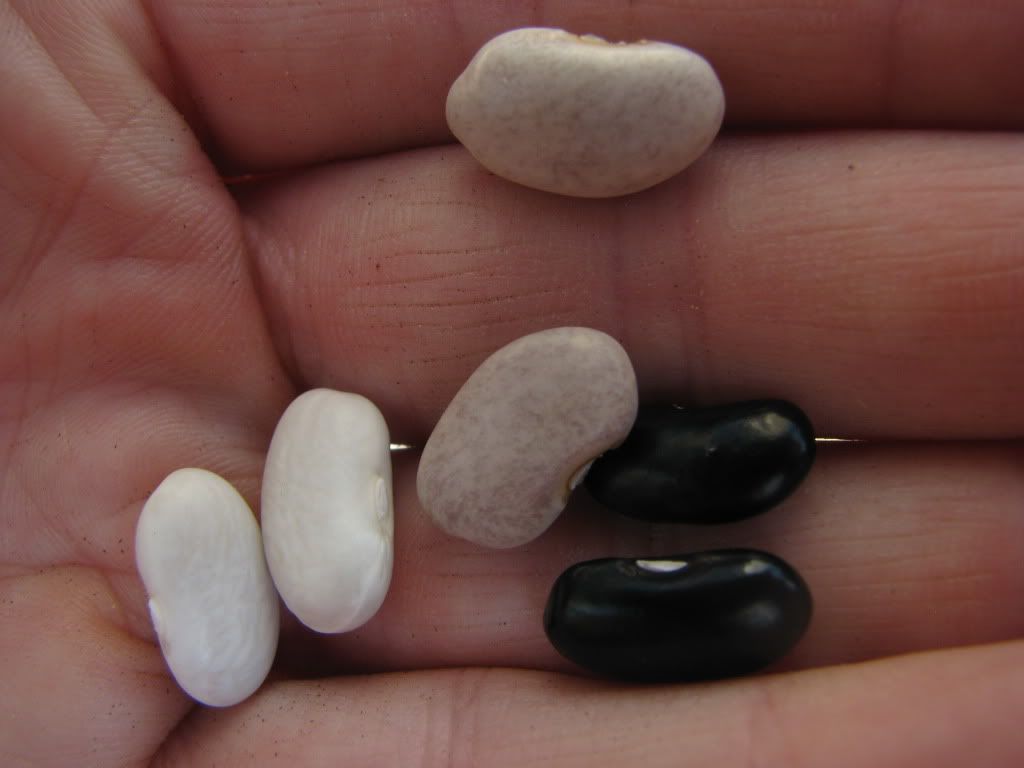
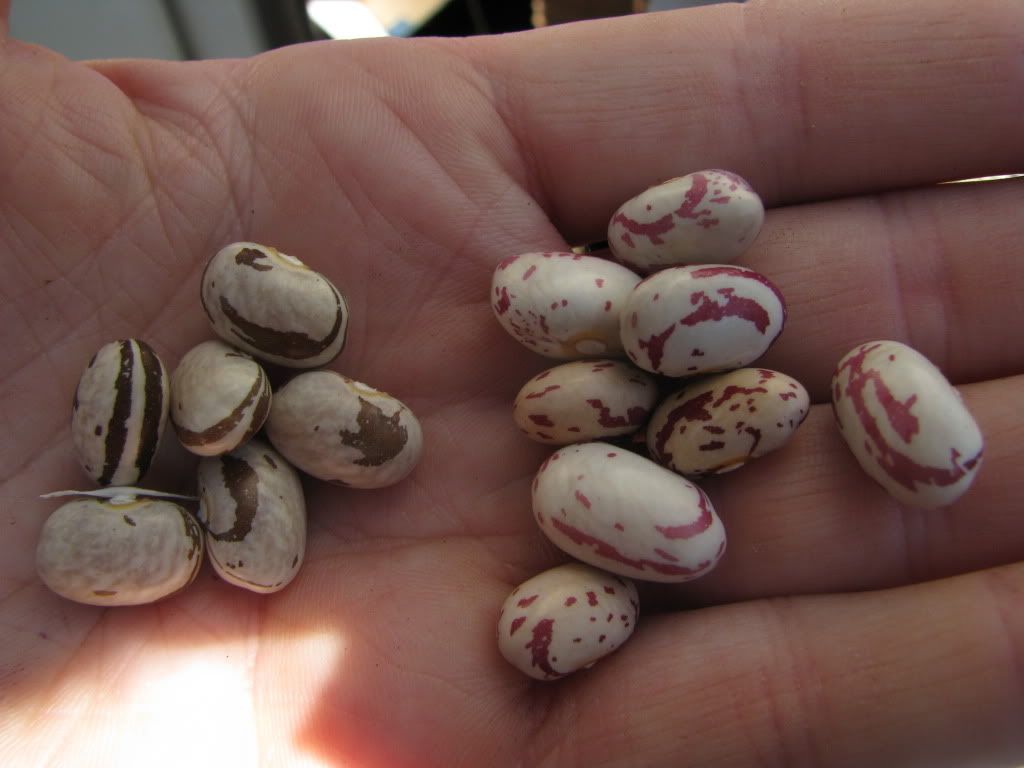
This bean turns out to be the most prolific of all my pole beans this year and I have no idea what it is. The pods are flat like the Hunter but purple like the Cherokee and the beans are a pale lavender/tan colour. If you recognize this bean as something you sent me, please jog my memory. In the meantime, here is some possible evidence of crossing. First the beans:

Photobucket
From left to right: Hunt, Mystery Bean and Cherokee Trail of Tears.

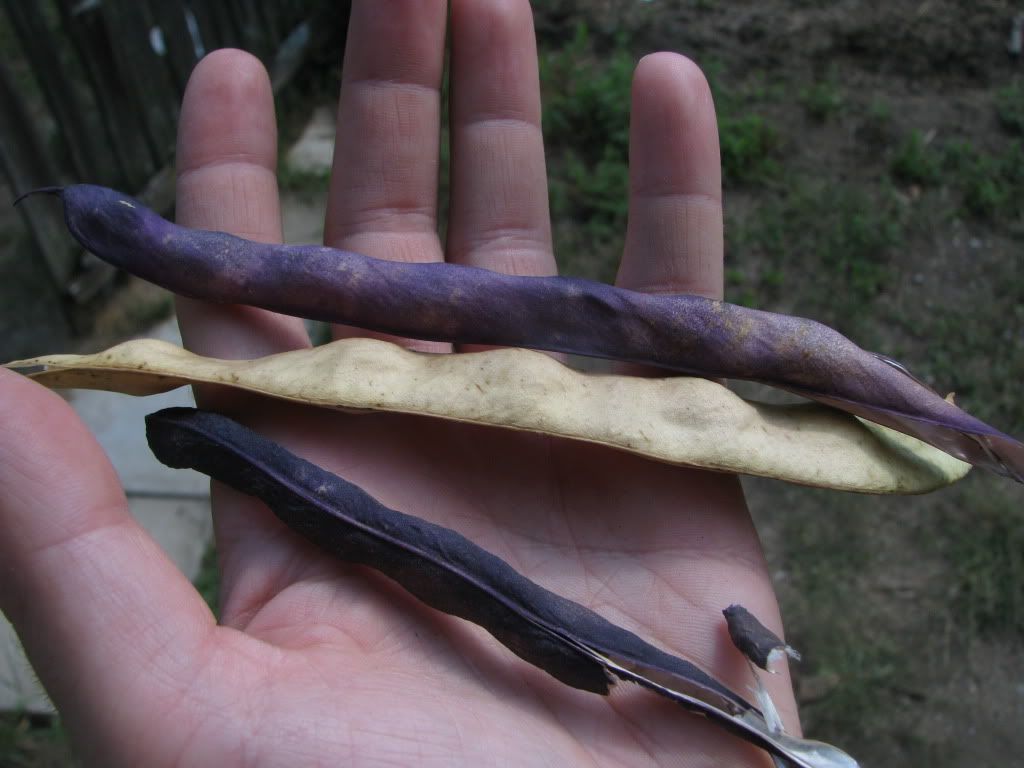
You can see that the pale 'lavender' mystery bean has the same markings as the Hunter bean. And now the dry pods:

Photobucket
From top to bottom: Mystery bean, Hunter and Cherokee Trail of Tears

I have to admit that I assumed all the purple pods were Cherokee though there were actually very few round pods. Most of them were flat like the Hunter.

Photobucket
From Left to Right: Hunter, 'Cranberry,' and Mystery Bean

And among the rest of the beans was one other surprise, some of the (not true) 'cranberry' were streaked brown?? I might have planted some variety like that but I've only found two pods so far that contained these nuggets of difference.

Photobucket
From left to right: brown marked bean and 'Cranberry'

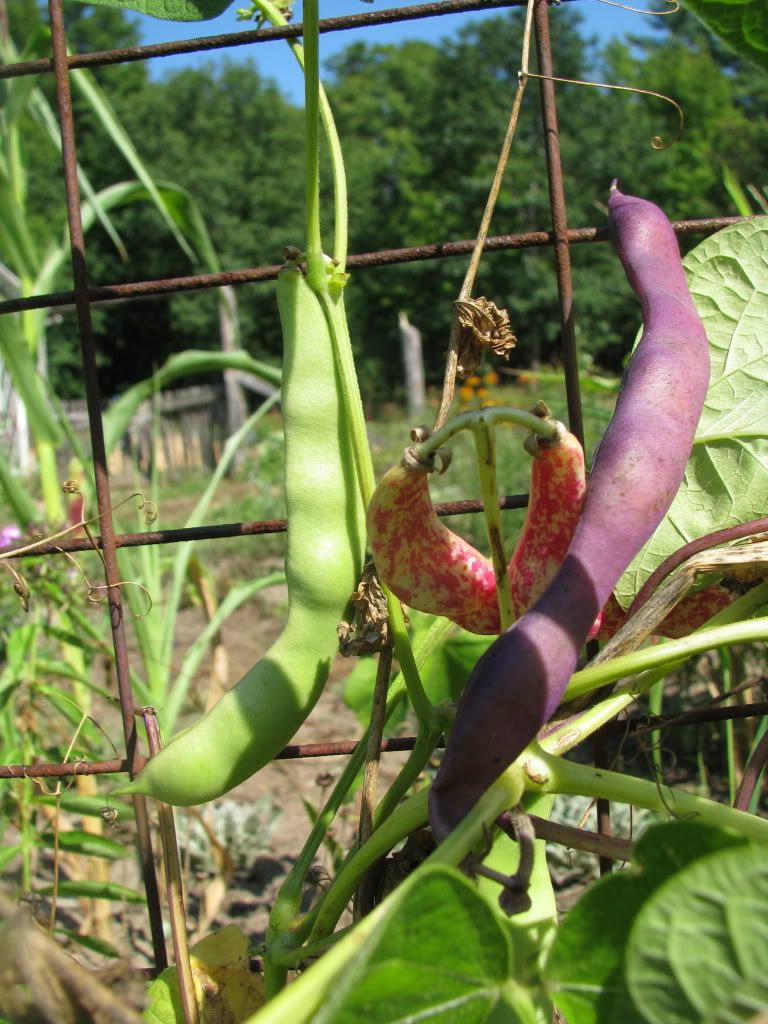
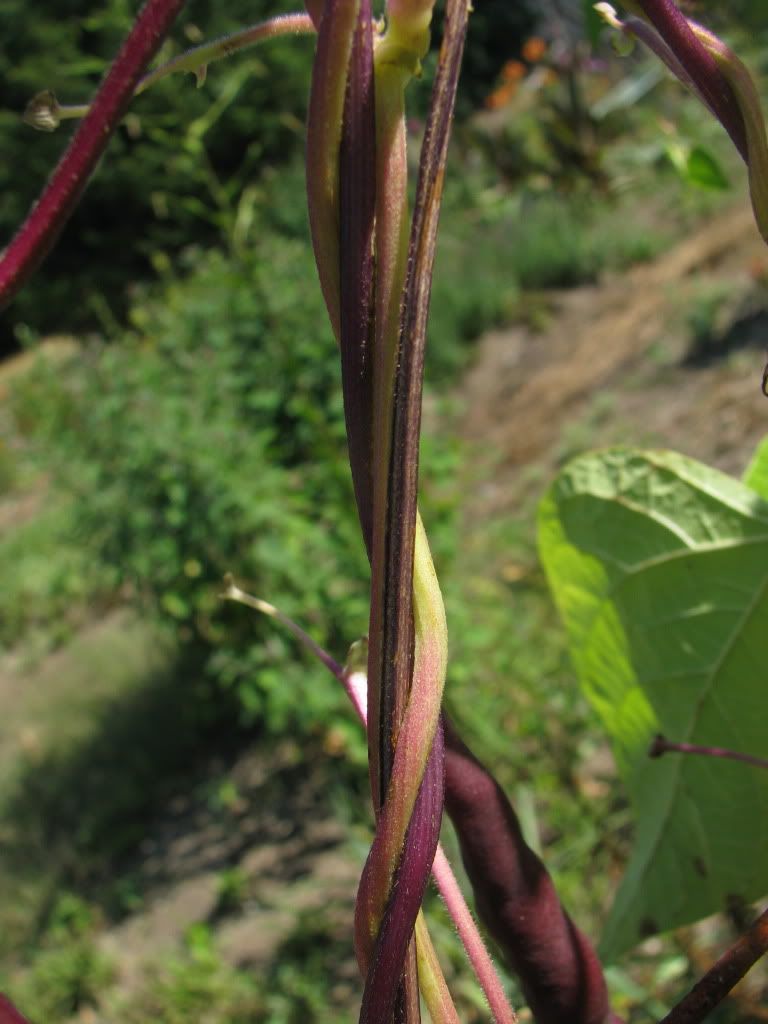
Viva la diversidad! Here is a picture of the twining vines of various hues.

Photobucket
A twisting rainbow

Besides puzzling over these beans, I was threshing radish seeds. Here is a my quick step by step.

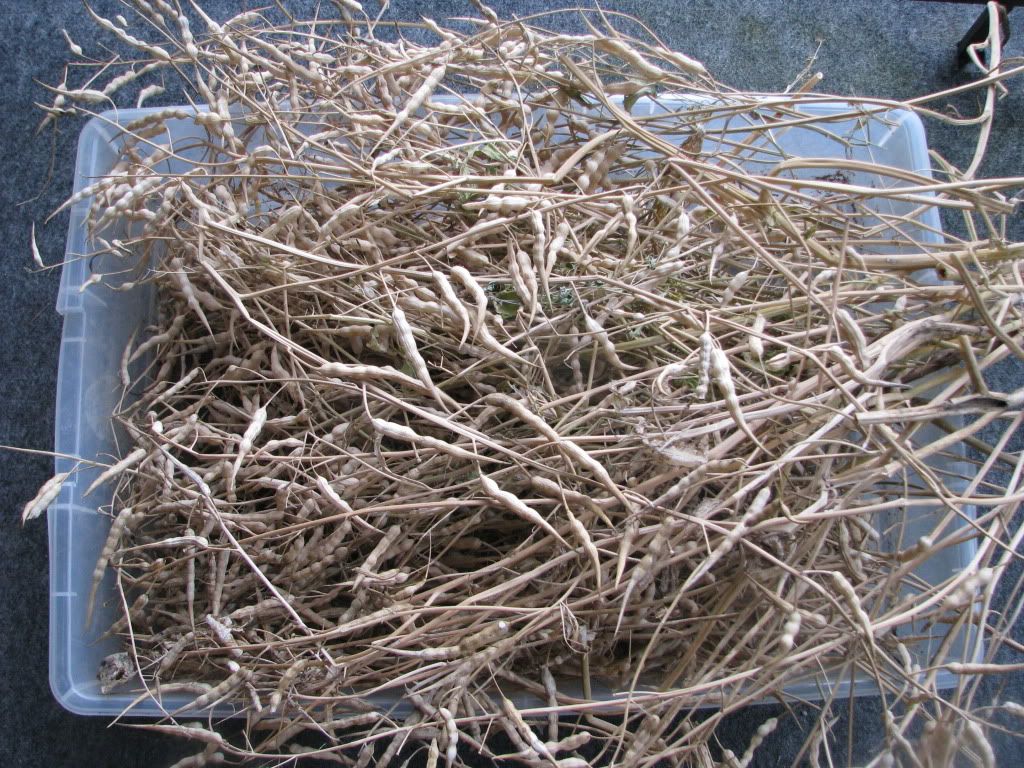
1. First gather dried pods

Photobucket
A pile of pods

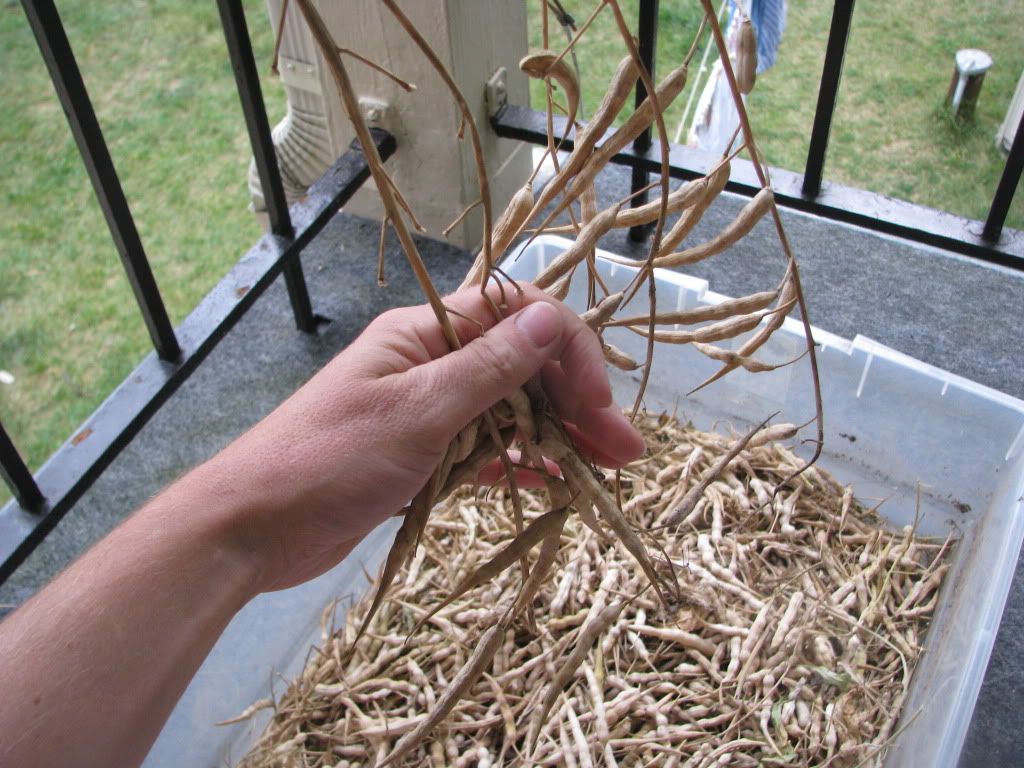
2. Strip the pods from the stems

Photobucket

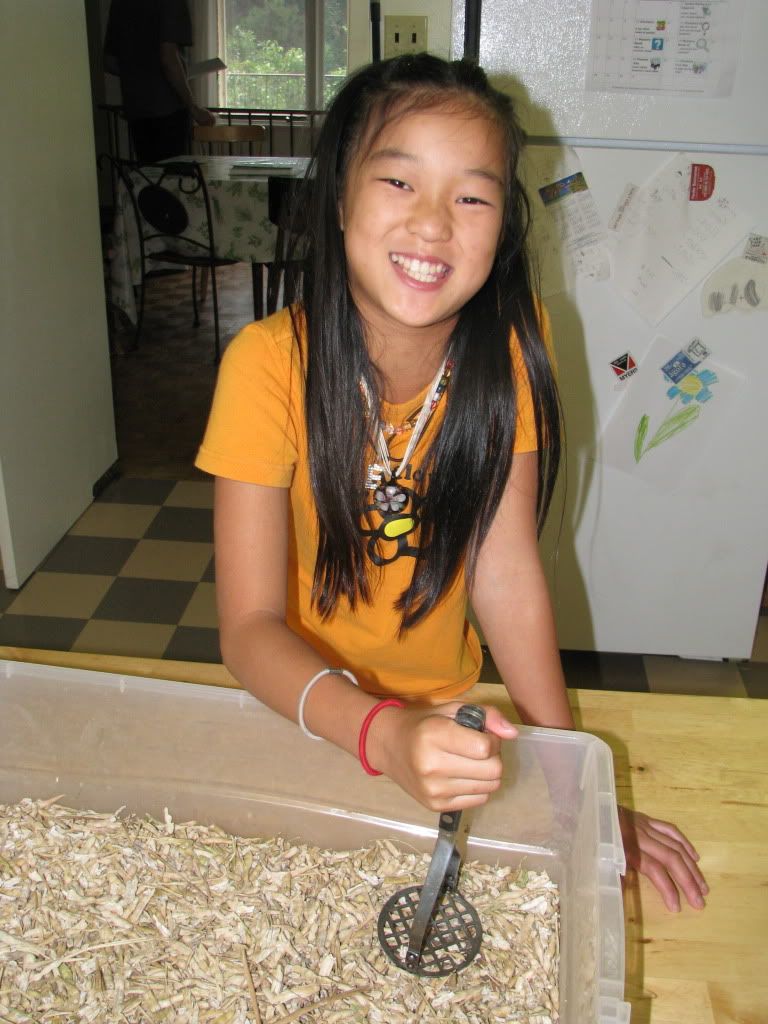
3. Step on them or rub them between gloved hands or use a masher like my niece. Or some other method to remove the pod from the seed.

Photobucket
You may recall her as a tyke in the Cabbage picture

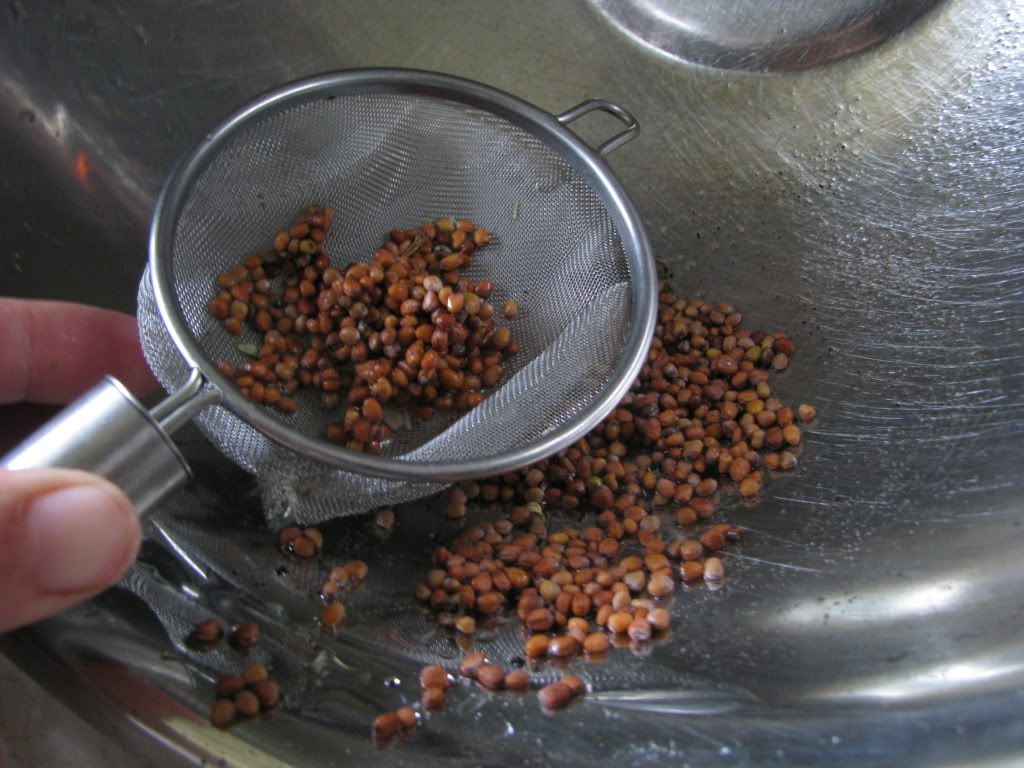
4. Pour chaff and seeds into a bowl or bucket of water and swirl around. Remove the floating bits of pods and pour off most of the water leaving just a bit of water and seeds on the bottom then pour the rest through a strainer.

Photobucket
Almost all done. These were rattail radish seeds actually and I had a lot fewer pods. With the daikon radish of most of these pictures, I needed a bucket.

5. Dry and label seeds well!

P.S. Nagging Aunt of the Garden - that's NAG to you - doesn't have time to open her twitter account but wants to tell you to go buy garlic at one of the festivals round these parts tomorrow! I'll be in Carp if you want to sign up to be a member of Canadian Organic Gardeners. :)