Thursday, December 27, 2012

Finally it begins!
a nursery post

For awhile now, I have been volunteering working* part time at what I love with an edible garden design here, an installation there, and pondering the lack of suppliers for the plants that I use. Many, and I mean many of the plants that I installed in other's oasis were from my own stock so it got me to thinking that there was a need for a plant nursery that sold not merely useful but beautiful plants for edible landscaping.

Photobucket
Future site of some propagation beds.

I collected seeds, hunted down cultivars, spend a year trying to find a place, had another baby and my share of mayhem and now finally I'm ready to begin. Instead of being all mum about it, I'd like to invite you on the journey of trying to set up my own nursery. Don't worry this won't replace those other fun posts where I talk about weird stuff I see in the garden or neglecting** plants experiments with growing techniques. I'll include those too!

In the meantime, I have a name and a logo that I am drawing up as we speak. A plant list that I'm trying to keep manageable for starting this spring and a lot of trepidation about all that could go wrong along with hope about what could go right.

Photobucket
No, that's not the name but there may be unusual Taraxacum on the plant list.

* I haven't quite got the hang of charging people all the time.
** Oh yes, I've even started keeping excellent records, particularly for breeding and stabilizing varieties.

Thursday, December 6, 2012

Finally Threshing Leek Seeds

Photobucket
Flowerhead standing at about 4 feet and attracting the bees in Summer 2012

In Summer 2011, I grew a nice crop of leeks mostly blue leafed, winter hardy sorts such as the Long Island Seed Project's blue leek seed. In fall 2011, I left some of the nicer blue ones to overwinter and they produced flowers this year. A portion of them were partly *hairy.* That is instead of having flowers, they produced green baby leeks.

Photobucket
Fuzzy picture of leek trying it both ways: sexual and asexual reproduction.

Apparently you can induce leek to grow this grass by trimming flower heads so I'm wondering if these flower heads were partially damaged. This technique is used to make leek lines for exhibition.

Photobucket
Sitting around on the bookshelf until I finally had time to thresh

Turns out that the leek grass made bulbils (rather like garlic bulbils). After harvesting their flower heads, turns out that they had also produced offsets - little leek bulbs produced beside the main one rather like a potato onion or garlic once again.

Photobucket
I wasn't expecting leek bulbils even though I'd seen the hairy green baby leeks growing up from the flowerhead earlier in the year.

I put aside the bulbils to see if they will still grow - some had bitty roots on them - and separated the seed capsules from the stems.

Photobucket
Seed capsules waiting in a bowl.

There were also many leek moth cocoons that did not appear to had produced fully fledged adults (no I'm not sad).

Photobucket
I had picked off a bunch of these during the year from stems and leaves but didn't see them on the flower heads. These were clearly not happy little munching moth larvae. 

If you have only a few, you could rub them between your fingers (or with gloves depending on how hard they are) and remove the seeds that way. Given that I was not feeling very zen, I stuck mine in a LCBO bag - nice sturdy paper - and applied my rolling pin.

Photobucket
I first used a lunch bag but the LCBO bag was much better. You want to spread them rather thin and proceed lightly if you have a heavy hand.

Afterward, I took the chaffy mess and put it in water. The chaff was pretty light, so you could probably use other methods such as blowing, wind or fan but I was inside so I used water separation.

Photobucket
I don't bother to do this if seed sinks to the bottom of the bowl but in this case, it couldn't so I used the fact that the chaff was more buoyant to separate the seeds.

Pouring it all in a bowl then filling with water, give it a swirl or two, then let settle for a short time. The viable, heavy seed will mostly sink. Remove chaff from the top and set aside.

Photobucket
Mess of chaff, seed and water, prepare to be sorted.

Carefully pour off water. Use a sieve if you need to for the last part.

Photobucket
Plenty of heavier seed on the bottom and a few bulbils.

Then spread out somewhere to dry such as coffee filters, paper towels or paper plates.

Photobucket
Leek seed drying on paper towel. It's better on heavy paper type stuff so you won't risk sticking.

After they dry really, really, really well, they'll be labelled and started again next year.

Photobucket
These are the 2012 offsets from the 2011 leeks.

Long Island Seed Project

Tuesday, November 27, 2012

Description of my disappointing oca disaster*

I was excited to try the andean tuber oca . Known to grow well in areas with long frost free seasons because they don't start to tuberize until nights lengthen, I figured I'd grow them here in the land of hard freezes in October. Makes sense right? But heck, I'm a gardener and if there's one thing almost all of us share, it's optimism. I mean I didn't think I could grow sweet potatoes when I first started gardening here either.

Well, turns out that daylight sensitivity was not going to be my problem. My precious oca plant material was knocked off first by an unrelenting drought followed potentially by some sort of marauding bug - slugs? From the orchard batch, I collected exactly two mini tubers:

Photobucket
These mini tubers are drying out sides up. One is yellow with rose eyes and the other is yellow.

But I still had one beautiful pot of healthy plants. Today, I tentatively moved aside some soil, a bit discouraged to see that the stems seemed to be separated from the roots only to discover:

Photobucket
The juvenile delinquent of some critter eating up my tubers.

A tuber with a grub in it. So I figured I'd dig up the rest but only found one other tuber equally eaten. As I have had mystery grub damage in sweet potatoes, regular potato and garlic, this might be an issue endemic to my back garden. I am in the midst of trying to ID the culprit. The oca was grown in a pot at the back though not in the questionable garden, so it is possible that it came on the tuber stock. I will be tossing the pot and its contents just in case.

These grubbed up tubers won't store but I wonder if they would grow (once I spear the grub). I plan on trying to grow then overwinter some oca plants so I won't be totally without next year.


You lost me at oca

Oxalis tuberosa comes from the Andean area of South America where it has a rich history of use including references to eating the greens but mostly the tubers are used. They taste like lemony potatoes I hear. The sour taste comes from oxalic acid (hence the name) such as found in swiss chard, rhubarb and spinach. Depending on the variety, the concentration of the acid varies as does their preparation. I believe, the ones that you would could get your hands on in the North half of the world are mostly/fully the lower oxalic acid variety so they are eaten much like potatoes. Their leaves are quite pretty, looking like weedy sorrels that you may nibble on in salads.

From what I've read, it is a well known veggie in New Zealand simply referred to as yams but other than those two locations, isn't cultivated much (please correct me if you've been spooning them up since you were a babe in other coordinates). However, lately there has been a resurgence of interest with European bloggers like Rhizowen Radix* including it in his root crop explorations. In North America, it is mainly grown in coastal areas as it is daylight sensitive so that it waits until the days shorten before it forms tubers. It is also killed by hard frost. They are left in the ground after light frosts as rapid tuberization happens at this time. Most of the references I've read have harvests in November or December.

Other than that annoying quality (the day length, temperature thing), they seem to be low care crops. As they stand some shade and from what I've read are not heavy feeders, many gardeners try them in polycultures as in oca test-bed's tomato-oca duo.

Another plant in need of further adaption to a wider variety of climates.

*Attention edible plant geeks: go check out this awesome blog. All that alliteration was for you Radix!

Tuesday, November 20, 2012

Sweet Potato: Good and Bad

The Bad:

I've been meaning to try rooting and growing some sweet potato cuttings indoors just because I've always mentioned that it is possible. So I cut a few of my favourites, stuck them in a cup and watched them root. Yes, I've been meaning to plant them for a few weeks now. They root quickly. Unfortunately, something else took an interest in them: spider mites

Photobucket
Hanging out with their siblings, a whole lot of spider mites.

Before I threw them out, I figured, I'd take a picture for you to enjoy. 

Learning to Love the Vile Villians*: Spider Mites

Here's an interesting fact:

"Under optimal conditions (approximately 80 °F or 27 °C), the two-spotted spider mite can hatch in as little as 3 days, and become sexually mature in as little as 5 days. One female can lay up to 20 eggs per day and can live for 2 to 4 weeks, laying hundreds of eggs. A single mature female can spawn a population of a million mites in a month or less." 

Gee thanks Wiki. You can get rid of them with a solution of water and soap or at least you can try.

Why didn't I try to rescue the plants instead of tossing them out with their rooting water? Well, they were far gone and I didn't then population of spider mites to move on to other  house plants especially my seedlings.

By the way, it is possible to overwinter sweet potato cuttings. I've done it for fun with a grocery store bought variety that sprouted. I just had some bad luck. Let me know if it went better for you.

The Good:

Here, I showed you a comparison between one plus year old stored sweet potato roots and fresh roots. Well, I wondered if those old roots still had it in them to sprout. They do.

Photobucket
This variety is Fraiser White and its sprouts are bright green. I am also sprouting an orange variety, probably Georgia Jet with purplish growth.

***

* I actually am fascinated by the bugs of all kinds. Anywhere you go is a zoo of diversity. However, I'm also passionate about plants and sometimes the two of them don't share space in a way that provides me with a harvest. See multiple mentions of those seedling eaters: earwigs.
** Baby makes mommy post short posts edition: There will be lots of these but you didn't have time to slog through the usual book did you?

Sunday, November 18, 2012

Time to gaze at baby seedlings!

What?

Photobucket
German chamomile seedlings awaiting to overwinter. I've fall sown california poppies in the gaps to make floriferous display in the summer all going well.

Despite the fact that there's a hairy blanket of ice crystals coating the ground and you were looking forward to dreaming big garden dreams while cuddling seed catalogues, the garden has not stopped. Summer sprung seedlings are hunkering down for the winter and other seeds are waiting for a period of cold to break their dormancy.

Here are some of the reproductively independent in my garden.

Lettuce self seeds sparingly. These are the grandchildren of the original lettuces I planted here. They are from a speckled open rosette variety.

Photobucket
Not sure how frost tolerant these guys will be.

Chicory performs well sown in the fall for sprouting sometime in the summer. They should go to seed the following year so seeding two years in a row keeps them going (same goes for any other biennial like parsnip). I love the bitter bite of raddichio and sugarloaf so have a variety mixing it up genetically in the old orchard garden:

Photobucket
These sugarloafs originate from my old garden and arrived as seeds accidentally transported in transplanting soil when I moved some perennials. The original seed was purchased from William Dam probably 7 years ago or so. Planted once!

You may notice the winter salad theme to these seedlings and in that light here is a small variety of corn salad. Hoping to have a carpet of these next year.

Photobucket
Small compared to some varieties but the first variety to successfully grow well for me here. Hopefully larger leafed varieties will have a chance next year.

Biennial kale has been reseeding itself for a couple years now here. The spring crop was nearly wiped out by the flea beetles followed by a ravenous plague of earwigs. By fall, the herbivorous arthropod population had dwindled allowing these freshly germinated ones to survive.

Photobucket
Red Ursa, a hardy, tasty crop originally from Wild Garden Seeds. Flanders poppy seedlings growing alongside.

Another biennial I spotted being reproductive: parsnip. I had a fabulous crop in 2010 but 2011's were demolished by the earwigXdrought. Thankfully 2010 flowered this year to produce a nice seed crop followed by babies. We'll see if they overwinter and then if they go root or flower next year. I've noted (and have read) that immature biennials may spend another season growing before going to flower.

Photobucket
Parsnips growing with a common cool weather weed in the old orchard garden.

Lots of flowers are doing it too such as sweet williams, forget me nots, Coreopsis and Violas. Here they are spilling into the mulched path.

Photobucket
Violas and Coreopsis making their home in the wood chips.

Instead of leaving it all up to nature, you can lend a hand.

1. Sow winter hardy greens late in summer so that they hopefully overwinter under a blanket of snow or in a season extension device such as a cold frame. Carrots (yes really), spinach and lots of brassicas seem to handle this treatment well.
2. Sow self seeders in fall or in wintersown containers. Amaranth, corn salad, kale, lettuce, cosmos etc... are easily started this way.

Monday, October 29, 2012

Sweet Potatoes Past and Present

As promised* here is a comparison between stored 2011 sweet potatoes and the new harvest 2012

Photobucket
Left: 2011 and right: 2012. I'm curious if the sprouts on the 2011 tubers would still grow? 

All the big 2011 sweets were eaten - yum - so left behind were those that I didn't use for sprouting slips that were still a reasonable size. The very small ones dried out but those that were at least as thick as a good sized sausage - 3cms or so in diameter - seem to keep even a year later. The 2011s were drier looking on the outside.

Photobucket 
Left: 2011 and right: 2012 cut open. Notice the streak of white in the 2012 sweet. Intriguing.

Inside, you can see what looks like some fibrous dots in the old sweet potato and I'm wondering if this would not have as nice a texture now. The 2012 sweet looks uniformly orange and juicy. Flavour is said to generally improve with storage for properly cured sweet potatoes. I'll have to give you a cooking update soon.

* Yes, I'm actually following up on my post as promised. As for my blogging absenteeism, the garden has not gone anywhere. It is, in fact, in the process of expanding but my expanded family responsibilities - newborn - is keeping me from taking care of the garden AND documenting it. However my gardening love/obsession has not lessened so many posts are in the mental queue including the oca harvest.

Friday, October 12, 2012

A tale of two nuts

Photobucket
A bag of 'green' black walnuts

At the edge of our clearing are planted 100 black walnuts, Juglans nigra, in lumber spacing or at least planted quite close so they develop tall straight trunks. They are fruiting now or nutting if you prefer. These walnuts are native to eastern North America and are found in the city* despite inhibiting the growth of a wide variety of plants in their vicinity and dropping staining hulls that squish underfoot revealing a rock hard nut within.

Photobucket
Chufa plants with frosted foliage.

Behind our house, some chufa plants that breezed through the drought are now dying back with frost. They produce edible nutlets often called tiger nuts or ground almonds. Though the same genus and species, Cyperus esculentus, yellow nutsedge - considered an invasive plant in some parts - it does not overwinter for me. According to Dan Brisebois from the ferme-cooperative Tourne-Sol, chufa is a frost intolerant variety of this species - var. sativus - and therefore not invasive here.

What do they have in common? They are both a pain to process.

Photobucket
The fibrous root system of chufa filled with treasure.

Chufa is fiddly to harvest as you rummage through the roots to pull off all the nutlets. I guess if I were feeling zen, this would be fun but in my hurry hurry live, it is less joyful.

Photobucket
Mostly clean chufa nutlets.

Next they have to be thoroughly cleaned. I scrub them with bare hands together in a colander. Make sure that you remove any rocks or other debris at the same time. Next, they can be dried to increase their flavour and for storage. Now, if you are me, this will be good news because it means that all further processing is shelved until theoretically you have more time. For a memorable crunch, you can eat them right away too. They can be ground into flour for baking, or made into a slushy but delicious drink horchata or in other ways that you might use almonds, I imagine. I'll have to get back to you after I try them in cookies...

Photobucket
Mostly cleaned black walnuts quite far off fully processed.

Black walnuts, now there's a bit of work. If you are wondering what it might have been like to be a pioneer, go forth and collect ye some of nature's nutty goodness. There seem to be lots of ways of getting to the nut but here's what I did. I tore off the outer hull with gloved hands (for a more authentic experience, turn your hands rainbow brown by doing it bear handed) then I put them in a non staining sink and rubbed them together to remove most of the rest of the debris though I recently saw that someone used a wire scrubber which would work better.  Nature Skills write up on how to remove the hulls.

Finally, put them somewhere airy to dry like an onion bag or mesh screen for several weeks to months before attempting to get into their Fort Knox like shell. More on that later.

***


* Curious where to find nut trees around the Ottawa area? Here is a map. I don't know about how available these nut trees are.

The famous drink horchata is made with chufa.

Chufa is used as game food though they may be referring to yellow nutsedge.

Friday, September 28, 2012

And the (tomato) winner is...

Photobucket
The podium has been filled with my top tomatoes of drought-stinkbug year 2012

... unnamed because it doesn't have its label but looks to me like oxheart. How am I suppose to do serious gardening around these parts with kids and birds and dogs removing my labels. I even double labelled these. Next year I will make that backup map I keep threatening to do.

Gold: 'Oxheart' (centre of photo) was early for a beefstake, delicious and weathered the drought well without excessive blossom end rot. It also put up with my habit of letting tomato plants sprawl over mulch rather than staking.

Silver: 'Opalka' sauce tomato (left in photo). Also italicized because of label destruction though I'm more sure of its identity. Not only that but Opalka has been a winner before for me though in a different garden. That time it fought off various diseases and pests pretty much untended and definitely unwatered at a community garden.

Bronze: Striped cavern (right in photo) did not do super duper well but it was adequately early and won because of its interesting form.

Runners up included: An OSU blue cross - no blossom end rot and medium early, an OP sungold type Cherry tomato - lots of cracking but very early, A. Grappoli - prolific, earlish and did dry well, currently experimenting with storing the whole plant indoors to see how well it dries.

I'm saving seeds of all these varieties and would love to resurrect the 3 tomato seed trade from a few years back. The rules are simple: trade three seeds of your variety for someone else's. This way we can all get more variety in our tomato salad. This year, I wasn't able to grow many black/brown tomato varieties which are my favourite so that's what I'm looking for!

***

Seed Trade Alert!

3 Tomato Seeds

Email me (top right) and you can receive three seeds of one my prize winners if I still have any left in exchange for three seeds of your favourite type. I can only grow short and medium season varieties and would love more brown/purple tomatoes.

***


Monday, September 24, 2012

Wormy apples are...

... delicious?

Photobucket
A slightly rain split head of San Michele X Red Rock Mammoth F1

At least they can be. Given the organic status of our acreage, all fruit are grown without any sprays. In the case of raspberries (and friends), currants, gooseberries, strawberries, haskaps, grapes, cherries (not that we've had too many yet) and blueberries this means simply harvesting them before something else does and for plums, harvesting slightly underripe to beat the brown rot, but when it comes to apples, creative measures are required.

This year and last, some trees (not the same ones) were ignored by the apple pests and could be stored whole in the cellar. Those that look especially wormy can also be harvested slightly underripe or at least processed right away. The value added activities of peeling, slicing and more are key to getting more apple goodness.

What to do with wormy* apples:

1. If crisp then invest in an apple peeler and corer - they are real time saver - then dehydrate.

Cut away the wormy bits. Some apples that have eaten cores will split in the peeler but for the most part, I find it works though I have less coddling moth here than I did at my last place and more apple maggot. You can see ours at the end of the table in the picture. We call her Suzy. I don't know why but because this implement is named, our kids have developed a real affection for it.

2. Peel (or not if you can get away with it) and cut up to make sauce.

I like to leave lots of red peels to make a lovely pink coloured sauce. After boiling with some sugar and cinnamon, I mash it through a sieve to remove the skins. You can also toss in other fruits. Dehydrating the sieved sauce makes great fruit leather or bake in pastry for tarts.

3. Make and freeze desserts like pie.

4. Make apple butter, chutney or other preserves.

5. or cider - going to get a press soon!

6. Grate with cabbage, add a touch of sugar, salt and mayonnaise to make a yummy coleslaw. Or otherwise use to make dinner

7. Feed to the deer (and then eat deer...)

Last night, we took the above and made number 6 with half the cabbage and a few tart apples - that's the San Michele x Red Rock Mammoth f1 cross heading for the second year in a row(!!)  - and used some other apples to make some turnovers for dessert.

Any other great ideas for apple preserving?

Here's a great link on preserving apples from local kitchen blog


*wormy: Obviously there are wormy apples and then there are wormy apples. Some are just too far gone. Destroy by crushing or some other mechanism wormy apples will lower populations of the pest. I get some apple maggot here or at least something that tunnels under the skin in multiple locations but less coddling moth which I used to get in the city. Maybe next year I'll try traps. Also I don't get scab but I do have some sort of core rot that is more of a problem with the pears (and the apples if I don't process fast). Obviously they might be too wormy to rescue which is why I recommend checking on them to find the right balance or ripeness and unworminess.

Monday, September 17, 2012

My no fail crop? Sweet potatoes!

Given the drought growing conditions this year, I wasn't sure how the sweets would. They were started from my own overwintered tubers, supplemented by a few slips from Mapple Farms, and set out near the end of May mostly in beds pre-warmed by plastic mulch. However I also planted some nearby in an uncovered raised bed so I could see if there were any major differences.

The first thing I noticed was that the sweets were rooting where they touched the ground rather like squash or tomatoes might. This would allow them to mine more water so would yields be higher on the bare dirt?

Photobucket
Sweet potatoes root easily along the stem making this an easy way to propagate them if you don't have tubers available or want to increase some long slips (sweet potato plant babies)

The first plant had an interesting collection of corkscrewed tubers directly under the plant. I have heard of this happening in pots or in pot like conditions such as putting a transplant that had been grown in friable soil in a hole of clay soil but this soil is pretty sandy so not sure. This variety seems to be prone. You may be wondering which variety and I promise to tell you. Promise once I check.

Photobucket
Not a bad yield but not bakers. Certainly tricky to clean! These will make a lovely mash or stew.

Next plant was Georgia Jet with adequate yield. I'm beginning to think my concerns of poor growth, given that after establishment they were watered maybe twice or three times during the two plus month drought, were well founded.

Photobucket
Small plant = smaller tuber development.

After harvesting many more sweets of similar quality in the bare earth bed, I moved on to those planted in plastic mulch. I planted on roughly two foot centres. The clear plastic is stretched and secured on raised beds ad sweets planted into cut Xs with dirt securing the X down.

Photobucket
Slightly weedy sweet potato bed in south facing circular sun trap garden.

A couple of the plants were keen to flower in this bed interesting if you had a longer season and wanted to do some breeding.

Photobucket
Some vines had many buds on them!

I start to peel back the plastic to get to the plants. The plants are certainly heftier and so is the harvest!

Photobucket
That's a nice roaster.

..and it continues!

Photobucket
That's a nice yield: two large roasters and several medium.

This plant had three larger and several medium. I'm thinking these sweets are living up to their reputation as being drought tolerant. It's possible that the clear plastic not only warmed the soil but retained moisture. By the way though I use plastic for season extension in polytunnels and in this application, I would like to give up the habit as much as possible hence the bare dirt experiment. Perhaps in a normal moisture year growth would be similar. Next year we'll try organic mulch and see what happens. Pot culture is another option but I tend not to do too much as I find it negatively compromises lateral root growth and therefore total growth in plants.

Photobucket
Um what is this sweet trying to say to me?

Most productive were predictably Georgia Jet - orange skin and flesh - and Japanese Yam - reddish skin and creamy flesh. What I think is Beauregard followed with odd shapes. Some were straight and if they had plumped up, they could be huge and trailing behind was Superior with hardly any tuber formation. I still have two varieties from other gardens to unearth so I will let you know.

Photobucket
The haul - A wine box full of sweets.

Now I need to cure them at high heat and humidity. There are better ways to do this but letting them hang out in the sun in a plastic bag worked for me last year.

 Photobucket
My ad hoc curing quarters. Packed neatly in the wine box and then placed loosely in a plastic bag. Their proximity should keep the moisture high along with the plastic. They need to breath a bit hence the loosely wrapped part.

P.S.: I still have some sweet potatoes from last year. After harvesting the stragglers in the front, I'll hopefully have a comparison for you between Fraiser White last year and this year. They really do keep a long time if properly cured and stored.

Photobucket
Striking decorative foliage but poor tuber formation for me. Said to do well in Niagara region.

Last year's harvest
Ken Allan's Sweet Potatoes for the Home Garden is available in Ottawa Public Library but also worth the purchase price for the serious enthusiast (Mapple Farms sells it too as do others).

Tuesday, September 11, 2012

Big Harvests

Late summer and early fall is the time of year that I can measure harvests in wheelbarrows rather than baskets such as this one full of apples, grapes and summer squash mostly the flying saucer kind as my children would say.

Photobucket
Still have a whole lot of apples to harvest for a plethora of apple treats including apple grape sauce that I really like.

Also other big harvests news or what else fits in my harvest basket: Welcoming our new little boy!

Photobucket
Baby bunny, pumpkin and wiggly worm are some of his unofficial names.

Those of you not overwhelmed by those squishy cheeks may notice the grass or weeds that resemble lawn have regained their green tone again. Dare I say the drought is almost gone? Sending watery wishes to those with dry wells.

Saturday, September 1, 2012

Cool things cabbages do and...

Photobucket
F1 San Michele X Red Rock Mammoth Cross. Plant reheading second year.

Where the heck have I been?

Well you see, first my camera broke and then there was this drought and that put a damper on my gardening glory then there was the fact that I am in my last weeks of pregnancy. Baby expected next week by the way so that's what's been keeping me from filling you in on the plant fun.

If you must know, the recent rains reinvigorated everything :D though the forest is still looking sad. Some bushes that I thought had bit the dust have resprouted leaves and I have some late fruit appearing on the weary pumpkins. If frost holds off until October, they'll be lots of pumpkin pie come winter. The weeds which couldn't germinate because of the lack of rain are taunting me now as I lug my large belly around the garden. You are not  supposed to do much digging in dirt if you are in the family way because of various pathogens.

But I suppose what you really want to know is about the cabbage. This is the F1 Red Rock Mammoth and San Michele cross. All its brothers and sisters from last year were either winter killed or demolished by a destructive plague of flea beetles followed by their earwig accomplices. One made it. Not enough to produce F2 seeds but I figured I'd spare it and see what it did.

And look what it did! That is a huge head on a second year cabbage that had already headed last year. I'm impressed. I am growing out some more F1s from this year which are also rehearing after being partly defoliated by aforementioned earwigs. They'll stay in the ground over winter hopefully producing the much wanted flower and seedpods next year.

P.S. Earwigs have been brought under control by a troop of guinea fowl, ducks and loose laying hens added to our acreage this year.

Wednesday, July 18, 2012

Drought Watch 2012
What still no rain?

Photobucket
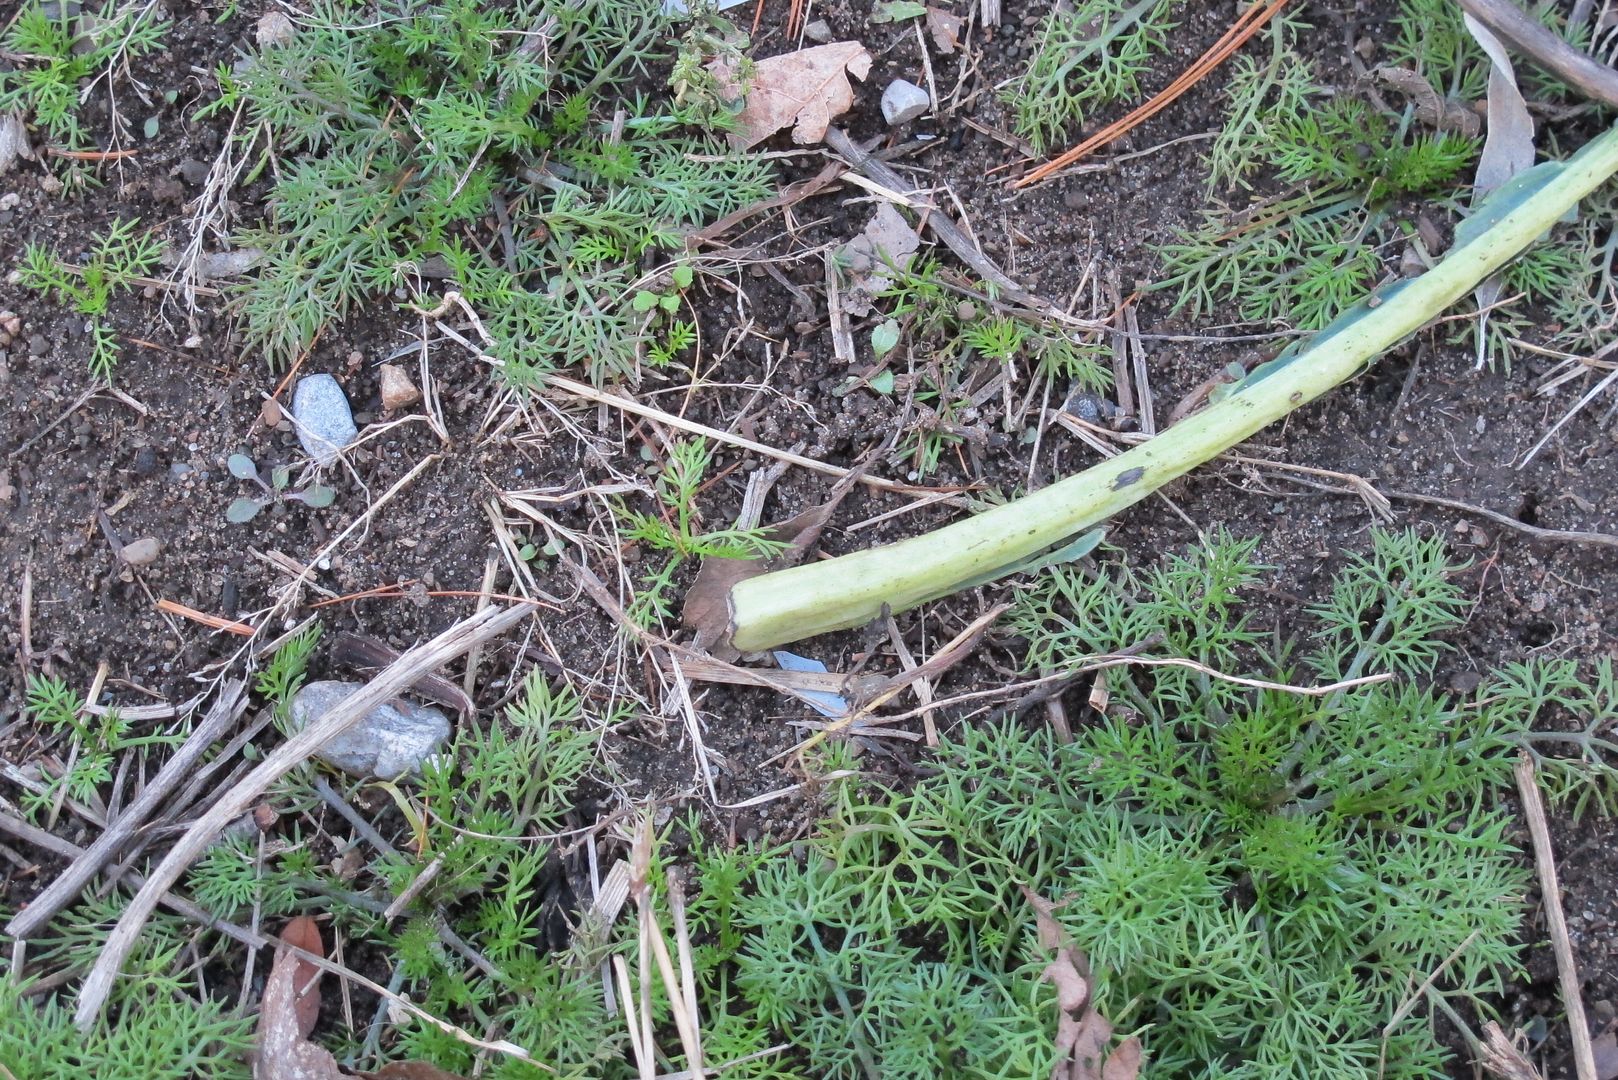
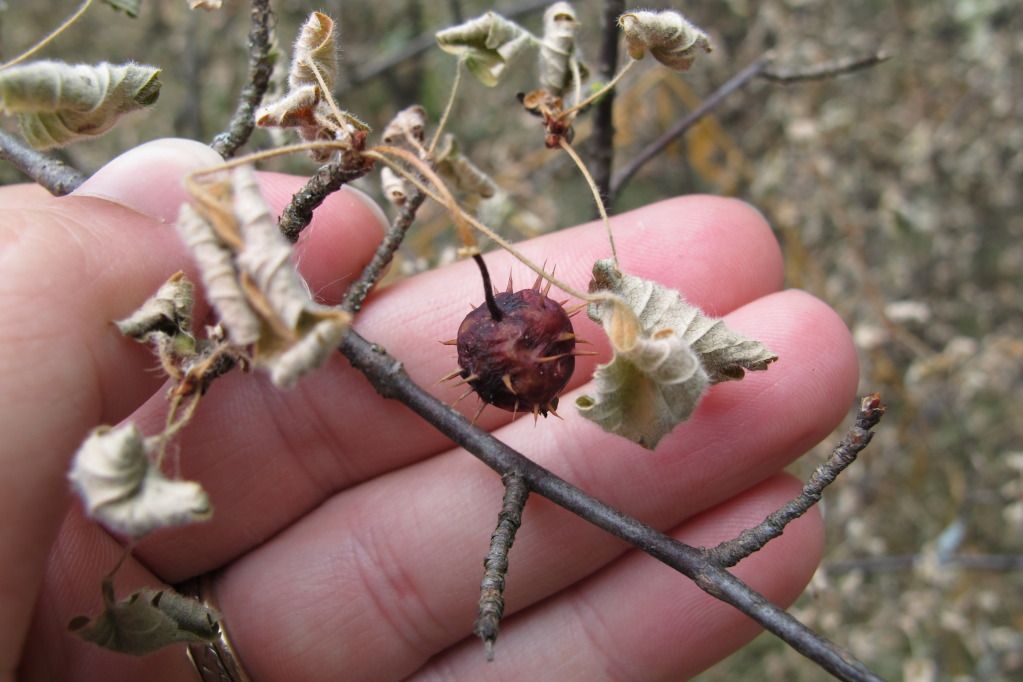
Prickly gooseberry dried on the bush in the woods.

I suppose this is where the city and the rural diverge, at least at the moment as those in the city are being encouraged to water to prevent a fire hazard where many of us in the country can't. Though I know that city folk have been seeing the signs from ponds and creeks turned into mud holes or mud cracks, box store landscaping dead and the great swathes of dead looking grasses and crispy shrubbery.

Some of you may have had rain over the weekend or yesterday which is AWESOME. We were not one of them though the sky teased and taunted us the entire day with heavy, grey clouds and rumbling thunder. Unfortunately, the two week forecast looks dismally pleasant if you were planning a beach holiday someplace with normal tide lines. I wouldn't go camping: forest fires.

In fact, fire is becoming a serious worry of mine when I look at the state of our forest at the top of the hill. I honestly ache for the trees. Thankfully the graceful giants directly around our house are still looking alive.

All that to say, this blog is officially on drought watch until further notice.

What is drought? 

Simplest definition? A drought is insufficient water in the water cycle. Need more? Okay. So a lack of precipitation possibly combined with high levels of evaporation and lower than normal surface flows cause insufficiency of soil moisture and the eventual depletion of larger water reserves such as major river systems and groundwater. Doughting-out is a top down process. First you turn of the cloud taps which dries out everything else. Its reversal is also top down. Bring down the rain (or snow/hail/sleet) and soil moisture will return to normal, seeping into groundwater and rivers systems. Hurray!

According to the Ottawa Gatineau Watershed Atlas, there are three kinds of drought that are interrelated and can follow each other. When precipitation falls below 75% of normal, it is a Hydrological Drought (they don't mention the period of time required). This combined with a lack of surface flow can lead to a lack of moisture in the top one metre of soil - the root zone of crops, i.e., an Agricultural Drought. A Hydrological Drought is when major surface systems and groundwater are aversely effected.

Ontario's Low Water Response further defines this into levels of drought intensity roughly equating to Level 1 - hmmm, this doesn't look good - moving on to Level II - oh, yeah, the writings on the wall - and Level III - help! More officially, when you get to Level III drought, water supply does not meet demand "...resulting in progressively more severe and widespread socioeconomic effects."

At the moment, they use above ground measurements - precipitation and surface water flow to determine if we are in a drought rather than merely looking at crunchy leaves and fish flopping in a few inches of water. According to the above linked 2010 document, they are working on measurements for groundwater.

So, a Level I drought is when the 3 month precipitation or 18 month levels drop below 80% of average. Or if the river flow levels drops below the lowest average summer flow for a month in the spring or below 70% at any other time. "Hmmm... I think we have a problem."

If a further 2-3 week period (depends on demand) of very little rain - less than 7.6mm - follows, you have entered Level II. Alternatively, if the following three months or 18 month period of precipitation remains between 40% and 60% of average or if surface water flow drops between 50% and 70% during spring or between 30% to 50% below lowest average summer levels at any other time of year you have entered Level II. "The writings on the wall."

"Help!" is defined as continued levels below 40% of normal of precipitation or continued surface water flows below the level II percents. Confused yet?

I'll tell you my observations.

Photobucket
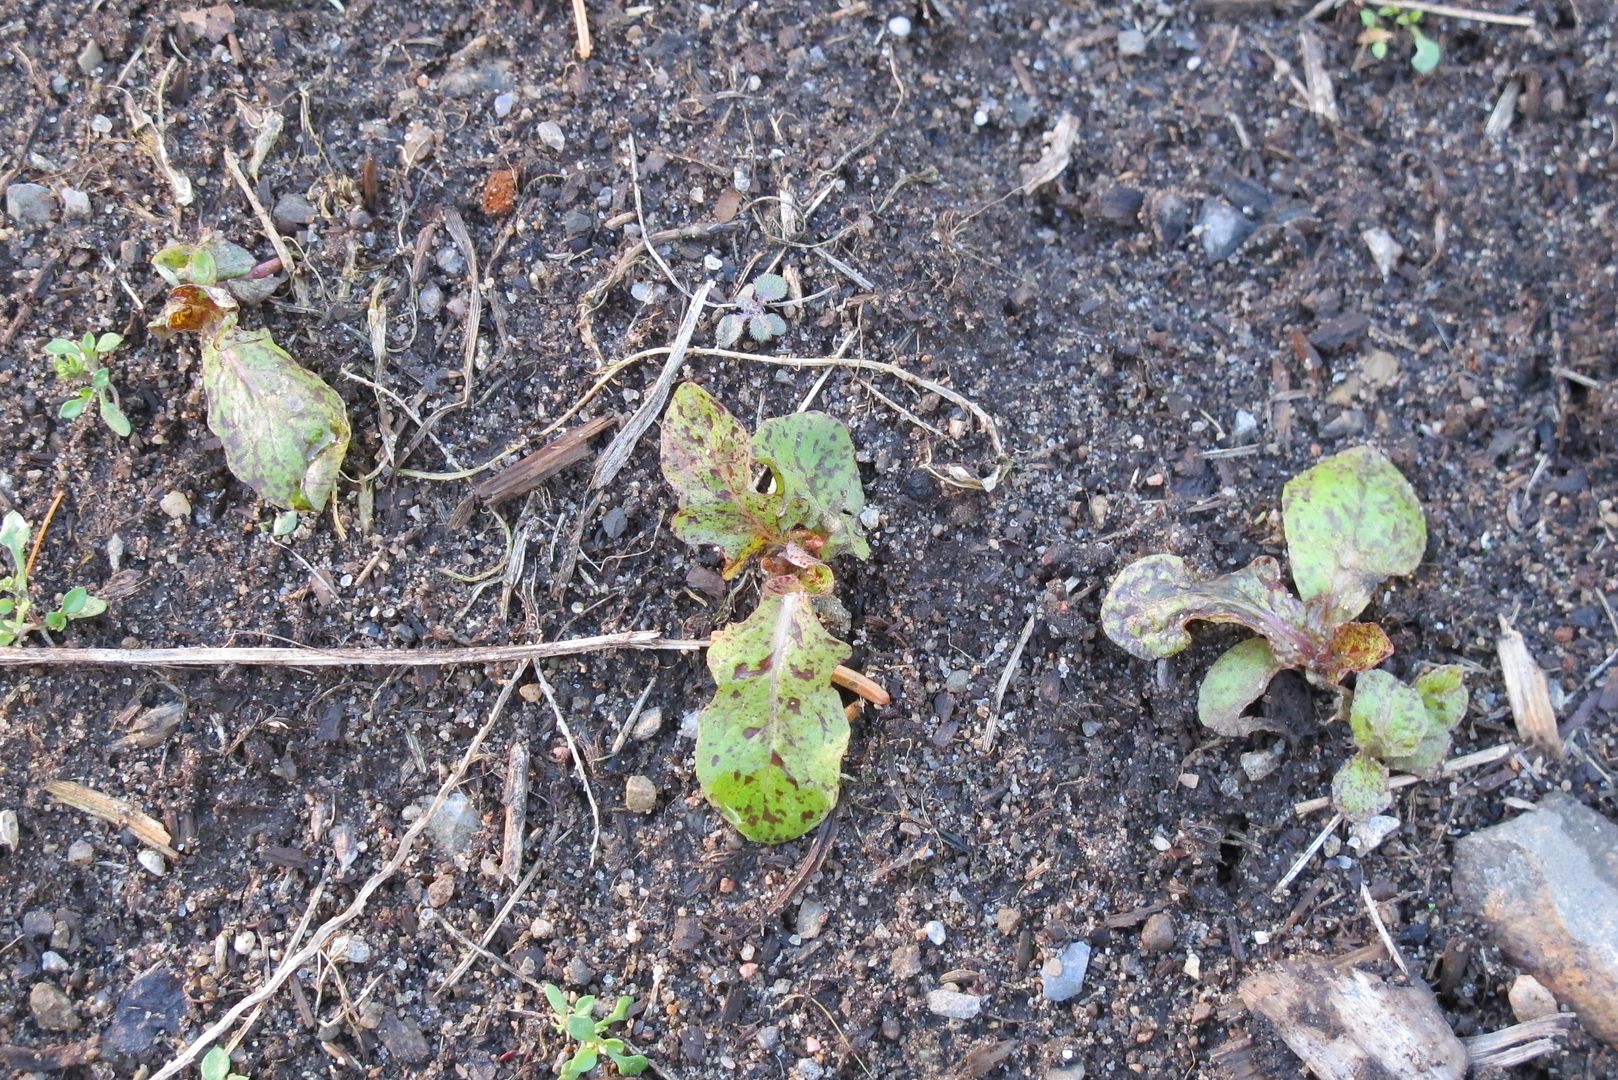
A small tree with leaves curled and dry though still green. Some birches are changing colour early but trees like young maples are just dying. I'm hoping some are just going dormant like the grass.

Pre-level I: Gee, it's kinda dry this year. We haven't had rain for like 2 weeks. I've had to water to establish seedlings.

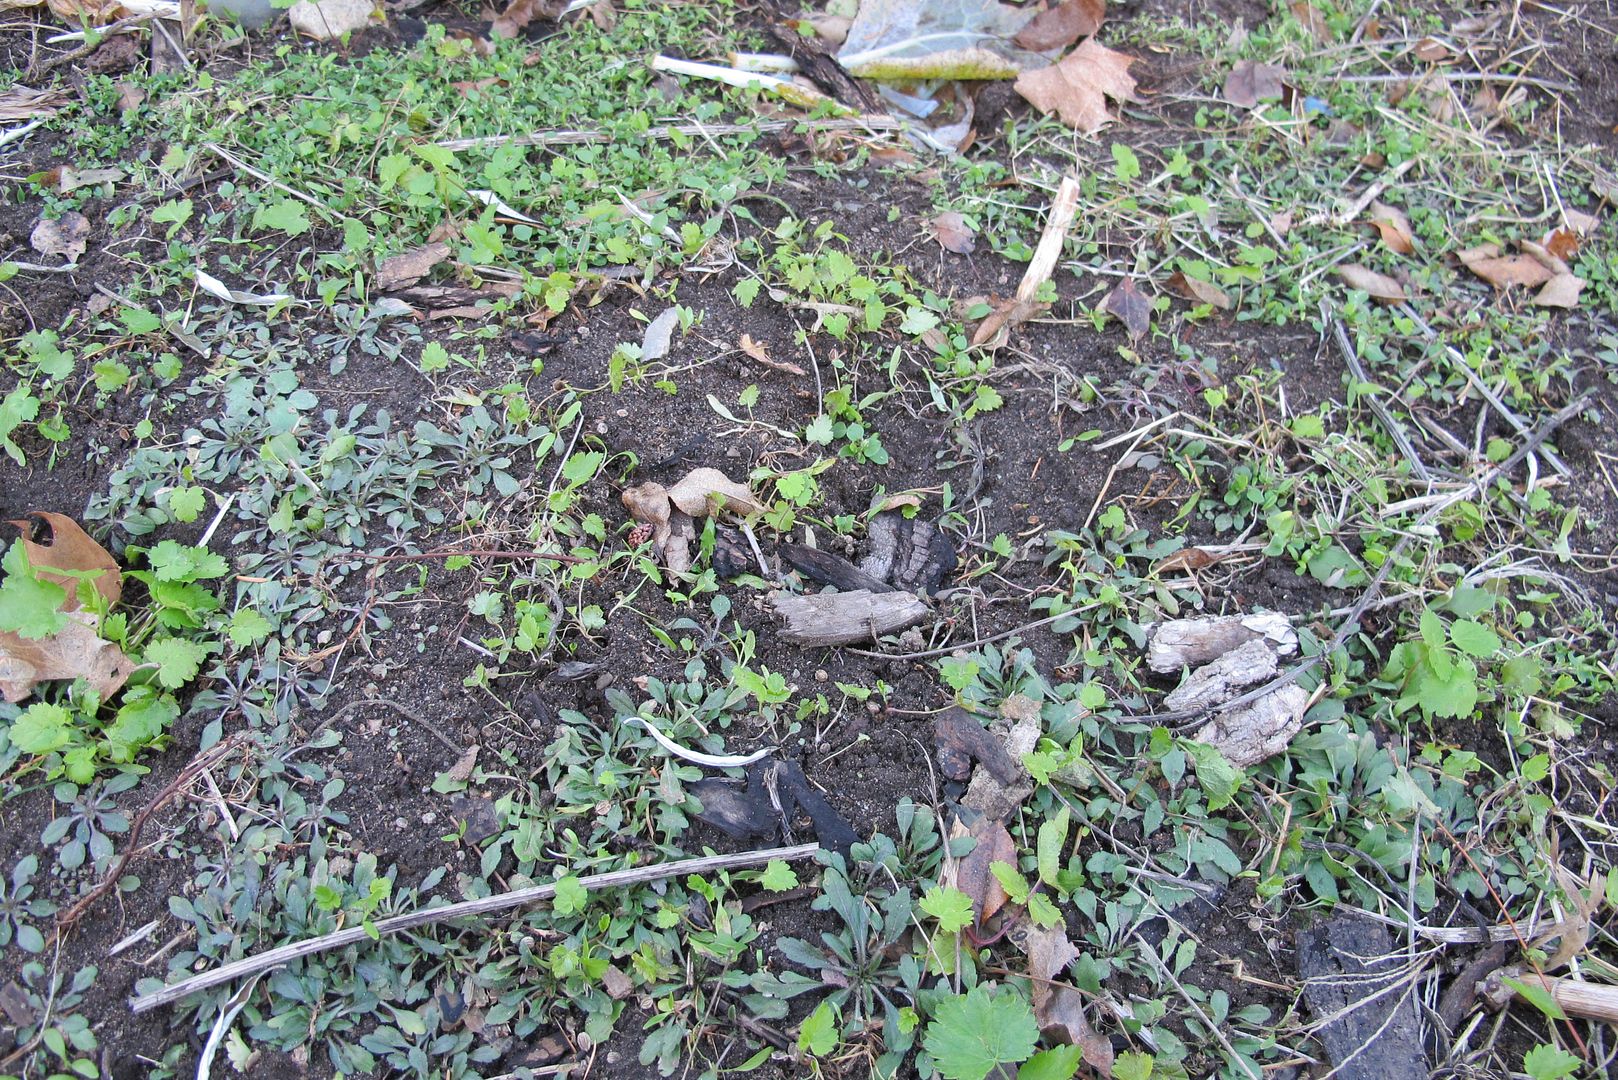
Level I: The lower forest isn't muddy at all. Strange. And that grass is playing dead. If I don't water, my peppers are going to curl up their roots and die. No bonfires here.

Level II: O.M.G. If the trees in the rocky outcrops aren't dead, they're doing a good job pretending. Woah, the ground covers - both  in the forest and in the garden - are fried. I better just concentrate on saving things in the garden that I can't replace. And keep my nose on smoke alert. Didn't that creek used to have water?

Level III: I'll let you know when I experience it.

Whose experiencing drought?

The trees, the animals, the... okay so here is a map of Southern Ontario last updated July 12, 2012.