Thursday, December 24, 2009
Happy green & red holiday
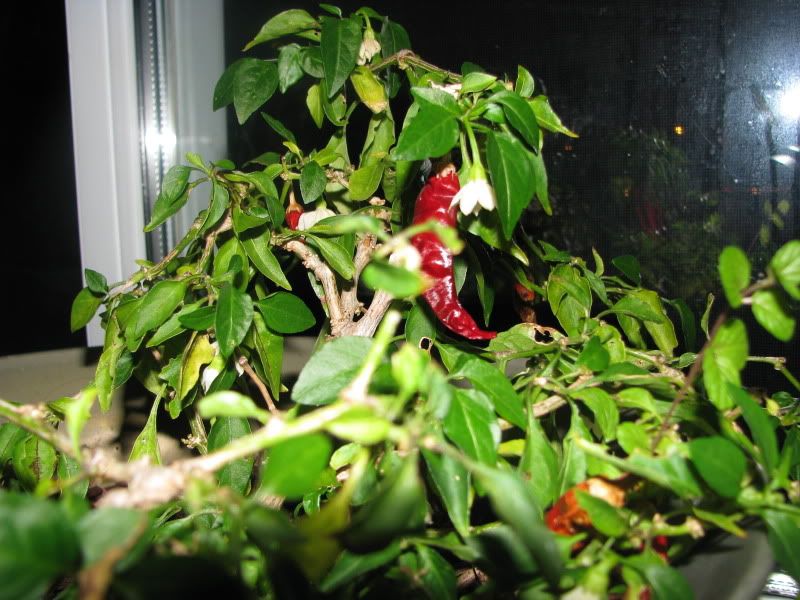
Here is my four year old 'long red cayenne' Capsicum Annuum. It does very well in its cramped pot. Right now, it is covered in flowers and has produced several crops indoors. The peppers dry very easily, even on the plant such as last year's crop that you can partially see. It's proved an excellent plant for me. Forgive the flashed overexposure as this was a holiday pic taken after dinner and before putting some excited little girls to bed.
Overwintering peppers has proved quite fruitful for me and I hope to encourage you to dig up some of your favourites to get a jump start on the next growing season. This seems to work best on smaller fruited varieties, like habaneros - Capsicum chinense - but as you see I have good luck with hot C. annuum as well.
For more, see The Chile Man
Wednesday, December 9, 2009
Welcome Winter
Hoping for a white Xmas? Come on down.
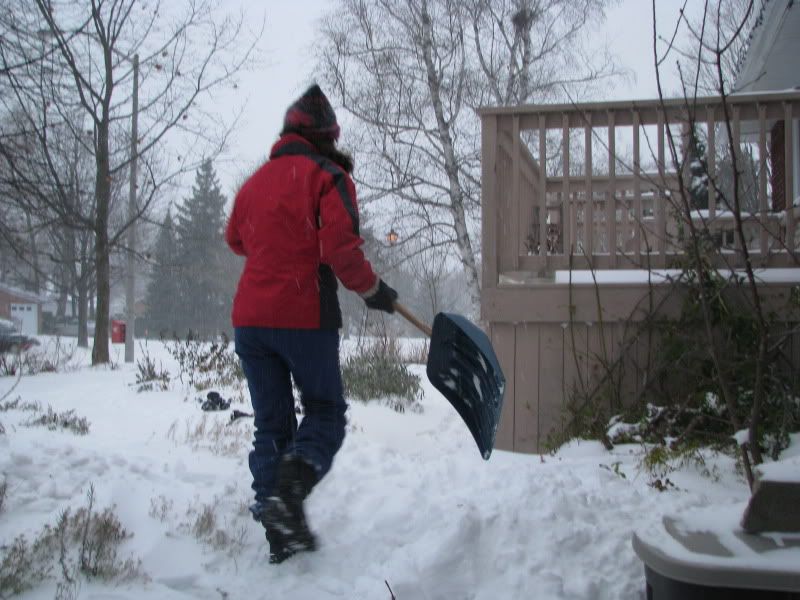
Yup. Ottawa is joining the snow club. The first blizzard hit our parts dumping who knows how much of the white stuff. I commenced my winter exercise and asked my darling eldest (above) to snap a picture of me as what I look like is a big mystery on the web. Not that I am shy but I'm normally the one behind the camera.
Speaking of behind the camera: My well snow-pant-padded deriere.
"Falalala lalala blah."
Monday, December 7, 2009
Soil Scars and Dressing your Dirt
A list o' veggies
Perennials:
For those lovers of food forests and perennial food crops, no dig agriculture can be quite easy to achieve. After planting up your garden patch, a thick mulch could be laid and maintained around your veggies. This is similar to the up keep of many perennial ornamental gardens. Of course, some of your food might be under the ground so you may have to go rooting around for it and all gardens change over time, with plants outgrowing their spot or dying so holes will be dug for division and replacement.
Not all perennials will appreciate a very heavy mulch layer, or the same type of mulch. A good rule of thumb is to look at what environment they evolved in. If they grow happily in or around a forest, then lots of leaf litter would probably make them happy. (Keep in mind that some plants grew in groupings with certain types of trees which may have different root depths, give various amounts of biomass back to the soil, acidify the soil in varying amounts, release exudes from their decaying matter or living form, etc...). Other plants that hail from more arid places may like a mulch of rocks which I find a bit finnicky to maintain in treed suburbia but can be quite aesthetically appealing. Thankfully most of the food plants that I grow put up with a variety of conditions. If you have no choice, or you don't want to make your yard a series of biospheres just wing it and see how it goes. It may be that a rich environment makes a plant grow more lushly than it normally would giving you a suffit of good eating greens or that a well behaved plant becomes a thug or visa versa.
Reseeding Annuals / Biennials / Short Lived Perennials
To maintain their population, their seeds will need to fall on favourable ground. Some seeds also require light to germinate. Small seeds might get lost in a thick layer of coarse textured mulch like straw. A thinner layer of finer mulch such as well shredded leaf mould may provide the balance between weed control, moisture retention and adequate germination. You could wait to reapply mulch until after the baby plants are up and thinned in the spring. Apply it more sparingly so that it is nicely broken down into a rich humus layer by reseeding time later in the summer or fall. The sea of seedlings that they produce in the spring may be seen as a living mulch. Thin often to allow for adequate growing room for the remainders. You can either toss these thinnings on top of the soil to act as mulch or if they are edible greens, add them to your meal.
Some seeds may be less hindered by a mat of mulch but my experience is that I get much heavier germination when topdressing is mostly broken down.
Annual Veggies
In a heavily mulched veggie garden, or one that was recently created using no dig techniques, transplants will do well assuming that there are sufficient nutrients available for them to use. In other words, make sure that if you are using mostly uncomposted material that it isn't too fresh, but if it is then incorporate some dirt / well rotted manure / compost into the planting hole to give the plant a feeding while the uncomposted layer is breaking down. In a more established garden, or one that is just getting a topdressing of mulch with a healthy organic layer, just move aside the mulch and plant into the 'dirt' layer below and water well.
Direct seeding vegetables in this kind of bed usually works better if you create a dirt trench or planting hole by moving aside the mulch and sowing. If the layer is very thick, you can move aside the mulch and add a layer of dirt / compost / well rotted manure to sow your seeds into. For greens or root crops, you can sow thickly and then thin several times over the growing season allowing the leaves to cover as much ground as possible, creating a living mulch. Just be careful not to let the plants compete too much or it will negatively affect growth. In practice, I've found the 'living mulch / crowded plant' technique works best with greens but more poorly with roots but that may be because of my particular growing conditons or practices.
Plants grown vegetatively like potatoes or onion sets can be pushed down through the mulch until they touch the 'dirt' layer.
Green manures as mulch
I have recently read of this technique. You start by planting a green manure, then cut it down, leaving the plant residue on the ground into which you sow.
Thursday, December 3, 2009
Big on Fall Leaves
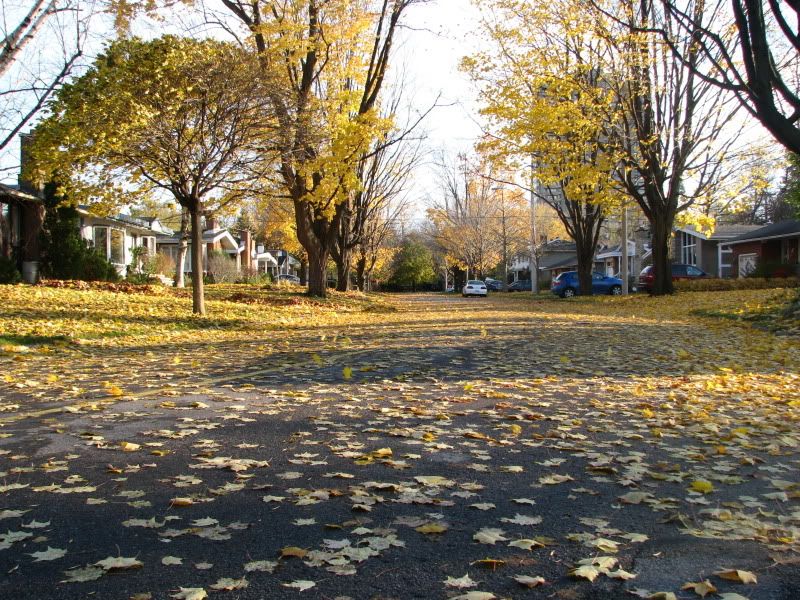
When I think autumn, I think leaves. Crunching along beside curbs cluttered with the bounty of fall litter. These gold, orange, brown and red riches fall in the urban forest just like they do in the wild but instead of enriching the soil, they are carefully removed, bagged and placed at the curb for pick up.
Leaves litter a suburban street.
Now don't get me wrong, I love bagged leaves. When I get a chance, I haul them back to my property where they are transformed into leaf mulch for perennial beds, path material, compost browns, insulation for tender crops and leaf mould. However, I feel a bit guilty taking from others who have not learned to appreciate this harvest time bounty. Not only are they missing out on a great soil conditioner, but it is easier on the back too since as an adult, fall memories contain a fair amount of raking.
My leaves are left if they flitter to a mulched path, perennial bed or beneath the hedge where they act as weed surpressers. Since my veggie patch is made of raised beds, leaves naturally settle on the pathes, locking teeth and becoming an effective mulch. Those that litter the lawn are mulched by our lawn mower and either left there or collected in the lawn mower bag. This rich mixture of grass clippings and leaves is then spread on the perennial beds. What remains to rake is only our patio stones and the rock path. Any extra leaves are left in a pile by the composter to add as part of my 'brown' layer, or to decay into leaf mould, a wonderful topdressing for the garden. Of course, if I'm making a new garden bed, the leaves are part of the organic layer I place on top of the sod.
Big Brash Brassica
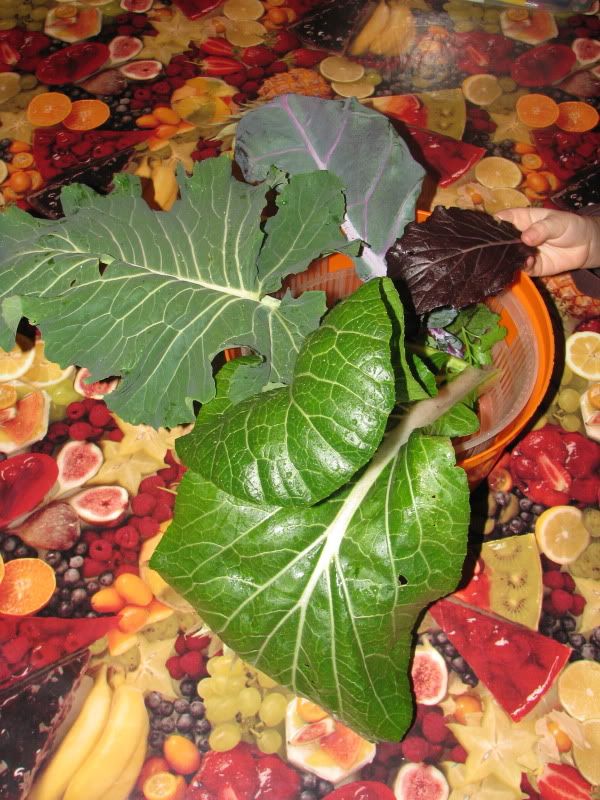
But this is not the end to my leaf harvest. Brassicas make up a big portion of my fall garden as they are cold tolerant and tend to grow better in the cool, fall weather. Here my eldest daughter (her hand for scale at the top right) shows you some supersized greens: leaf broccoli, kale, chinese cabbage and a baby mustard leaf. They were whizzed up and added to a pancake recipe to make a savory base for curry. The kids loved these pancakes which did not taste that green (a plus for them).
As December begins, leaf harvest is almost at an end. The trees stand naked and the brassicas are braving the bracing wind. All is waiting for snow.
***
Also...
Seeds, glorious seeds. I'm pleased to say that I have had lots of requests for seeds (see side bar for seed list) and another batch of mailings will be going out this week. They may take a bit longer in this Xmas rush but hopefully they'll be there shortly.
Wondering where part three of the Soil Scars and Dressing your Dirt went too? I felt like a leafy interlude but Part III on specific veggies will be here next week, promise.
Saturday, November 21, 2009
Soil Scars and Dressing your Dirt
Part II - what to do?
How I Learned not to Dig
Thought we'd start off with a pretty flower picture. Here is a blueberry patch that includes edible and decorative plants in part shade. It was created and is maintained using no-dig techniques. Blueberries especially appreciate the moisture retentive nature of a rich, organic soil. They are topdressed mostly with pine needles and oak leaves, both of which help to create the acid soil blueberries need.
Almost all my gardens have been created using simple techniques variously described as Lasagna Gardening, No-Dig Gardening, Hay Barrel Gardening etc... My first couple veggie patches, however, were created by laborously removing clumps of sod and weed roots, double digging, ammending with compost, peat and other recommended nutrients then carefully smoothing this even mixture until the crumbs of soil were as small as a pea and as flat topped as can be. I had heard about mulching to prevent weed growth and diligently did so which worked so I started reading more about mulching only to discover that I might not need to dig afterall.
Next year, I expanded my dimunitive 12x8 foot veggie patch to an expanded 20x40 feet. This took one day. It was early in the spring and the sod had yet to green up. A truck dumped 10 cubic yards of dirt onto my driveway, eliciting giggles from the neigbhours. I cut the outline of where the garden was going to go, all the while my hubby watched carefully to see if I stepped outside of the negotiated boundaries. Then wheel barrow by wheel barrow we dumped dirt 4-6 inches high. I shaped beds, and planted. Voila - a garden.
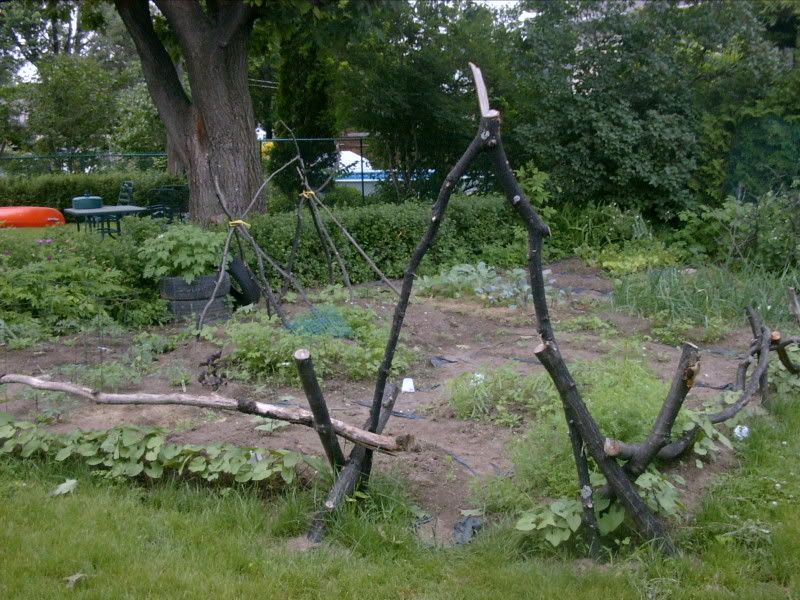
Shortly after the making of my first huge, no dig bed. My neighbour was cutting back his oak tree so I inherited some braches for fencing.
Did I get weeds? Some but very few and yes there were creeping bellflower, dandelion and violet in the yard. I pulled these when I saw them but mostly I dealt with the abundant growth of the garden enabled by the breaking down of the sod underneath and the imported seeds in the soil like mustards and lamb's quarters. P.S. I now know that all the seeds mentioned in this paragraph are edible.
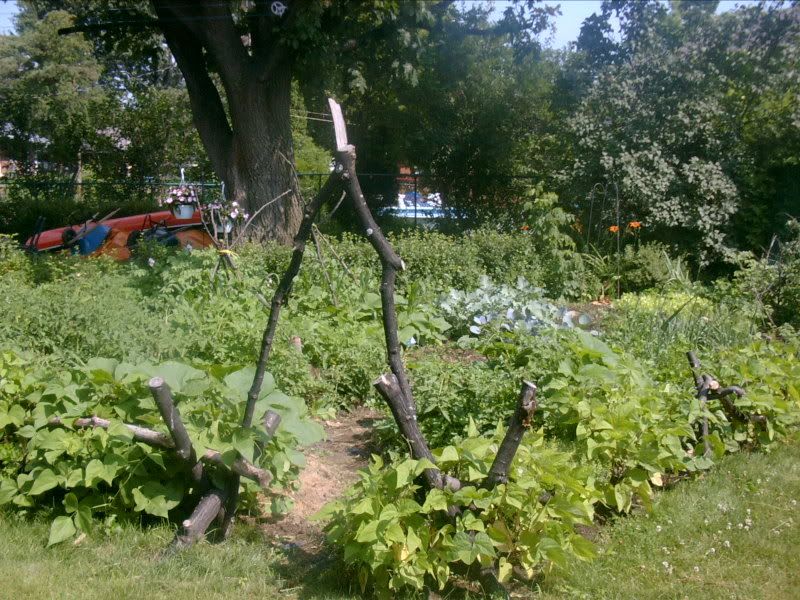
Abundance in the garden, several months later. Note the grass clippings used as mulch on the path.
From then I've advanced this technique to use a number of top dumped materials such as fall leaves, compost, manure and other organic mulches. I've also used cardboard or newspaper over the sod before dumping on my dirt ingredients but unless there was a serious weed problem, this doesn't seem necessary. In fact, in the case of really invasive weeds, I tend to remove as much as I can then smother with plastic for a season before trying to plant a new bed.
The First Steps
The best time to do this is either in the fall or early spring.
It is great fun marking up lawn. Determine where you want your garden and then take a spade and make a dotted dig line around the edge. Some people like to use hoses or flour or spray paint sold for this purpose but I find that turning over a clump of dirt all along the line is easiest. If you decide you don't like it, you can just plop the sod back into place, firm it down with your foot and try again.
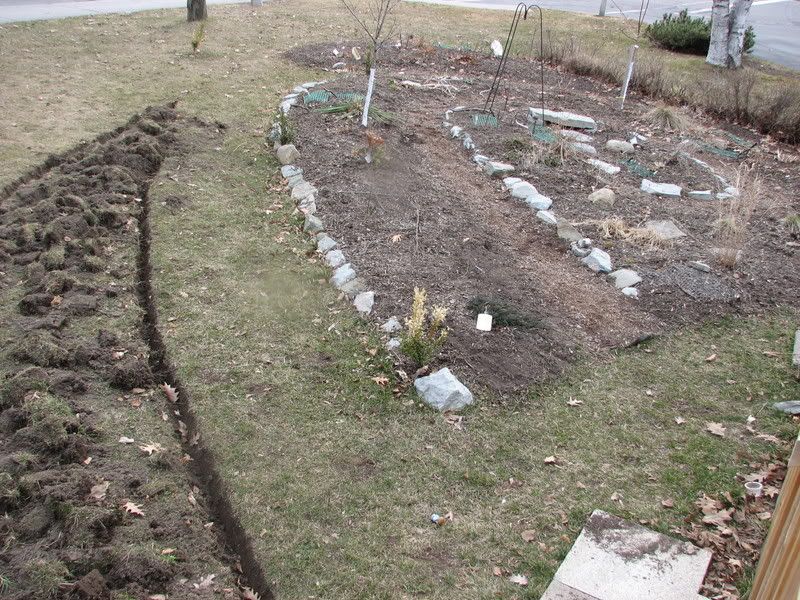
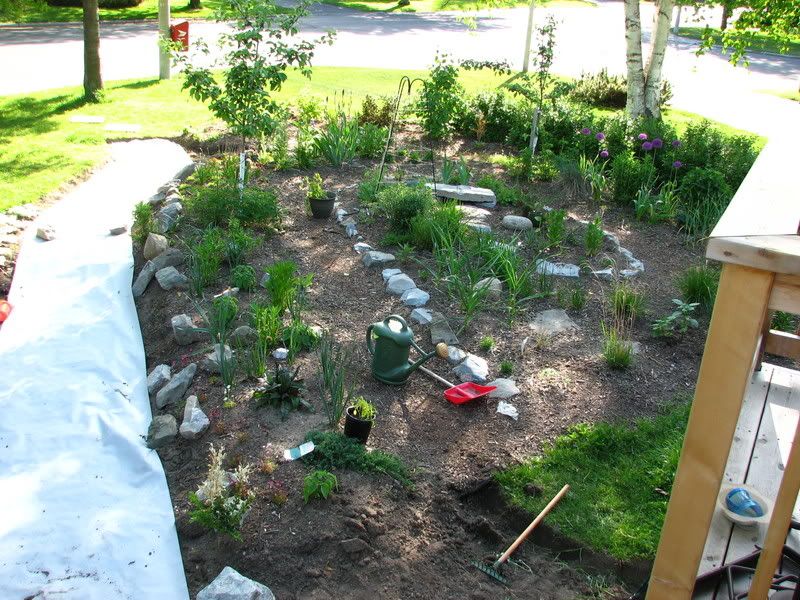
My front lawn is south facing and huge which is just asking to turned into a garden. Now only 1/3 remains as green concrete. I used no dig methods for all of it. Here you see on the left a new bed being put in. I tossed the sod strips from the edge on top of the bed though this makes it somewhat uneven for covering purposes. I recommend that you put the extra sod in your composter.
Put on your gardeners goggles and stare at the line you have dotted from all angles. If you like it than dig out one shovel depth in between your dig dots, smoothing out curves and straightening lines as you go. It may help to use a sticks and string to keep your straight lines straight. If you want really clean curves, even circles, then use a stick with a string marked at a certain length. Position your stick in the ground so that the outer edge of the circle or semi-circle falls where you want it and then stretch the string tight to the mark in various places around the edge of your design to dig out the dotted curve.
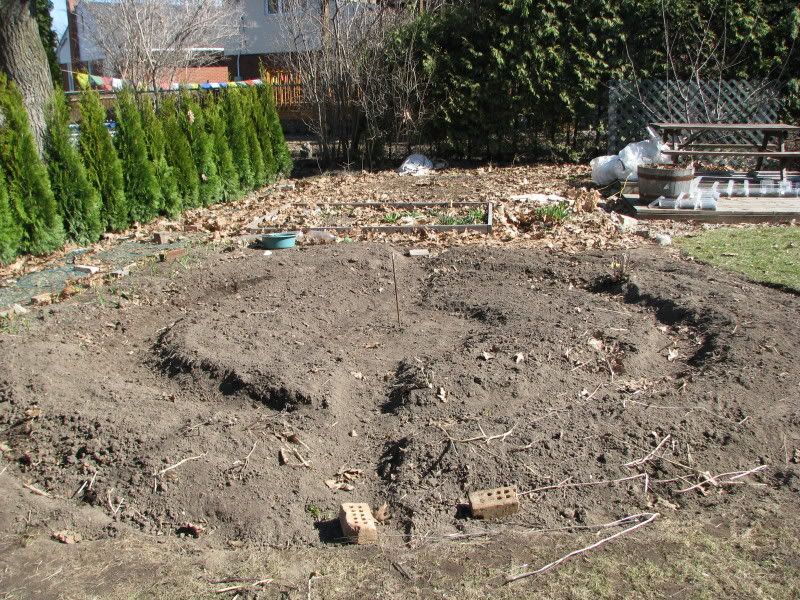
This circular veggie patch was made using a tall stick in the middle with a rope tighed to it and secured so it wouldn't ride up the stick. It was knotted in two places and the path it travelled round the stick marked at each 'wide' circle. Then a foot out from the mark to make the pathes.
Once you have cut out your line, cut out one space width of sod all around the edge. I promise, we'll stop digging soon. You can choose at this point to lay down overlapping black and white print newspaper (though most colour prints on regular newspaper are safe too) or cardboard. If you use cardboard, I recommend punching holes with a pitch fork every foot or so to allow for better drainage while it's breaking down. Wet down this material.
At this stage, you can also dig out areas for pathes that will have drainage or other support or lay down landscaping cloth in areas that will not be mounded with dirt ingrediants. If you are not using paper or cardboard, and the sod is out of dormancy, then cut the grass really short. Obviously you can use this time to put in any side supports such as stones or wooden beams to make a raised garden.
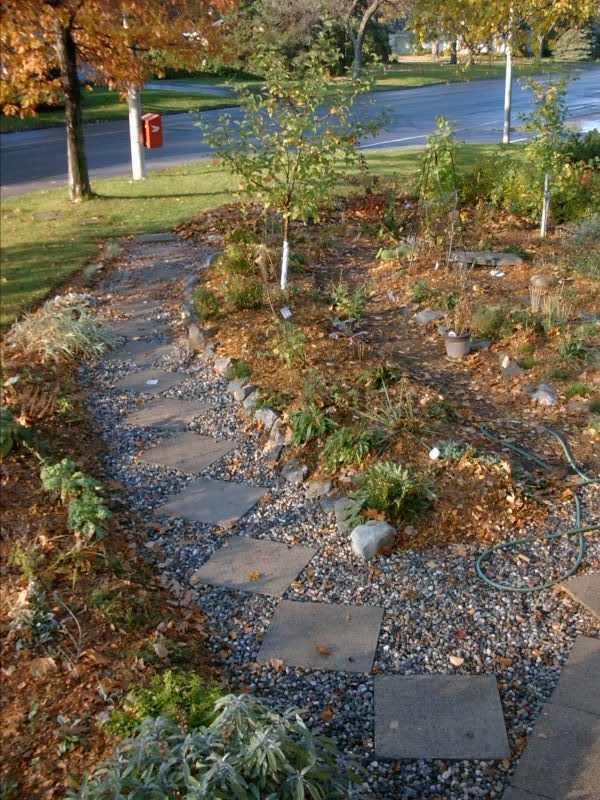
Landscaping cloth being laid for a simple gravel and patio stone path.
Now, either over your 'paper' or over bare sod, start laying down your organic matter. I recommend a couple inches of soil first but anything will do. Remember different materials will tend to make the soil more or less acidic such as pine needles (more acidic), bone dust (less acidic). It helps to think of this as sheet composting so ideally you would be layering both green, fresh material and brown, dry material. If using mostly dirt, compost and manure, then a layer of 4 inches does me well. Just make sure you are amply burying your grass (hence cutting it really short to begin with). If you are using mainly loose materials like leaves, make an 8-12 inch layer. Really there is no boundry on height just make sure you add enough to occult any light from getting to the sod beneath.
If you are using both dirt like materials (compost, dirt, well composted manure) and loose materials (hay, grass clippings, leaves), put the dirt materials in the bottom and leave the dry materials on top to act as mulch.
You can plant right away but I'd give it a couple of weeks for the sod to start to break down beneath. If you do plant right away, then cut away the sod clumps underneath, filling these holes with some sort of dirt. Make sure that no sod is exposed to light.
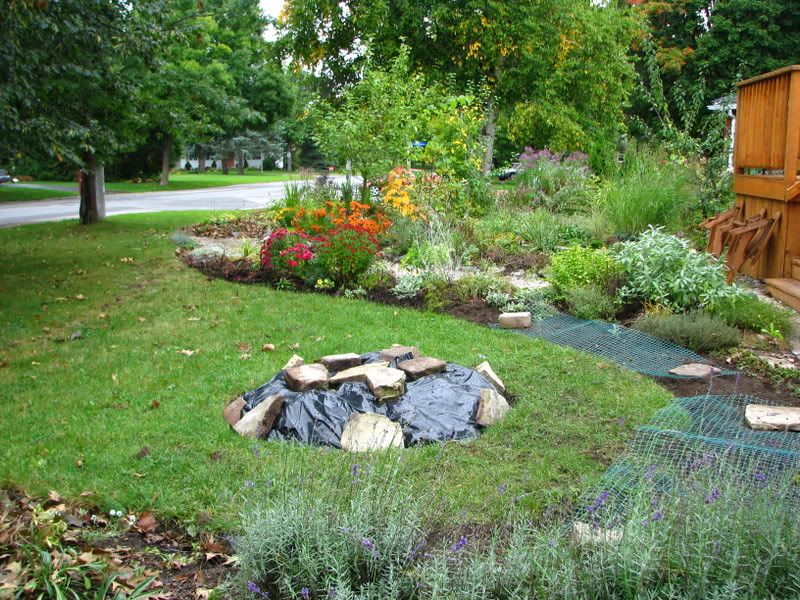
Small circular garden created by piling the sod from the edge and covering with plastic from fall to spring. After the plastic was removed, it was planted and mulched. You can see some additional expanded beds nearby with plastic netting ontop to prevent squirrels from stealing freshly planted bulbs. The garden in the background is the bed that was being cut in the above picture.
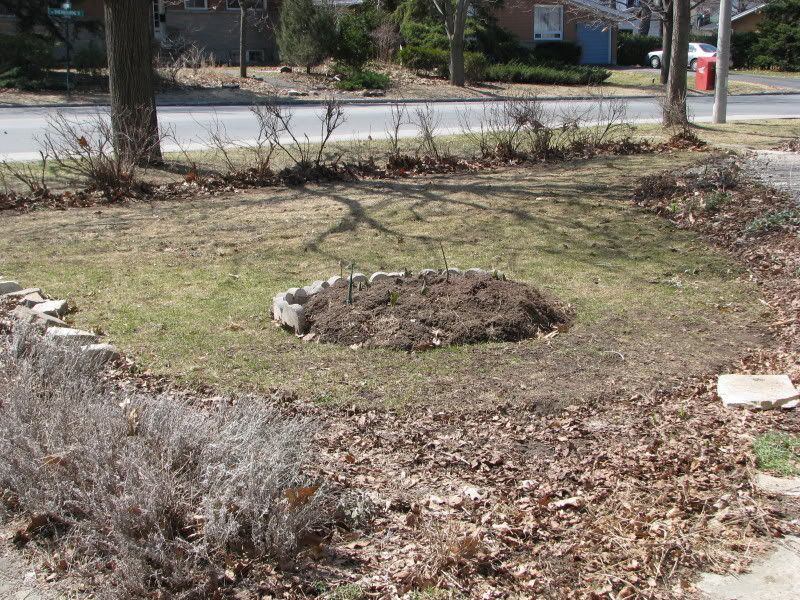
Spring following year, notice the sod is gone.
If you don't have enough materials to make a bed right away, then you can always lay cardboard over the area you want to plant the following year. Weigh this down with something like boards, stones etc... and cover with what you have. Keep adding organic matter as it comes to hand. Wait until things get growing next spring and then plant.
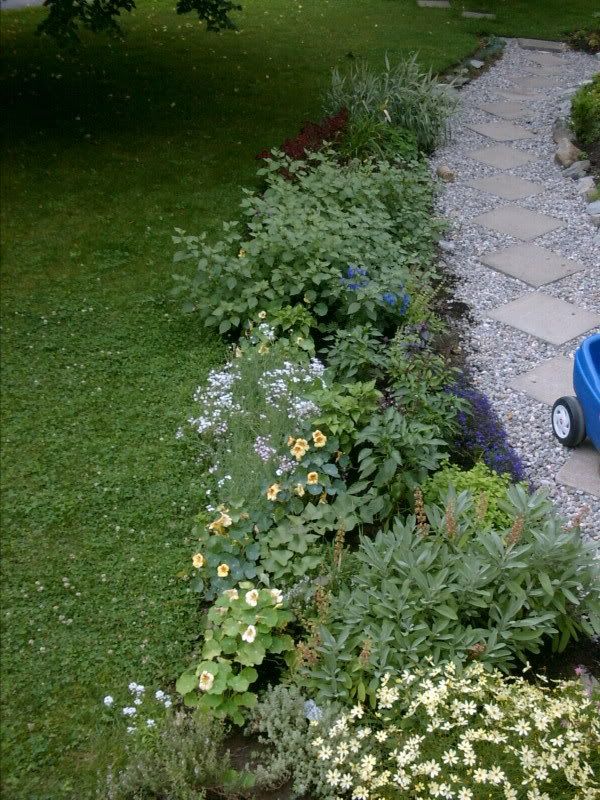
Left side of front spiral garden. Several months after creation.
The Second Steps
If this is a dirt garden, you can scatter seeds and plant. Once things are up and growing, mulch around the plants to lower weed growth. If you already have 'mulch' material on top, then you can make planting holes by moving aside some mulch, putting in a plant with ample dirt around it. Once it's up and growing, move the mulch in closer. You can also create seeding blocks by moving aside mulch and adding dirt / compost then seeding on top.
Once the organic matter breaks down, you should continue to topdress your garden with whatever materials become handy like straw, leaves, green clippings (without the seed heads or invasive stems/roots - think mint which can root along the stem unless you want a bed of mint of course), maures etc... The layer of material not broken down thins quickly in our garden so planting and making seeding blocks becomes as easy as pushing aside the 1-3 inches of whole matter and digging in the rich organic earth or seeding atop it.
Fall leaves applied as mulch. You can run your lawn mower over them to break them down a bit first.
I let many of my plants self seed which they normally do without a problem even into a thin mulch layer and add new material only after the seedlings are up and growing for a few weeks.
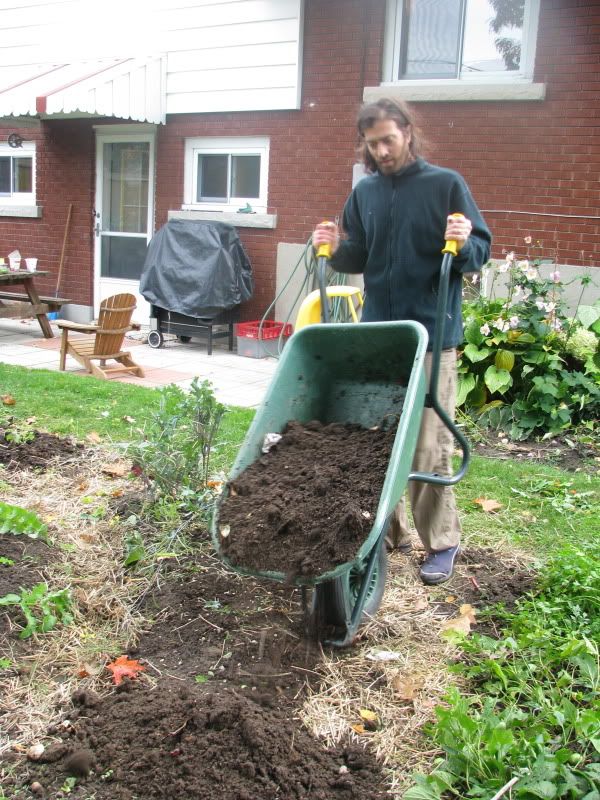
The husband topdressing with compost - I'll make a gardener out of him yet!
Annual weeds become few after awhile unless you stir the soil by digging out potatoes or add new material that contains them. Thankfully a lot of these weeds like purslane and plantain are edible so I weed into a salad strainer. Anything that I am not going to eat, I toss atop the garden mulch to break down unless it will spread that way. If you don't like any weeds in your garden then dig out the perennial weeds when you find them or move aside the mulch and lay down a layer of cardboard on top of that area, pushing the mulch back overtop. For really tenacious weeds, you may need to use black plastic. Alternatively, you can just cut them back when they start to out compete your veggies.
Next week - Specific Veggies and the No Dig Method
Wednesday, November 11, 2009
If I have seeds, you have seeds!
Do you have to send an SASE?
No.
Do you have to trade?
No.
This is my first time and I'm nervous.
That's okay. You can still have seeds
What's the catch exactly?
I like to share seeds. I consider it one of my missions in life and you taking them from me will help me feel like I am doing a tiny bit of good in the world. One day in the future, you too may be encouraged to share seeds, which would make me doubly happy. That's all folks, really.
You can get these absolutely free seeds, by contacting me via email (see sidebar profile).
***
I also belong to Bifucated Carrots International Seed Network list so check out others that have the same seed giving fetish as me. Contact them to see if they require SASEs/trades etc...
Monday, November 2, 2009
Soil Scars and Dressing your Dirt
No dig methods for growing veg
Believe it or not, common folk are not the only people interested in no/low dig gardening. Agricultural scientists have been looking into ways of lessening the use of the plow to preserve the health of the little 'e' earth, which will help feed us in farther futures than generally we pursue with these types of advancements. Disheateningly, as weeding is one of the things accomplished in big farm frequent tilling, a commonly suggested alternative is nuking the ground with Rounduptm and of course planting rows with the requisate Rounduptm ready crops.
This post does not recommend the use of death-icides for normal gardening or agricultural practices (or at all really).
What is it exactly that Big-Agri is trying to prevent by no/low tilling? Soil, like water or air, is a natural resource required for our life, and the biosphere as we know it, and therefore should be preserved. Good agricultural soil is a complex 3D structure stuffed with both floral and faunal organic materials. It has a porous structure that allows for the movement of both water and nutrients, as well as root penetration. When you till the soil, you break up the structure, alter its ecosystem and bring humus (broken down vegetable matter or the manna of soil) to the surface where it breaks down more quickly. Essentially you start to degrade and use up your soil. Overworked ground is tired. Bare dirt is exposed to the ravages of wind and water runoff.
In the backyard gardening world, no-till is commonly referred to as no-dig, including methods such as lasagna gardening, and topdressing. Instead of double digging and ammending the soil in the spring, compost etc... are spread on the surface and garden beds become strict no step areas to prevent soil compaction. In annual vegetable growing, disease causing plant remains, are removed from the garden and hot composted to kill off the organism, or removed entirely. Yearly (or more) addition of more organic matter is generally required to keep a thick surface mulch.
Like anything in life, it is not all rosy as there are some problems with this method so let's address them quickly.
The Problems
1. It promotes the growth of perennial weeds - Turn this around into, it prevents the growth of weeds, many of them annual that are typically found on disturbed ground such as lamb's quarters as these seeds need some light (to be brought close to the surface) to germinate. Tilling constantly rotates this seed bank to the surface for sprouting. Agricultural researcher Hida Manns,* writes about this fascinating succession of annual to more mixed weed growth in her technique where she does not only askew most digging, but also uses heavy mulching and weed management. Instead of pulling, she keeps the weeds at a lower height between the rows (to prevent sun competition I imagine). These meadow strips create an ecosystem of bug and pest busters between her vegetables. Her findings have been that crop yeilds are similar but the losses are from different reasons. A weedy garden probably suffers from some root competition but suffers fewer losses from diseases. The biggest advantages, beyond labour saving, is the lack of death-icides, as well as the preservation of the soil.
If you are concerned about perennial weeds, especially if they are difficult ones like couch grass, etc... you can try smothering with layered cardboard in heavily infested areas. Remember to pull as soon as you see them too. A little bit of digging to get out the tap roots is a-okay with me.
2. It slows the warming up of soil in the spring. Bare soil bakes faster to be sure and if you have a muddy field in a foggy land, I can see the attraction of getting a headstart. An alternative might be to raise your beds as well as to continue to topdress organic matter to the soil in order to lighten the texture. Slanting the garden toward the south when first shaping beds or planting on a southerly slope can create a warmer microclimate. Plasticulture such as mulching with clear plastic, cloches and row covers may also help to raise soil surface. If you heavily mulch, you may consider moving back the top layer of mulch that is not broken down to reveal your planting rows and once the seeds have germinated, move the mulch back.
3. It increases disease or pest problems. Ultimately, I don't believe this criticism. I can see how it applies to the agricultural practice of leaving crop debris on the soil to prevent erosion. However, heavy mulch can make an niche for certain pests such as slugs and mice even as it prevents others such as cucumber beetle from heavy infestation.
4. It robs the soil of nitrogen. Okay, this one originates from methods that start with a heavy unbroken down floral matter such as straw, leaves and the like. In the beginning of the composting process, nitrogen levels can fall as the soil organisms sequester it. Adding materials with high nitrogen such as manures, should help balance this problem. As reassurance, I have never noticed this in my garden but I use a variety of different mulch materials such as grass and other green clippings, autumn leaves, manures, and compost. Too much of any one thing may be problematic. This method can be compared to surface composting so add your greens with your browns.
Part II - I wanna try - realizing your no-dig dream
Coming next week
***
* Looking for info on Hida Manns, contact me, and I'll try to help, she's not easy to google.
Excellent Wiki entry on No Till AgricultureScientific America article (a 'innovation' friendly mag, with dubious green credility at times)
Thursday, October 22, 2009
Fall Revival 09 - long live the greens!
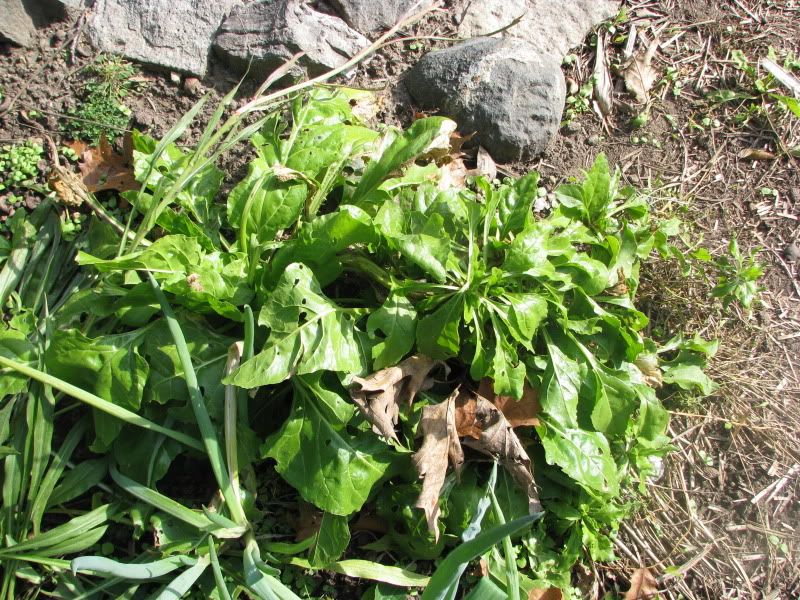
Gone to seed but not gone. After cutting back some spent seed stems, I find green at the base of the Bietina (type of Swiss chard)!
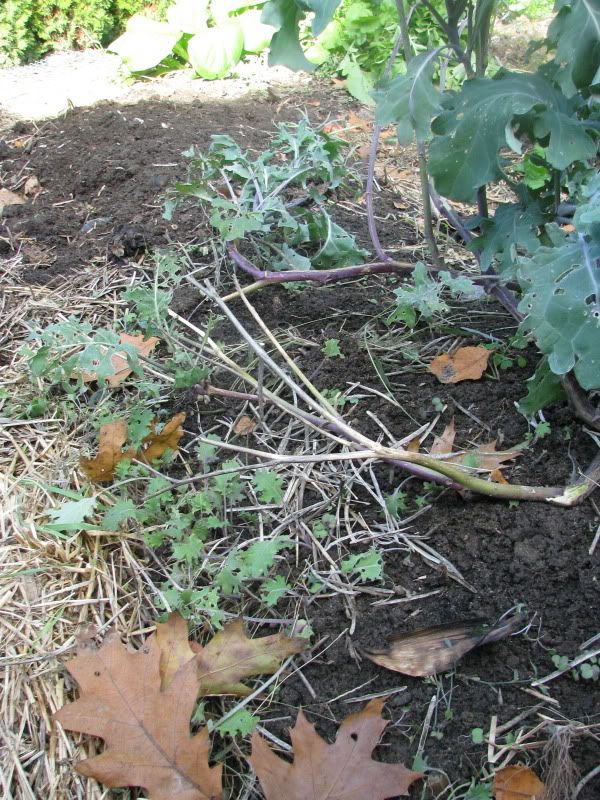
Don't count this 'Red Ursa' Kale out yet, after providing delicious and nutritious leaves last summer and fall, waking up bright and early from the receding snow pack this spring, the plant went to flower, reseeded these babies on the left of the pictures and put out a new flush of tasty leaves, on the right.
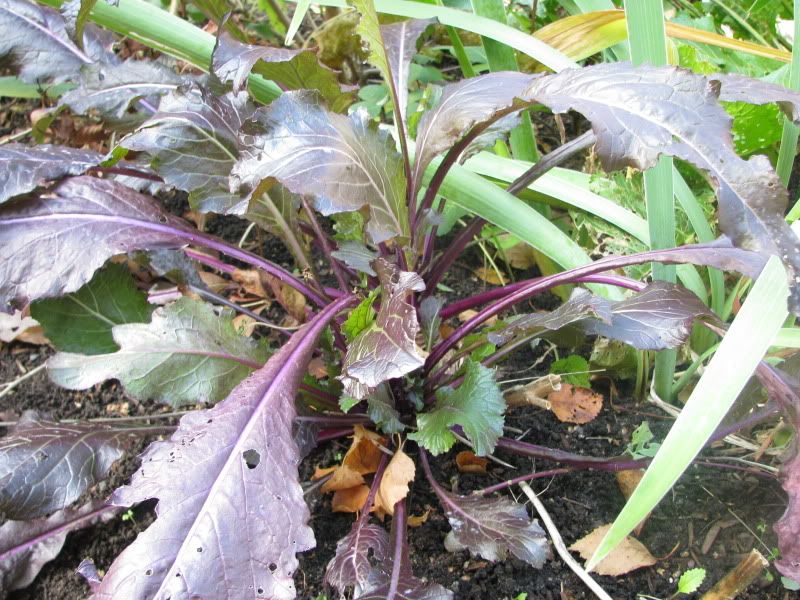
Even this annual mustard keeps going after its seed stock has dried up and fall down with this decorative wine coloured display.
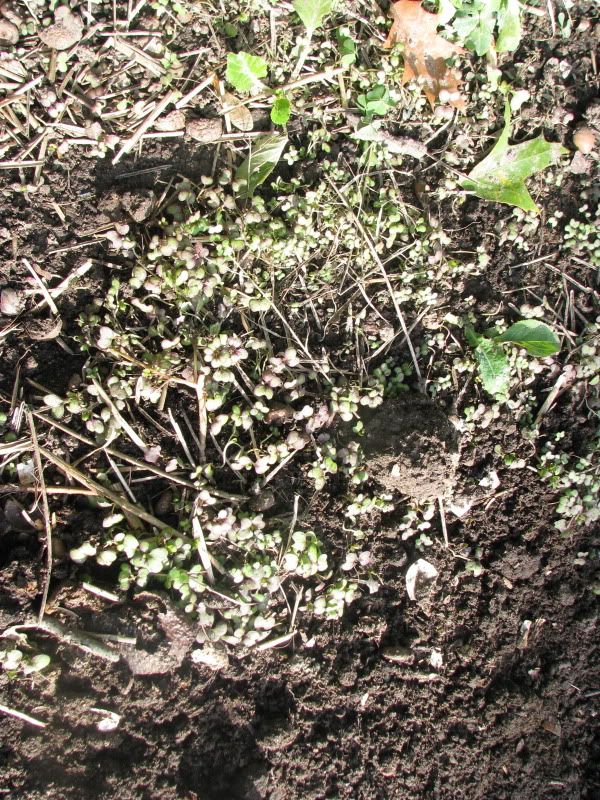
Here are some freshly germinated mustard babies not far off.
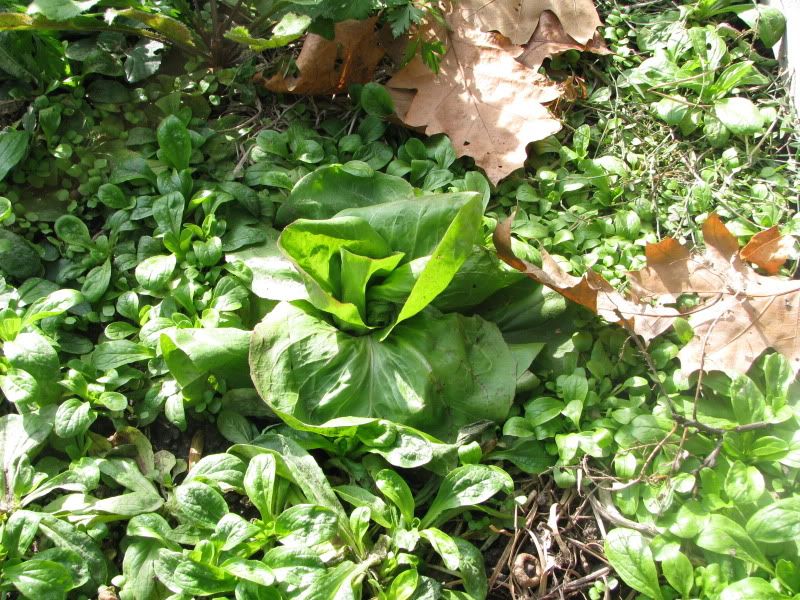
Mache's mom and dad may be gone, but its ultra hardy, mild tasting seedlings live on to lushly carpet the ground, with a self sown chicory in the middle.
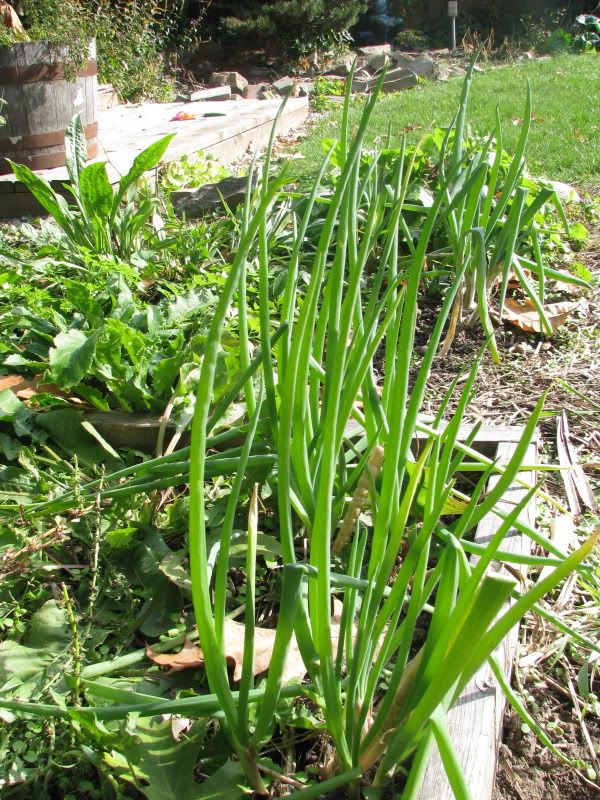
Not to leave the alliums out, bunching onions that were munched on by leek moth spring back,
and topsetting egyptian onion plant themselves to produce a widening patch of these rich tasting hollow spears.
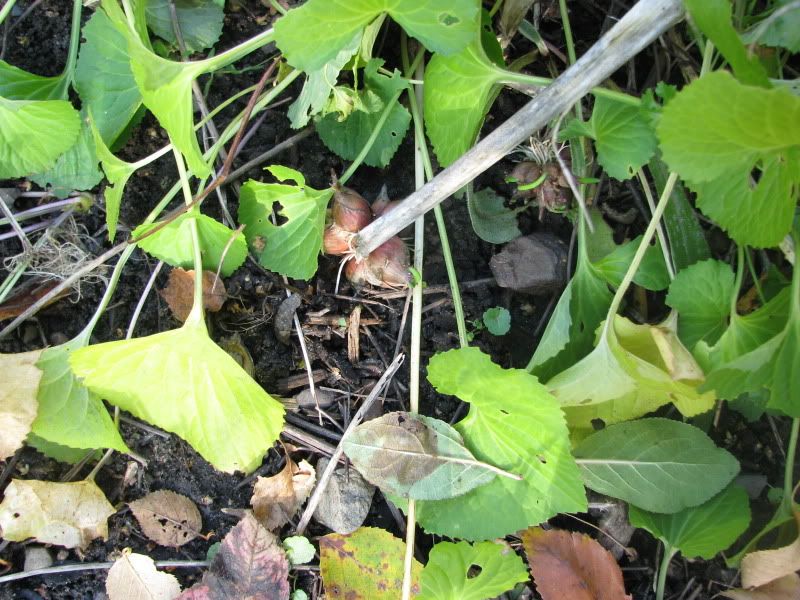
The bulblits are in the midst of the violet leaves, with small green spears emerging.
Viva the self starting fall garden!
Tuesday, October 13, 2009
Thank a squash
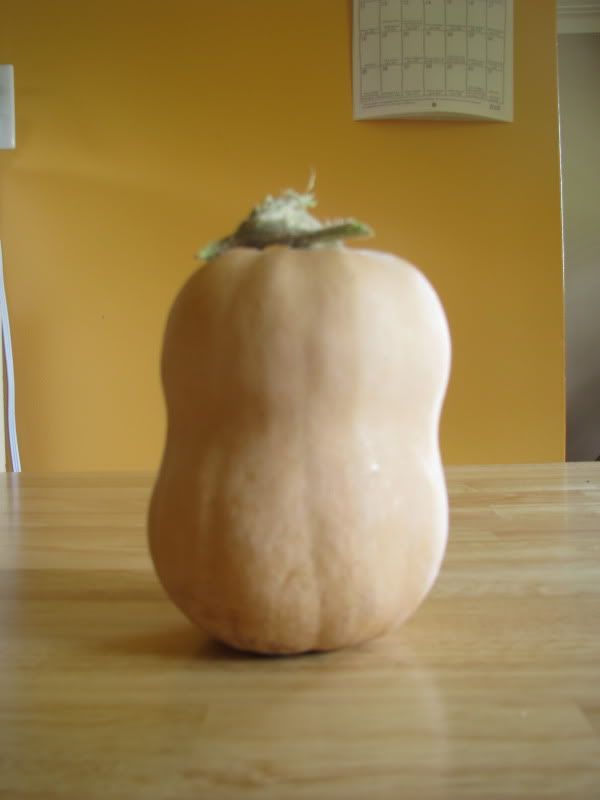
Here is a lovely little butternut and...
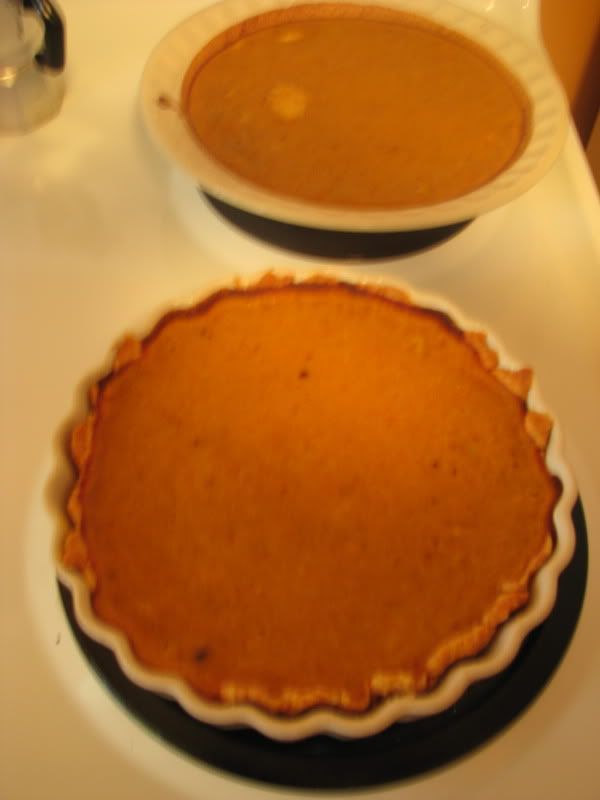
... what it became, a couple lovely little pumpkin pies for Thanksgiving.
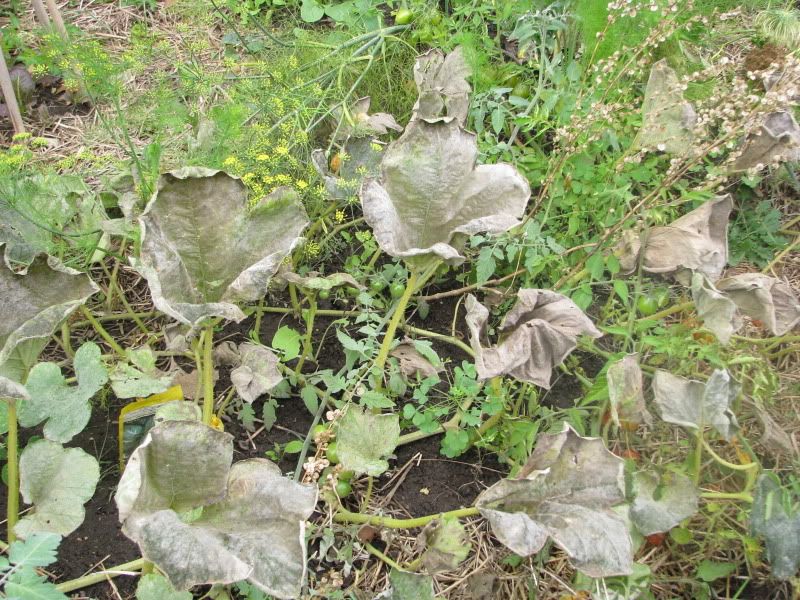
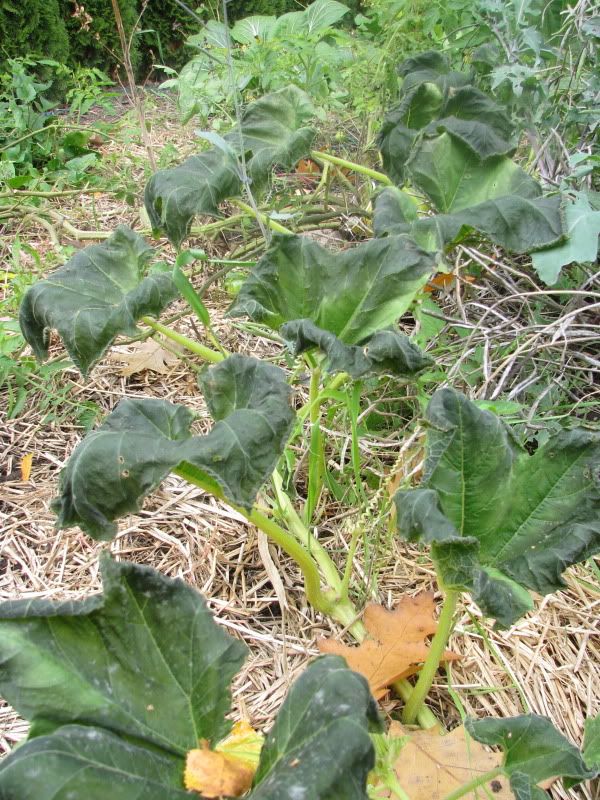
Of course the season here has come to an end and the leaves of the pumpkin have been wilted by powdery mildew:
The White Death: Powdery Mildew often starts around mid summer here. It doesn't usually kill the plant before...
and touched by frost:
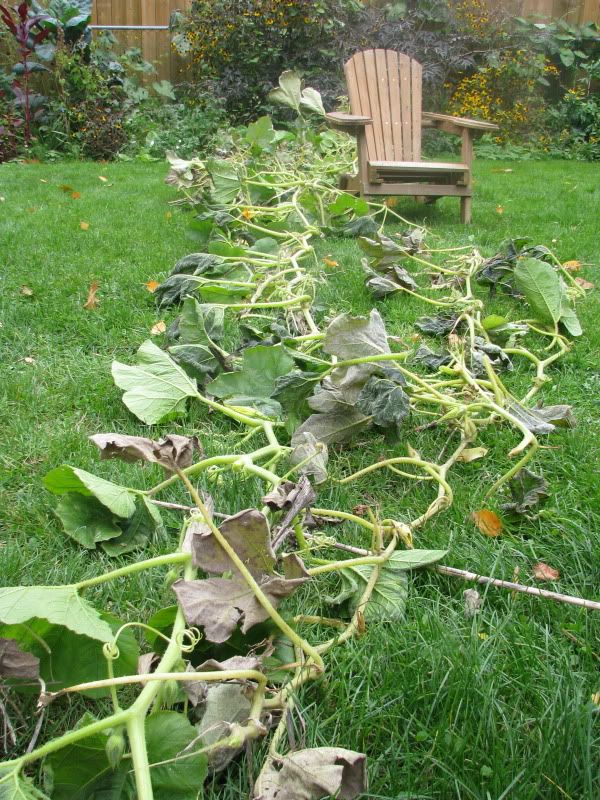
The Black Death: Frost damage will turn the leaves brittle and darkened, sometimes black. Say so long to your squash plant. Though I have seen light frost singe upper leaves while leaving immature lower leaves untouched. It's possible there might be some regeneration but I usually yank them right afterward.
but I got a descent and delcious harvest despite the slow start to this year.
The Long Tutorial on Squash Growing - go ahead read it, I dare you.
Starting from Seed
In Ottawa, you have two choices, start indoors or out. If you start indoors, they only need a short leap on the season of 3-4 weeks. Make sure they are started in something which you won't need to overly disturb the roots - think soil block, peat pot or newspaper cone. This is especially useful if you are trying to grow something with a slightly too long growing season or if your growing season is unusually short. It might also work as insurance against the unpredictablility of last frost.
You can also wintersow your squash by placing them in a mini greenhouse container outside and allow them to sprout when the microclimate suits them, which I find is usually around 2-4 weeks early. Some people provide extra early warming of the soil by planting in black tires placed on your mound directly on the ground. You can stretch plastic or floating row cover overtop to increase the warmth. I think this works better to speed germination but should be removed afterwards to prevent the solar oven effect.
Or you can direct seed. Since squash plants are hungry plants, dig in some manure, compost or other organic matter. Many people mound up the ground which can give extra growing room and heat but this is not necessary. Others plant pumpkins with beans and corn in the classic Three Sisters arrangement.
Plant no more than three seeds and stand back. If you have problems with cucumber beetle eating your seedlings, give them some protection such as a large bottomless margarine container twisted into the ground (will also protect against cut worms) with nylon stretched across the top. This only gives them a head start as the plant often outgrow this confined protective area. Feel free to create larger versions. Anyhow, up pops the plants and on they grow.
Cut off the head of the weakest seedling. Go on, do it. Don't let your kids watch, they might not let you. If you are me, then let the other two grow to hedge your bets or wait a few weeks and then mow down one more, leaving only one plant per hill.
Growing On
One squash vine freshly pulled from the garden displaying both forms of Death (see pics above). Notice the lawn chair for scale... okay I admit it is a child's size lawn chair but still.
If you are growing a bush-type squash, then they'll become rather large plants, needing about four square feeet to accomodate them but if you have the more exciting vining variety then it will need room! How much? Think 10-30 foot vines and you'll have an idea. There are a number of ways to handle this. Firstly, you can let them ramble amoung your other vegetables. Their big leaves will shade out some planting spots but also some weeds. You could also plant them at the edge of the garden bed letting them wander around the yard. This is a sneaky way of extending your veggie garden (ha hahahahahah) and it cuts down on the amount of lawn you are able to mow. You can also move the spreading vines so that they border the garden or stay out of the way though they will forever seek the best growing conditions like light, heat, nutrients etc... You can also let them ramble up trellises, existing trees and more. Trellising is good for small fruited / summer eating varieties but for larger fruited ones, you'll have to support the fruit. Nylon or other strong netting can be used to build little hammocks. An advantage to ground growing is that the plant tends to root along the vine giving it more access to water and nutrients. If fruit is allowed to mature along the ground, you may get slug scarring but unless it is heavy, I just find it adds to their character.
Usually male flowers appear first followed by females with minature fruit on the bottoms. You can eat squash flowers which are stuffed, battered, fried and more but leave some for pollination. If you are eating the immature fruit such as in zucchini or trombocino then keep them picked young so that the plant will keep producing more. If they are winter squash such as butternut or hubbards, let them ripen on the vine until the rind is hard and mature coloured (colour depends on variety). Cut cleanly off the vine with a sharp knife before the first frost, including as much stem as possible. Never pick up by the 'handle' since broken handles mean fruit spoiling more quickly.
Storage
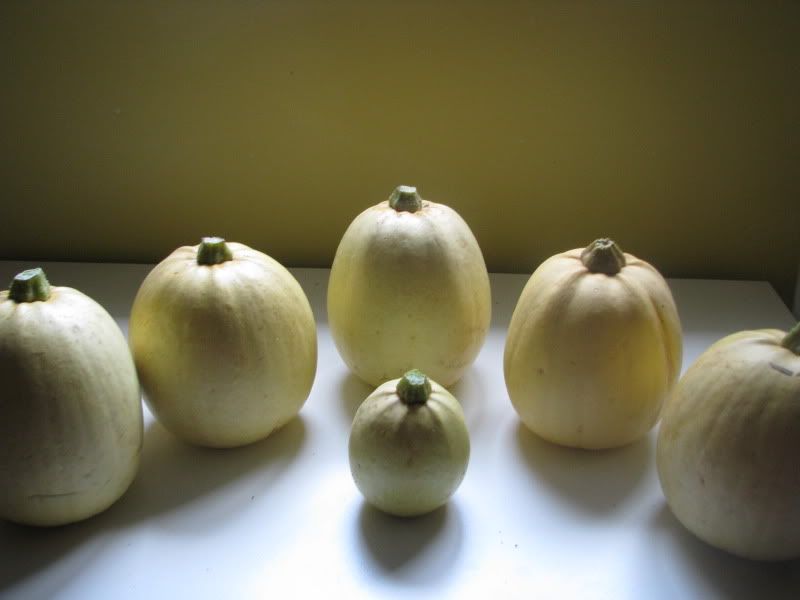
Descent harvest minus one that I ate before this picture from a single squash plant (same as pictured vine above.) You want to know the variety? Um... a nice Quebecoise seed seller gave me it... um... don't recall. It's somewhere in my seed tower...
If you are me, then dust off dirt and stick on a cool, airy shelf in the house until you want to eat them. If you are a less lazy gardener, you may want to wash them in a weak bleach solution to limit the amount of interloping rot causers, let them thoroughly dry and then store in a cool, well ventilated spot. Remember to check often for rotting and cull the bad ones. I guess it goes without saying that you should eat those with a shorter shelf life first as not all varieties have the same storage capacity.
Seed Saving
Squash plants are outbreeding and insect pollinated which means that your courgette (nod to you Europeans out there) may cross with your pumpkin to produce pumpettes and you need a lot of plants to maintain the genetic wealth of the variety and keep it strong.
Not all squash plants will cross. There are four main species that gardeners grow (this is not a complete list, no way, no how. Seed to Seed by Ashcroft has a good list). These are:
Cucurbit moschata: Butternut, Cheese
Cucurbit pepo: Many pumpkin and zucchini are in this category
Cucurbit maxima: Hubbard, Banana
Cucurbit mixta: various Cushaws, silver seeded gourds
So if two squash in your garden share the same surname (species name) then they can cross. Your real problem is getting enough plants to save good seed. Seed to Seed says 24 plants - yes I mean 20+4 not 2 to 4... 'is the recommended population size at goverement facilities.' If you are only saving for yourself or informed friends, then you can try saving from as many plants as would be sane for your garden. Store the seed well so you can use it for a couple years as long as the plants perform as you would like. Over time, if you continue to save from only 2 or 3 plants, you will get a weak, narrow genetic line so you'll probably want to buy or trade for new seed.*
Saving the seed is easy. Scoop out, separate from guck, dry really, really well and save in a clearly labelled air tight container. Keep out of light, moisture and heat.
***
*If you haven't read anything about seed saving and population size before and are now suddenly freaked out, FEAR NOT as not all plants are as space hungry as squash. Many are self pollinating and could be saved from just a few plants though more is always better.
I Wet My Plants and her series on wintersowing plants which include squash
Tuesday, October 6, 2009
Fun in Arnprior and a little name dropping
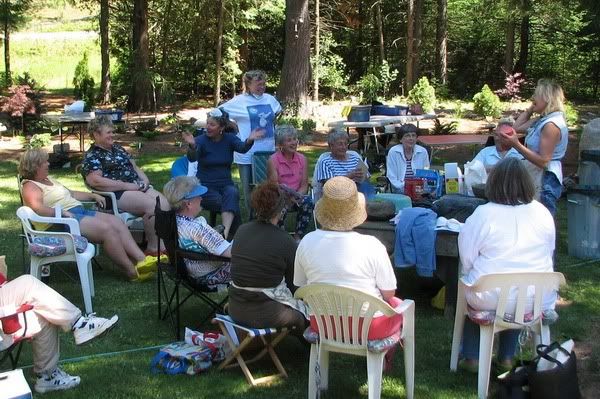
BTW: I am not in this picture and it is not of the talk. It does however capture their good times. This is a picture of a recent hypertufa planter demonstration.
If you are gardening obsessed and live in or around Arnprior, why not attend one of their meetings held at the local library so you can meet this friendly group for yourself!
***
And now for the Name Dropping
During the discussion, above and beyond the resource list, I rattled off various garden guru's names. For those of you that didn't have the benefit of a pencil, or the general readership (sounds gradiose doesn't it?) is interested, here goes*:
The Extreme Gardener (not to be confused with merely Extreme Gardener)- She's a permaculturelist blogger in Vermont with lots of knowledge who (unlike this blogger) appears to carefully write and edit her posts. Well worth a look if you like growing your own edibles. I mentioned her technique of heavily mulching sugarhat chicory to extend the harvest.
Tim Peters - One of the many plant breeder extraordinaires who has flag shipped and participated in many breeding projects including the effort to create perennial grain crops. I'll sneakily use this to also reintroduce you to the most excellent and political blogger, Bifucated Carrot to give you more of the scoop. Peters Seed and Research
Tom Wagner - A plant breeder who I know as the 'potato man' because of his interest in breeding disease resistant tubers as well as distributing TPS (true potato seed). Impressive picture of his disease resistant potato stock growing alongside blighted ones. Pay close attention to the pictures shown on the bottom of this page 2 thread. Right now, he's on tour giving talks in Europe with Michelle aka The Seed Man.
Dan Jason from Salt Spring Seeds - A member mentioned that he let his wilted tomatoes grow back. Beyond his Seed Site, he also has a Seed Sanctuary which is well worth the look.
Wild Gardens seeds - Just drumming up support for orach again. Here's a good listing of varieties but you are also welcome to contact me about my seed offer in the post below this one.
The Edible Hosta Project - A regular Homegrown Goodness contributor has put together a project to rate the palatibility of different hostas which are... drumroll... edible. He calls the tasty spring shoots hostons and prepares them much in the same way as spinach. He is also the origin of my use of the term 'Permanent Vegetable' which are vegetables that have annual / biennial life habits but so dependably self seed in your garden as to be considered permanent residents. I admit to extending this definition a bit to include perrenials as well on occasion. (sorry)
Frank's Cool Site - This is on the resource list but I don't think I have made mention of it yet on this blog which is a terrible oversite of mine so if you thought you could name a goodly proportion of vegetables, then cross check with his expansive list.
*Yes, I admit that was unreasonably link heavy but remember the initial buzz of the term hyperlinked when we thought we all wanted to play labryrinth with internet pages? I just thought I'd bring some of that back to you.
Wednesday, September 23, 2009
Gene mixing by nature - seed offer
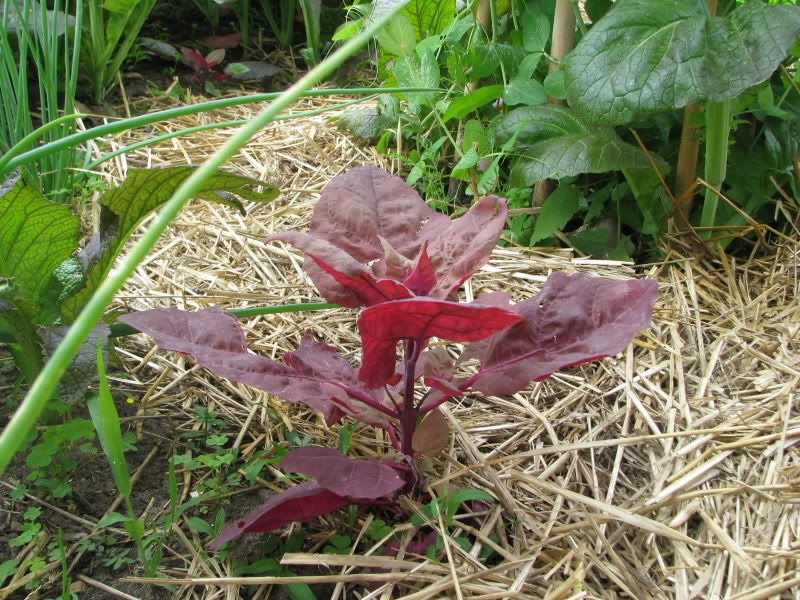
Orach is a fantastic and ornamental spinach substitute which holds longer than its aforementioned taste / cooking cousin. It's elegant colours ranging from golden green to deep purple, with complenentary towering seed stalks by the end of summer, make it so desireable that I like to call spinach an orach substitute. I have several varieties in my garden but I don't isolate so there are likely to be crosses. If you would like some seed of my garden's yellow/green/magenta and bronze orach mix then email me.
Cute Ruby Mountain Orach seedling. Can't find my field 'o' orach picture at the moment but they merrily grow in and around a purle lace elderberry bush in my garden making a nice contrast and complement in yellows, greens and bronze.
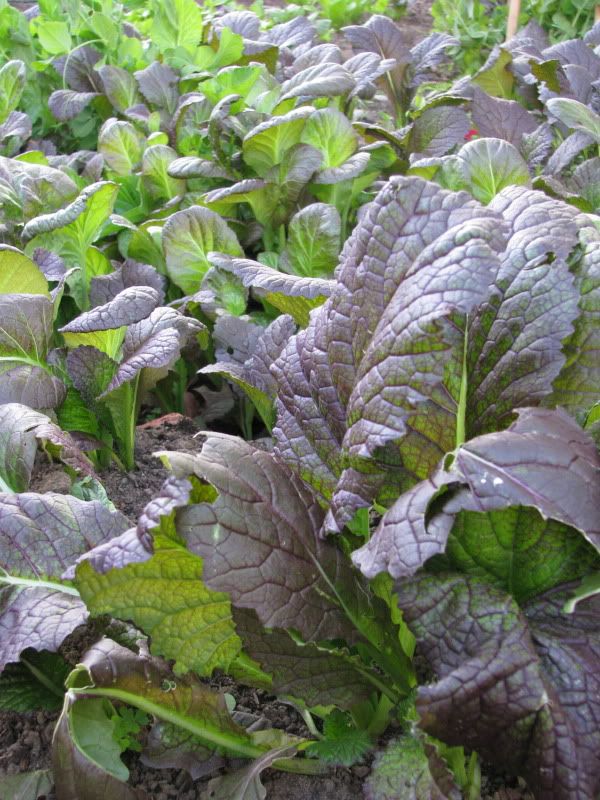
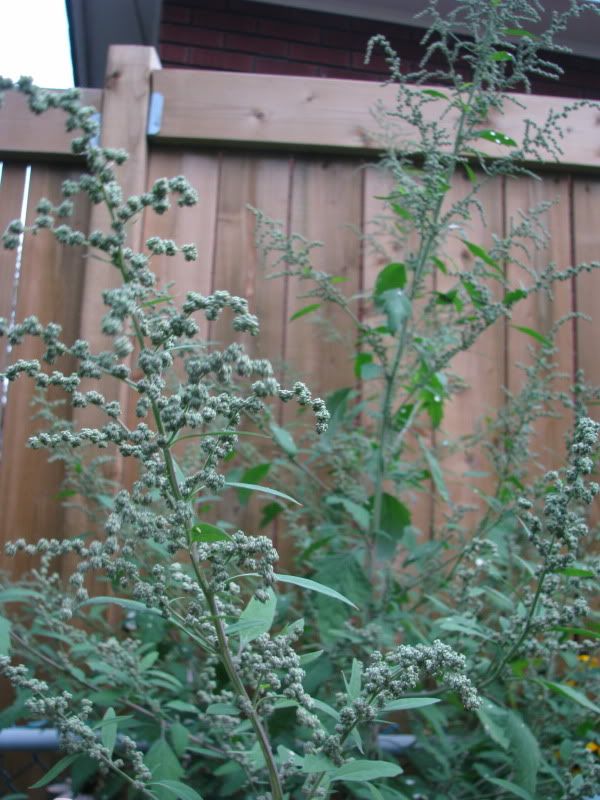
I believe the two types I am growing are both Indian mustards or Brassica juncea (has anyone seen my memory, I left it around here somewhere). I have a mix that may be red stemmed, red leaved, large or crumpled leaf types varying in hottness. This is a very early green that tastes great when used to spice up a salad or in stirfry. Substitute it for part of the 'spinach' you would use in another recipe to give it a new kick. My original seed was Osaka Purple and Wild Garden Seed mix. If you would like a small baggy of mustard seeds, email me.
A field of self sown Osaka Purple mustard. P.S. A poster pointed out to me that someone let their mustard go to seed in a public garden and that not everyone appreciated having bushels of these pugnent plants so caution is advised ;) They are easy to remove if you have too many.
***
Saving small bunches of Brassica seeds
- mustard in this case - my handy* tutorial.
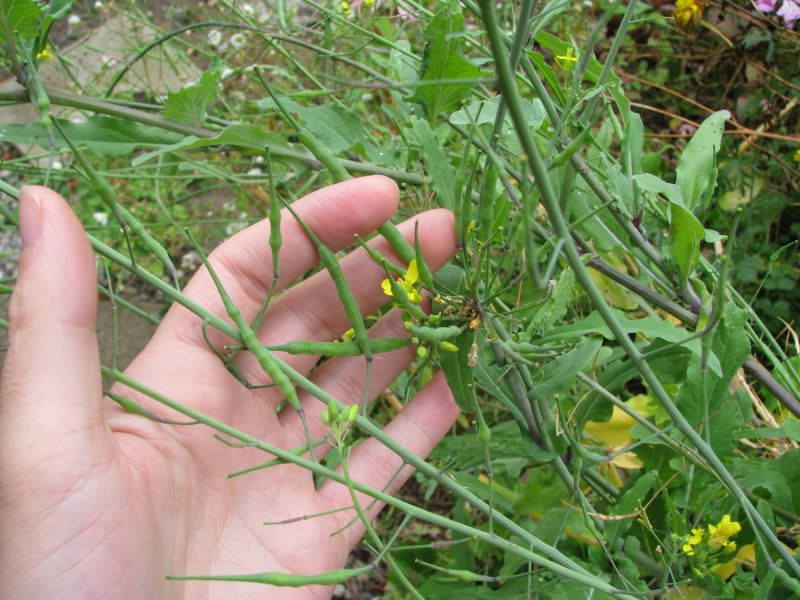
Step 1: After removing the early bolters or off types, let it flower and seed
A typical yellow mustard flower and plump green seed pods - incidentally, the pods are edible. The most known type of edible brassica seed pod is on the rattail radish.
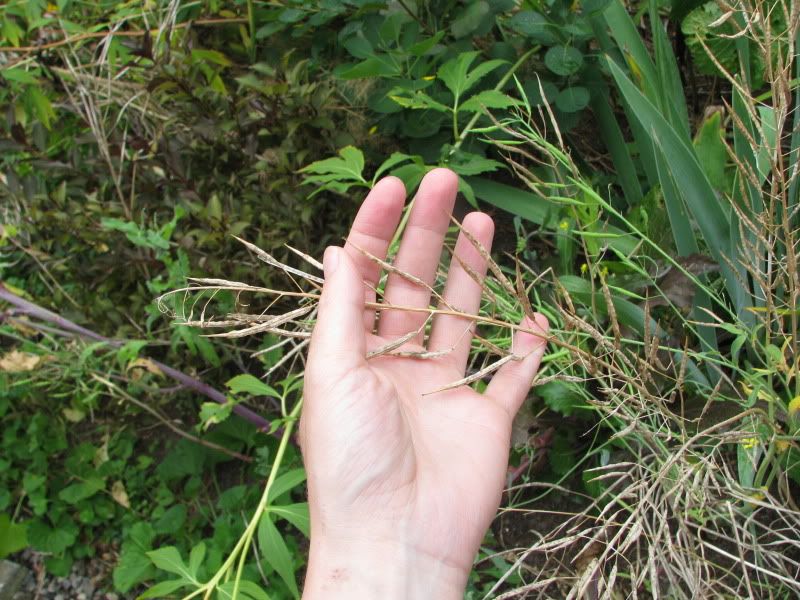
Step 2: Once the seed pods are dry and tan coloured, cut off whole stems but careful not to shake them, the pods shatter easily. Other writers note that it is really important that the seed pods dry on the growing plant as they don't continue to ripen well once removed. Also try to get keep them dry during ripening.
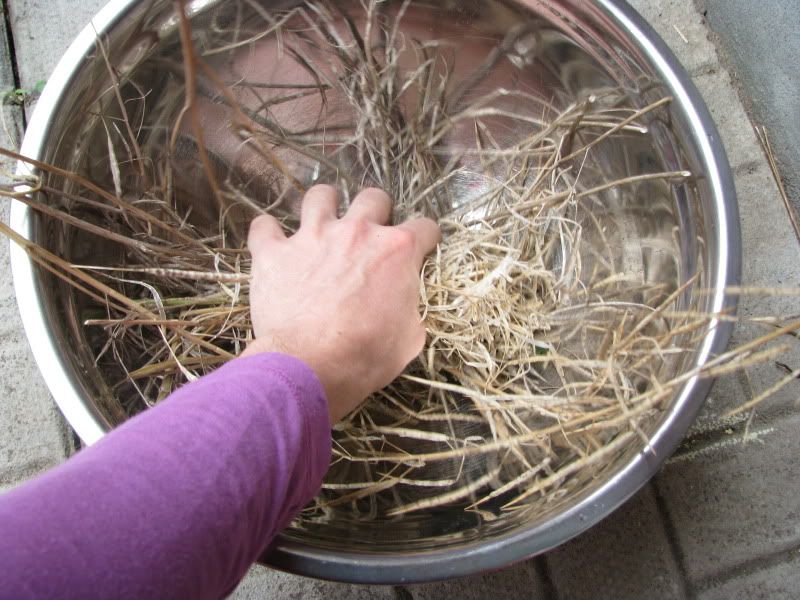
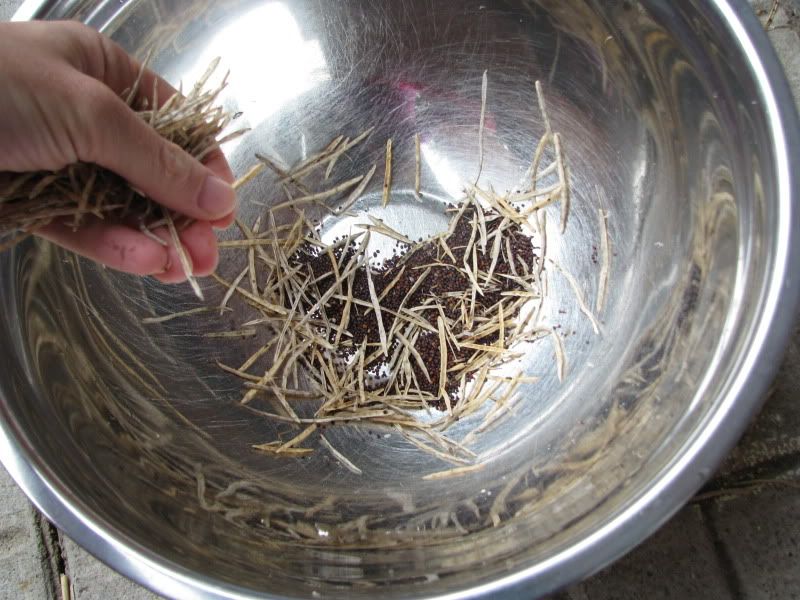
Step 3: Put seed pods in large bowl and crush them in your hands, the seeds will slide to the bottom.
Step 4: Remove the chaff that'll mostly be on top of the seeds - that's the extra stuff that's not a lovely reddish brown to black seed.
Step 5: Bag and label - TADA!
* Get it, handy? Notice how my hand is in most of the pictures... I thought I'd make them action shots.
Irish Seed Savers on saving Brassica seeds
Long Island Seed Savers on saving Broccoli seeds - with notes on fungal diseases
Friday, September 18, 2009
Jack Frost has been packing his suitcase...
It's the time of year to hurry up and take in the pumpkins, peppers, tomatoes, basil and other tender plants. Pull up and store those tender ornamentals too such as cannas, dahlias, and glads. If like me, you plant out half hardy herbs like bay larel and rosemary, they should come in soon too though they will live through a couple light frosts. Go, go, go, that white crystalline sheen does not respect busy schedules.
Lettuce in seed with red orach in the background.
Plants know it. Long ago, my corn salad and orach went to seed. Dry beans are rattling in their pods, lettuce and carrots sport their decorative seedhead fringes and my magenta spreen and bietina (type of swiss chard) have their mysterious green spikes that must look all the world like weeds to my neighbours. I self consciously assured the conservative gardening neighbour that I was saving seed from actual vegetables. I think she believed me and told me she didn't look over at my yard anyhow... (No really, she's a lovely lady but I don't blame her as the garden is looking a little bit dishelved at the moment).
Carrots in seed - easy to see that they are related to queen anne's lace also known as wild carrot.
The flow of ripe tomatoes which has been gaining speed for the last couple weeks is slowing down now. I will probably cover a few choose plants with blankets if it looks like we'll get a week or more of nice weather afterwards. As my hubby says, "Tomatoes are the ultimate seasonal fruit. You got to eat them when they taste good because soon they'll just be tasteless ice balls from the supermarket. Not worth it."
Magenta Spreen, a member of the goosefoot family, in seed. Think of it as a supersized lamb's quarters in party dress.
So today I'm going to be busy.
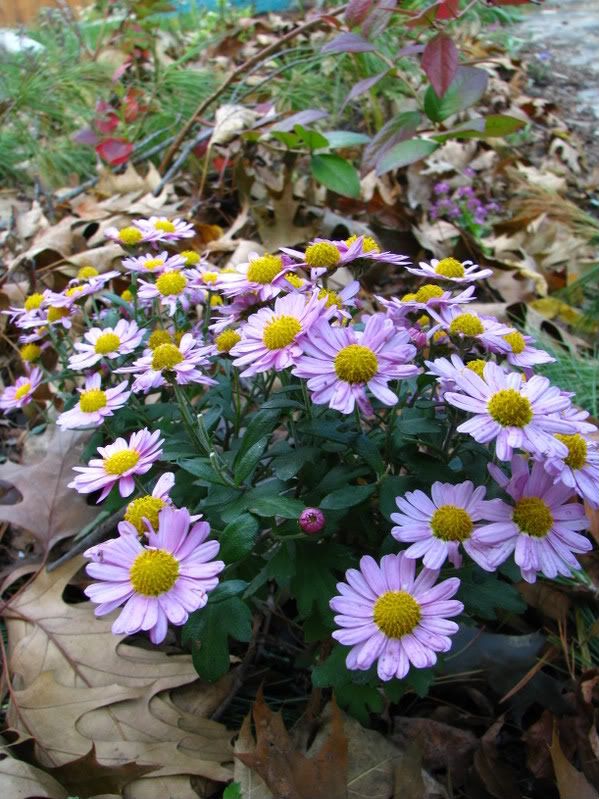
But the gardening season is far from over as my blush savoy cabbage is turning a lovely shade of purple and the kale keeps on pumping out leaves. Perennial onions, that melted in the heat of summer, have renewed vigor, pushing up green spires alongside the chrysanthemums that are in full bud just begining their dazzling show.
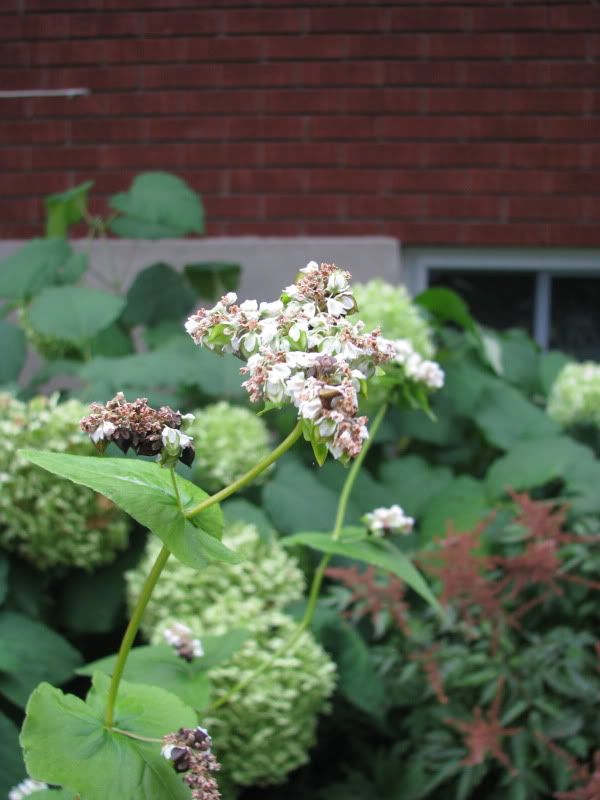
Buckwheat in seed. I grow it as a covercrop though of course it make a good grain too.
So when is Jack coming to Ottawa? Weather stations predict possible lows between 2-4C this weekend sometime, possibly even tonight. Anything 4C and lower is a possibility of frost especially in low lying spots as the temperature is read approximately 4 feet off the ground. It will decrease about a degree every foot down so it could be 0C at ground level. Other conditions favourable to frost are still winds and clear skies. And when he comes, you'll be sure that he too will make his complementary visit to "The Hill.*"
---
*The Hill: The rest of the country has a bad habit of calling the government Ottawa. Since not all the residents of Ottawa are employed by the government, it is often referred to as The Hill here since parliament resides on a slight rise in the landscape, cut behind it by a percipitous fall toward the Ottawa river.
Monday, August 24, 2009
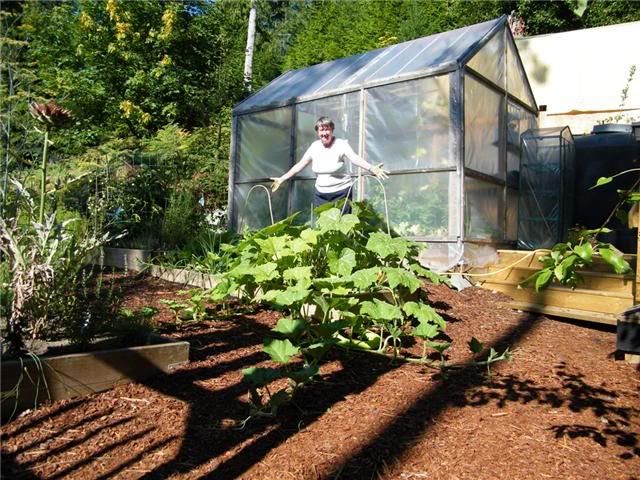
Mom and Me and the Squash that ate the Garden!
"Step away from the vine mom, it looks hungry."
My mom and her wonderful gulf island garden. See that huge Artichoke flower in one of the raised beds on the left. Yes, I'm jealous.
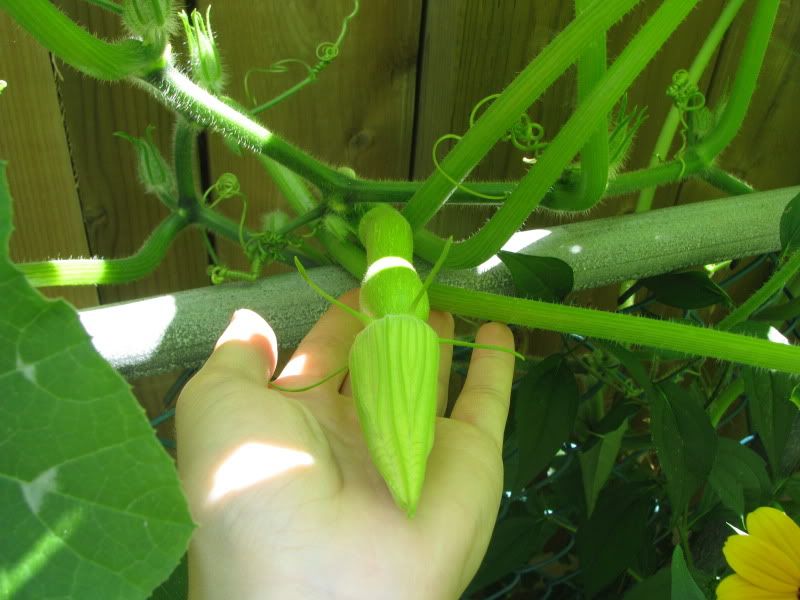
Last spring, I got my hands on a seed packet that I shared with my mom. Well, weather in Eastern Canada has not exactly been cooperative and vining crops got a sloooooow start what with a short drought in June followed by 40 days and 40 nights of rain in July. August has been slightly less soggy so I'm finally seeing my first female fruit.
Big things start small, I hope.
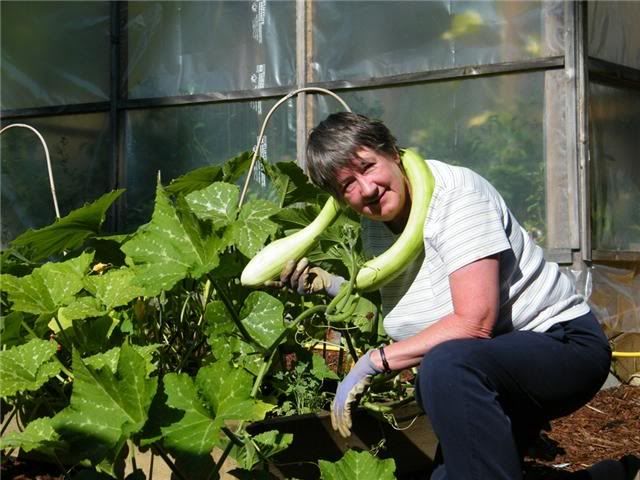
My mom, on the other hand, living on a Gulf Island off Coastal B.C. (otherwise known as La La happy snowless land) has been having drought. Her crops would have shrivelled and given up months before if it wasn't for the roof collected rain from winter that they store in a cistern. She tells me it has the lovely aroma of decaying vegetable matter that got caught in it as well making for a compost tea when it comes to watering time. Her trombocinos are a far sight more advanced than mine:
Newest fashion accessory for the eco-conscious.
How do they taste mom? Hopefully I'll find out for myself in a week or two... sigh.
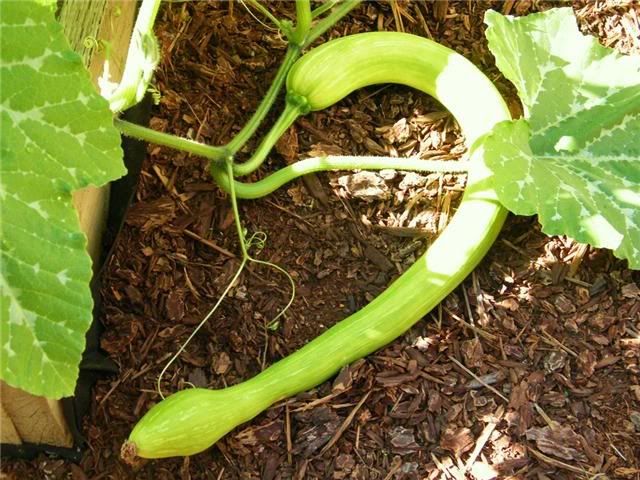
Trobocino snake slithering around in the garden mulch.
Monday, August 17, 2009
What the heck do you do with beets?
For those of you that are just starting to move beyond the salad garden of tomatoes, cukes and greens, you may have noticed the seed packets of beets next to the more familiar carrots. For many of us, beets are those blood red things that come pickled in cans that you were forced to try at a relative's house but don't let that put you of trying them.
First off, if you observe a few rules, they are easy to grow. Second, they taste good! Third, they can last a long time after harvest in a root cellar or the back of your fridge.
How to Grow Beets
Since you can find lots of articles with basic how to instructions on how to grow them, I'll tell you how my family does it. First of all, pick a spot in part to full sun. Most types are quick growing so you can use them to temporarily fill in a garden space that will be followed by a late crop or intercrop (grow alongside) with a veggie that takes a while to get going. I've seen plans that show beets grown with corn for example, with the corn lightly shading the beets when the season gets hotter. I could see them grown with squash or tomatoes and harvested before those crops get large. Some people intercrop root veggies with members of the onion family to ward off each other's pests.
Do not fertilize. Like most root crops, they don't need too much nitrogen. In fact, they are often shown to be the crop rotated in after a heavy feeder like cabbage. Some people add a little borax to the soil as this is one vegetable that can really suffer from boron deficiency. I've never noticed this problem but I thought I should let you know. Also, they will grow better in a lighter soil that won't interfer with their expansion.
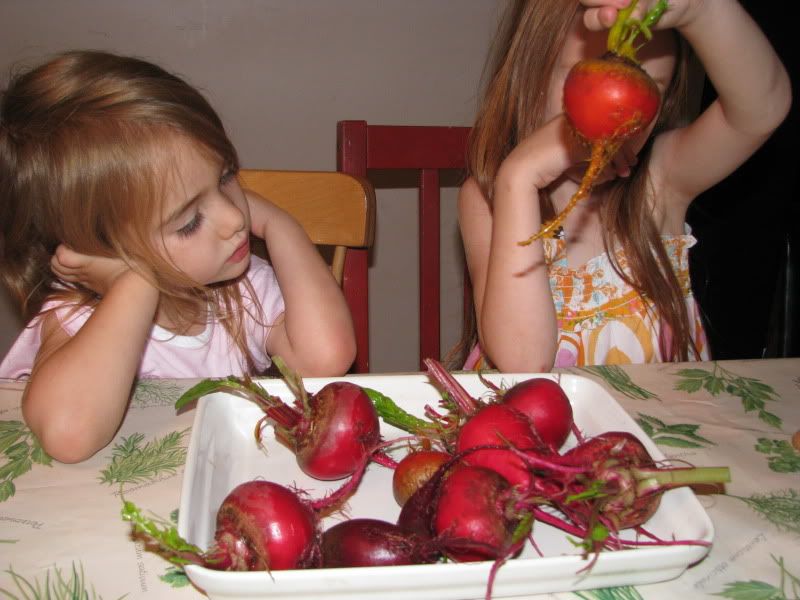
Approximately 2-4 weeks before last frost, get your kids to poke some holes in the dirt about every 4 inches and drop in a seed. These seeds are actually fruit and contain more than one seed. That is except for the rare variety like Golden. This will mean that you should thin later by cutting the baby plantlet off at ground level so there is only one per group. As this is my garden, don't worry about thinning, the slugs will do it for you. Follow the kids around, covering seeds they dropped. Water in and forget about it. If you experience drought and notice the beet leaves have fainted, dump some water on them again. Around midsummer, get the kids to pull, two handed so they fall on their bums giggling but holding their prizes of plump, fat beets.
Replant for a fall crop.
What to do with the things?
Well my kids enjoy just watching them cut open to see the variety of colours beets can come in. After that fun, very small, young beets can be cleaned and tossed, leaves and all into salads or stir fries. In our house, we like to bake beets in the oven either alone or with other root vegetables. Just cut into one inch cubes, toss some salt and oil on top and cook until soft on the inside and slightly crisp on the outside. They are also great mashed. Of course there is the famous borsch soup but I've never eaten it, let alone made it. Grate them into a salad or add the same gratings to potatoes, whisked with egg and fried as pancakes.
Of course, you can pickle them...
Storing Beets
I love going down to the cellar in the height of winter to get vegetables from my own garden. They need to be stored in a cool place - just around 0C / 32F - with high humidity but if you don't have a cellar then they'll stay fresh in the back of the fridge, in a plastic bag, for quite a while. I think I've stored some in the fridge for months. Check on them periodically to let them breeze. I fork up a mature fall crop, rip off the top (leaving about an 1 inch of leaves, or the young ones), and replant them, without washing them, in shallow boxes of either dirt (yes, dirt) or sand, under the front, outside stairs. As this storeroom is attached to the house, they don't generally drop below freezing. If I remember, I put buckets of water to keep up the humidity. They usually last several months kept in these haphazard conditions.
You can also bring them up into the light and warmth. Pot them in a pot of moistened sand or whatever, and let them grow some fresh winter greens for you.
Don't let the kids throw them around after picking which might bruise or injur them. This is not an easy lesson for my three year old.
Saving Seed
Beets are biennial so you have to overwinter them to get them to produce seed. For people in mild climates, that'll mean, leaving them in the ground... I wish. If you live in a slightly more challenging environment, then piling a foot of leaves after the cold weather has settled in and the mice have found homes, should keep them... still not really much of a trick. Now for the rest of us, if you want to replant your beets, you have to have maintain a low temp so they don't sprout too much as well as keeping up the humidity. Ideal cellaring conditions would be best. You could try growing your beets in a coldframe late in the season so they need to store for less time. I've had beets survive until January.
In the spring, around the same time you would seed them, replant the best looking ones. Make sure you plant at least 10 (As usual, this is an educated guess based on what I've read, more would be better but you could try it with less) for genetic health. Alternatively, replant a variety of kinds for a mix. They are wind pollinated and will cross with each other and members of their species such as swiss chard so if you don't want a cross, don't let them flower at the same time or isolate your plants.
If beet seed stalks look anything like Swiss Chard, then they will be tall and rangy, perhaps requiring support. When the seed heads are dry, the seed will be ready.
Read more at Real Seeds, a UK seed company (aka one of those places that can overwinter in situ... lucky ducks) for more info about how to save beet seeds and others.
Types of Beets
Gold ones, white ones, black and striped ones. Long ones, short ones, fat ones and heart shaped ones. Little ones, giant ones, one for sweetening your tea! There are lots of beets. Here are some of my favs.
Golden: There are several beets that go by variations of this name. They grow fast, are bright yellow in the centre with a mild taste and low germination rates.
Chioggia: Striped white and red. Also mild flavoured and non staining. They seem to size up quite fast in my garden as well.
Lutz Leaf Keeper: Grown primarly for salad greens. Nice roots, good storage root.
Cylindra: Has more cylindrical roots, hence the name. Someone told me this was good for making even slices. I'm not overly thrilled with it yet.
Bull's Blood: Grown as a bright red salad leaf crop primilarly.
Detroit Dark Red: Good at staining shirts. A commonly found beet variety.
There are lots more and I hope that some of you contribute your knowledge of other beet varieties.
Thursday, July 23, 2009
Pick a Pint of Peppers
(Scroll down for how to save pepper seeds)
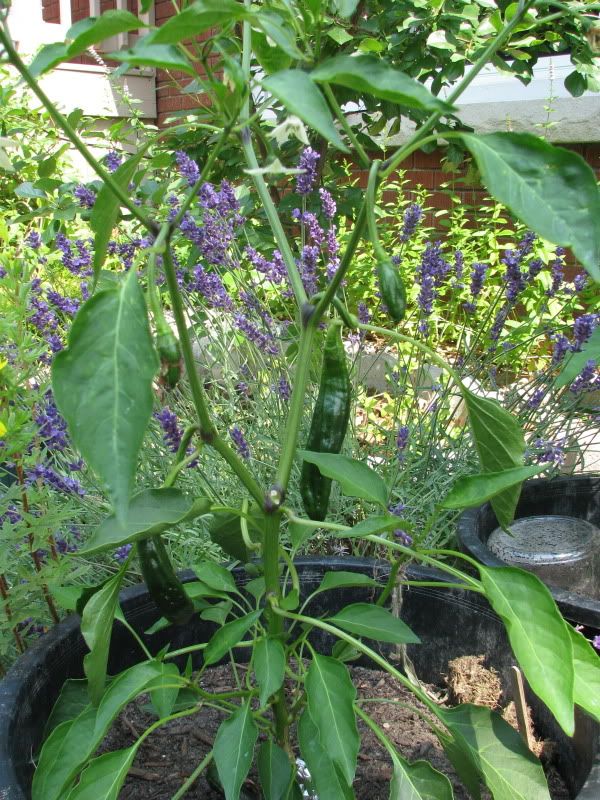
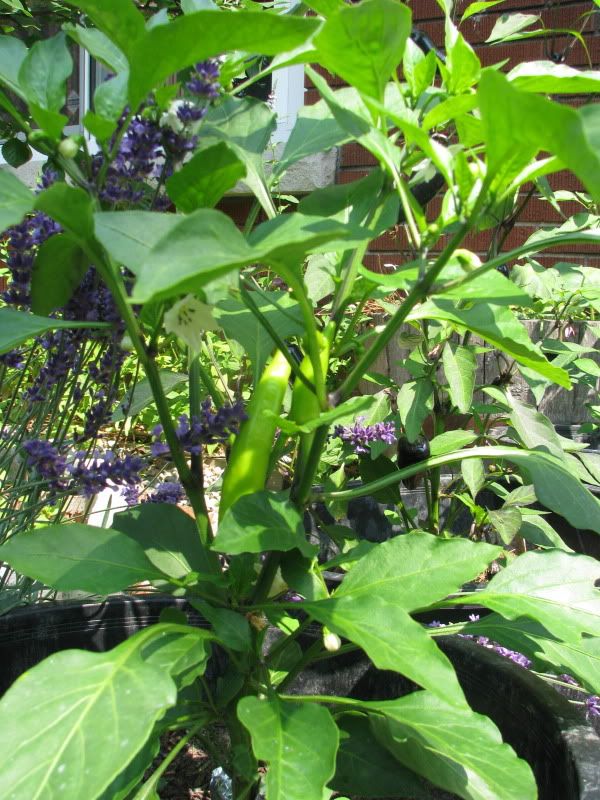
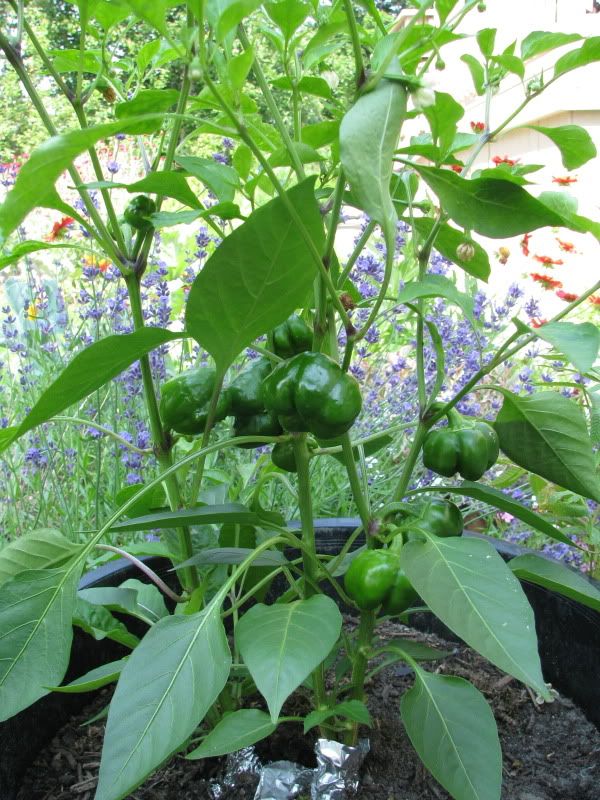
For those of you gracious enough to share seed, a selection of your babies:
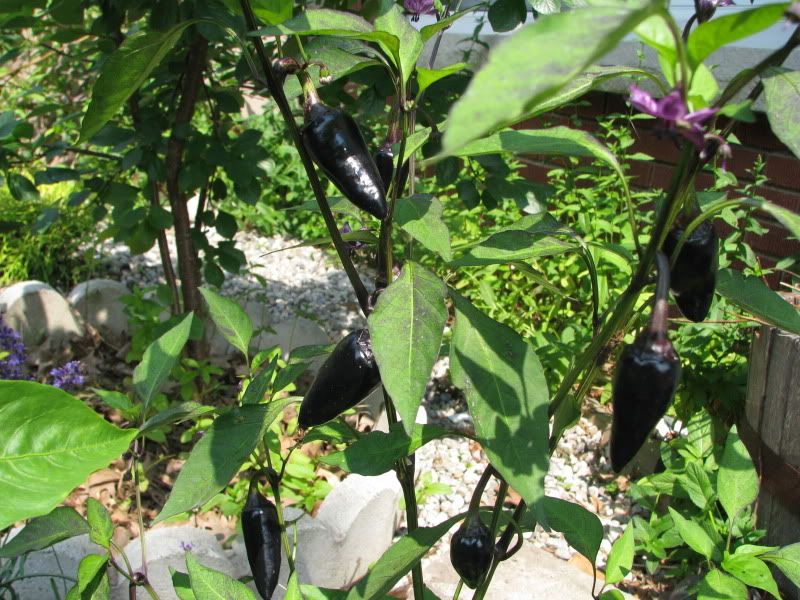
Black Hungarian from Southwest Ontario:
I was intrigued by this variety but had never tried it before. The plant is very ornamental and productive even in our less than ideal weather as of late. I am looking forward to tasting them.
D'eschellette (my ink ran... Michel what was that pepper called again?... How plant names get altered.) from MidEastern Ontario
Since I took this picture, mere days again, these peppers have really beefed out.
Banana Pepper from somewhere... I can't remember exactly where... (why you should keep better records than me.)
Mini Chocolate Bell saved from my garden
I did not isolate these plants from the others they were snuggle-close with so I don't know if there has been any crossing or not. However, they do have strange pointy bits on their flesh which I'm not sure is a change in the genes or some sort of pest damage. The peppers look undamaged just bumpy.
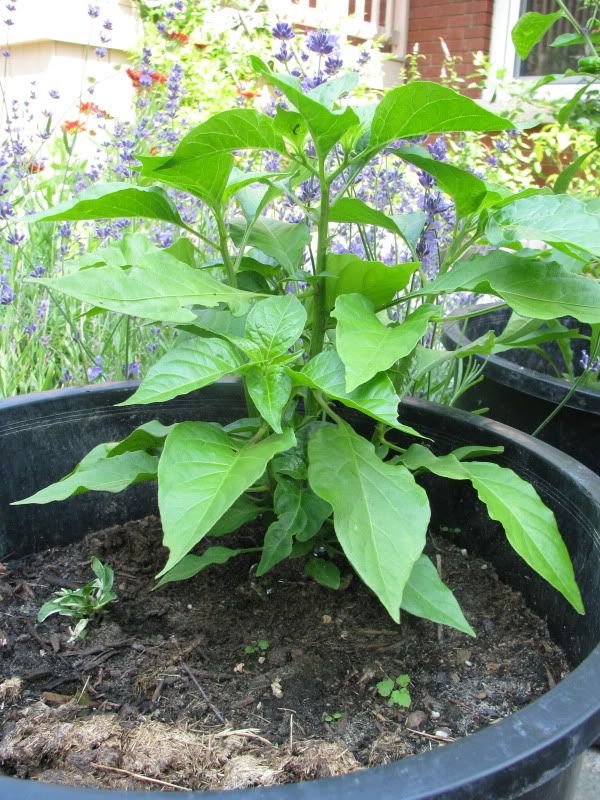
Scotch Bonnet Habenero from grocery store
Thanks box store, and anonymous growers, for these. They are just about to flower so I'm not expecting fruit to ripen outside or even this year but I overwinter my peppers so hopefully next year I can taste them. Beside it is the re-rooted variegated fish that I saved from The Museum of Agriculture's demonstration gardens (it was on the ground, I swear). I'll have to wait until next year to get fruit from that too.
4 year old peppers plants confined to small pots:
Long Red Cayenne, on the left, producing strong and Fatali taking a break this year after fruiting indoors.
***
Saving Pepper Seeds
This is easy. Find yourself ripe peppers, scrape out the seeds, let them dry for a good week, spread out on a flat surface with good air circulation, not touching anything, and then label and put away in a cool, dry place like other seeds.
I like to dry mine on paper towels as they suck up moisture. They also tend to stick to the seed but a bit of dry towel on my seed hasn't yet been a problem for germination.
Okay, that's the way I do it but there are some caveats.
Caveat 1: Peppers are generally self-pollinating (they fertilize themselves) but if you are growing more than one variety, especially in the same species (same latin name), it's possible they might cross. Sources vary on how common this is (see Chileman link below for lots of detail)
Caveat 2: If you are saving from a hybrid pepper, then the result is anyone's guess but heck, if you have the room, it might be fun to experiment.
Caveat 3: I'm assuming peppers carry seed born diseases. Chileman recommends discarding any deformed, damaged or spotty seeds. You can treat seeds with 'hot water' before planting them. I have never tried this but it sounds like something you would want to do just before sowing them. As a general rule, don't save seed from plants with serious disease and warn the person you are sharing seed with of any potential problems. Destroy any deformed or suspicious seedlings or plants while growing too.
***
Chileman gives you more details on saving hot pepper seeds
Treating seed with hot water or chlorine from the Ohio State University